Detailing Your Documentation: Adding Main Components
Here we go, detailing your documentation!
2.0 - PDH Placement
2.1 - Systemcore Placement
2.2 - Motor Placement
2.3 - Sensor Types and Placement
2.4 - Conclusion
2.0 - PDH Placement
A PDH (Power Distribution Hub) is used to distribute power from a battery through the robot to components that require power. Although it is recommended to talk with the Electrical subteam on where to place the PDH, you should place the PDH in an area with few mechanical points of interference, where wires can be easily traced and managed, and where important wires are clearly distinguishable from the rest. A clear example is shown below in Figure 1.
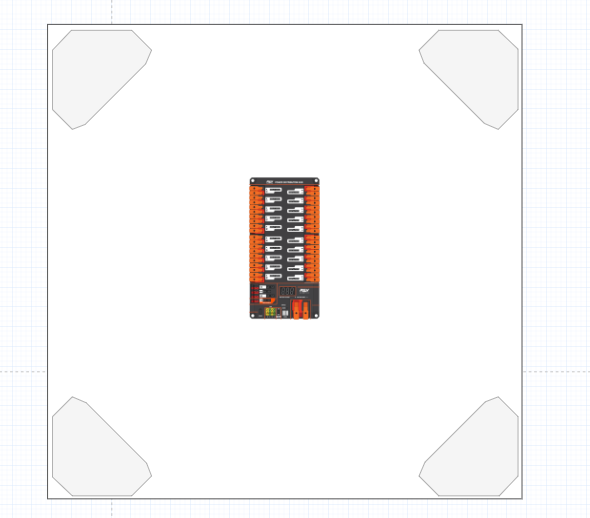
Figure 1
2.1 - Systemcore Placement
The Systemcore is the brain of the robot that gives out singles to different components through the CAN chain. You should talk with the Electrical subteam lead about the Systemcore placement, but you should position the Systemcore so it's readily accessible to both the radio and the RSL. To keep wiring clean and easy to trace, consider placing it away from the PDH, since that area tends to have a high concentration of wires. A clear example is shown below in Figure 2.
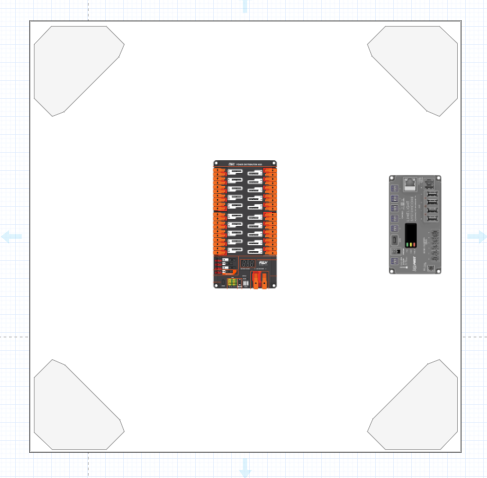
Figure 2
2.2 - Motor Placement
A motor is a device that converts electrical energy into mechanical energy. It is recommended to talk to the Mechanical subteam to place each motor, but you can orient each motor so its wires face the interior of the robot, keeping them accessible for troubleshooting. You should ensure all wire extensions are long enough to comfortably reach and connect to their corresponding electrical components. In you drive base you'll most likely be using swerve modules. These contain two motors each make sure to include these. A clear example is shown below in Figure 3.
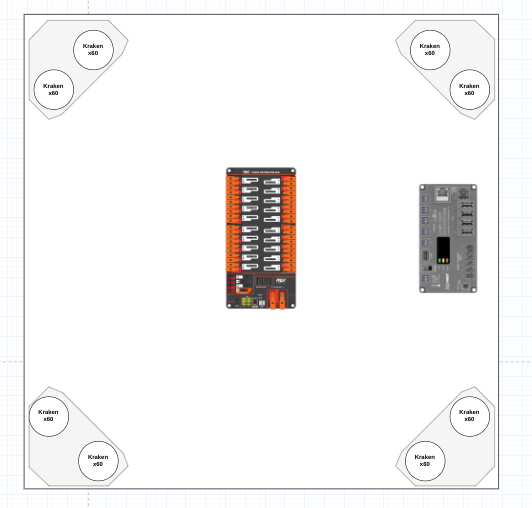
Figure 3
2.3 - Sensor Types and Placement
There are many types of sensors, including CANRange, CANCoder, Limelight, Pigeon, and CANColor.
-
CANRange
-
A CANRange sensor is a type of sensor that has a laser detection system. So anything that passes through the CANRange detects it and sends feedback through code. You should communicate with the Mechanical and Programming subteam for the placement, but you should place it where all its wires are out of danger from any mechanical component and where the laser points to the area you need it to point to.
-
CANCoder
-
A CANCoder sensor is a sensor used to measure the rotation, speed and the position of the component it is attached to. You should talk to the mechanical subteam for this components placement as they know where all the motors are going. It is recommended to orientate the wires so that they are out of the way of any mechanical component or danger.
-
Limelight
-
A limelight is a smart camera that detects April Tags throughout the field using code. It is recommended to talk to the programming subteam because they need to position the Limelight aiming towards the field.
-
Pigeon
-
This is a type of sensor that determines the gyro of the robot, so in simpler words, it determines if the robot is on a slant or flat ground. You mainly have to be mechanical because they need to be able to put it where there are no points of interference with mechanical components.
-
CANColor
-
This component detects color through code. They are used to detect gamepieces. You will mainly have to communicate with the programming subteam to place this component as it needs to face towards.
In the example (Figure 4) below four CANcoders are shown above the swerve modules.
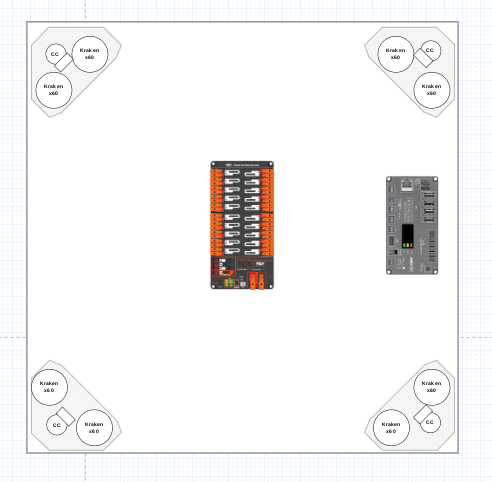
Figure 4
2.4 - Conclusion
This concludes this section of adding main components next will be adding wires and creating the document key.