Configuring a Robot
- Setting steer offsets for a Mk 4i drivetrain
- Setting the magnet offset for a CANcoder
- Flashing a Radio
- Testing Robot Code
- Setting up Motors
- Re-zero code for drivetrains
- Setting up a new robot (Roborio)
Setting steer offsets for a Mk 4i drivetrain
- Put the robot up on blocks
- Begin with the bevel gear (the black ring on one side of the wheel) on the modules all facing inward
- Use a straight edge to ensure the modules on each side are all facing the same direction
- Deploy code that sets the angle offset to
Rotation2D.fromDegrees(0.0) - Open the driver station and pull up the labview (default) dashboard. go to the variables tab
- The value you are looking for could have any name. It will be derived from something like
Rotation2D.getDegrees() - Set this value to the angle offset for each module exactly
- e.g.
Rotation2D.fromDegrees(12.3243)
- e.g.
- Deploy code
- Test
- If a wheel is spinning the opposite direction of what it should be, add 180.0 to the angle offset
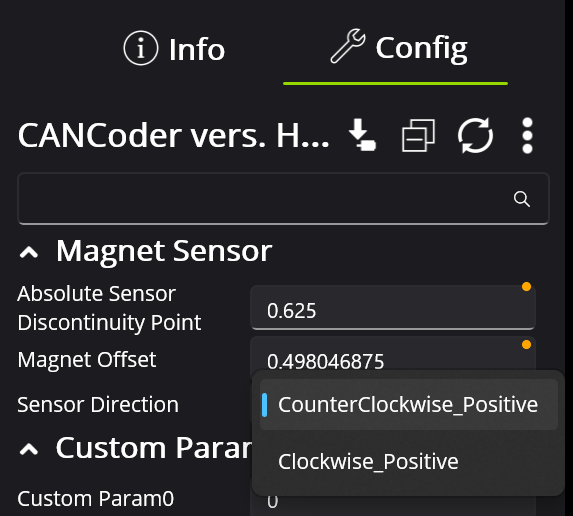
Setting the magnet offset for a CANcoder
- Move the encoder's mechanism to the desired home position
- Reset the magnet offset of the CANcoder to 0 in phoenix tuner
- Apply config (hit the button with the down arrow next to CANcoder Configs)
- Hit the green refresh button
- Check the absolute position of the CANcoder
- This will appear in a table under Self Test
- Set the magnet offset to the absolute position multiplied by -1
- Apply config
- Hit the green refresh button
- Confirm that the absolute position now reads 0
- If it is still significantly far off from 0, adjust the magnet offset number until the absolute position gets as close to 0 as possible. Remember to hit apply config and the green refresh button every time you change the magnet offset
- Set this new value in the code
- Deploy code
- Reboot the robot
- This is needed so the updated values in the CANcoder are properly distributed to the other CAN devices
- Confirm that the absolute position still reads 0 at the desired position
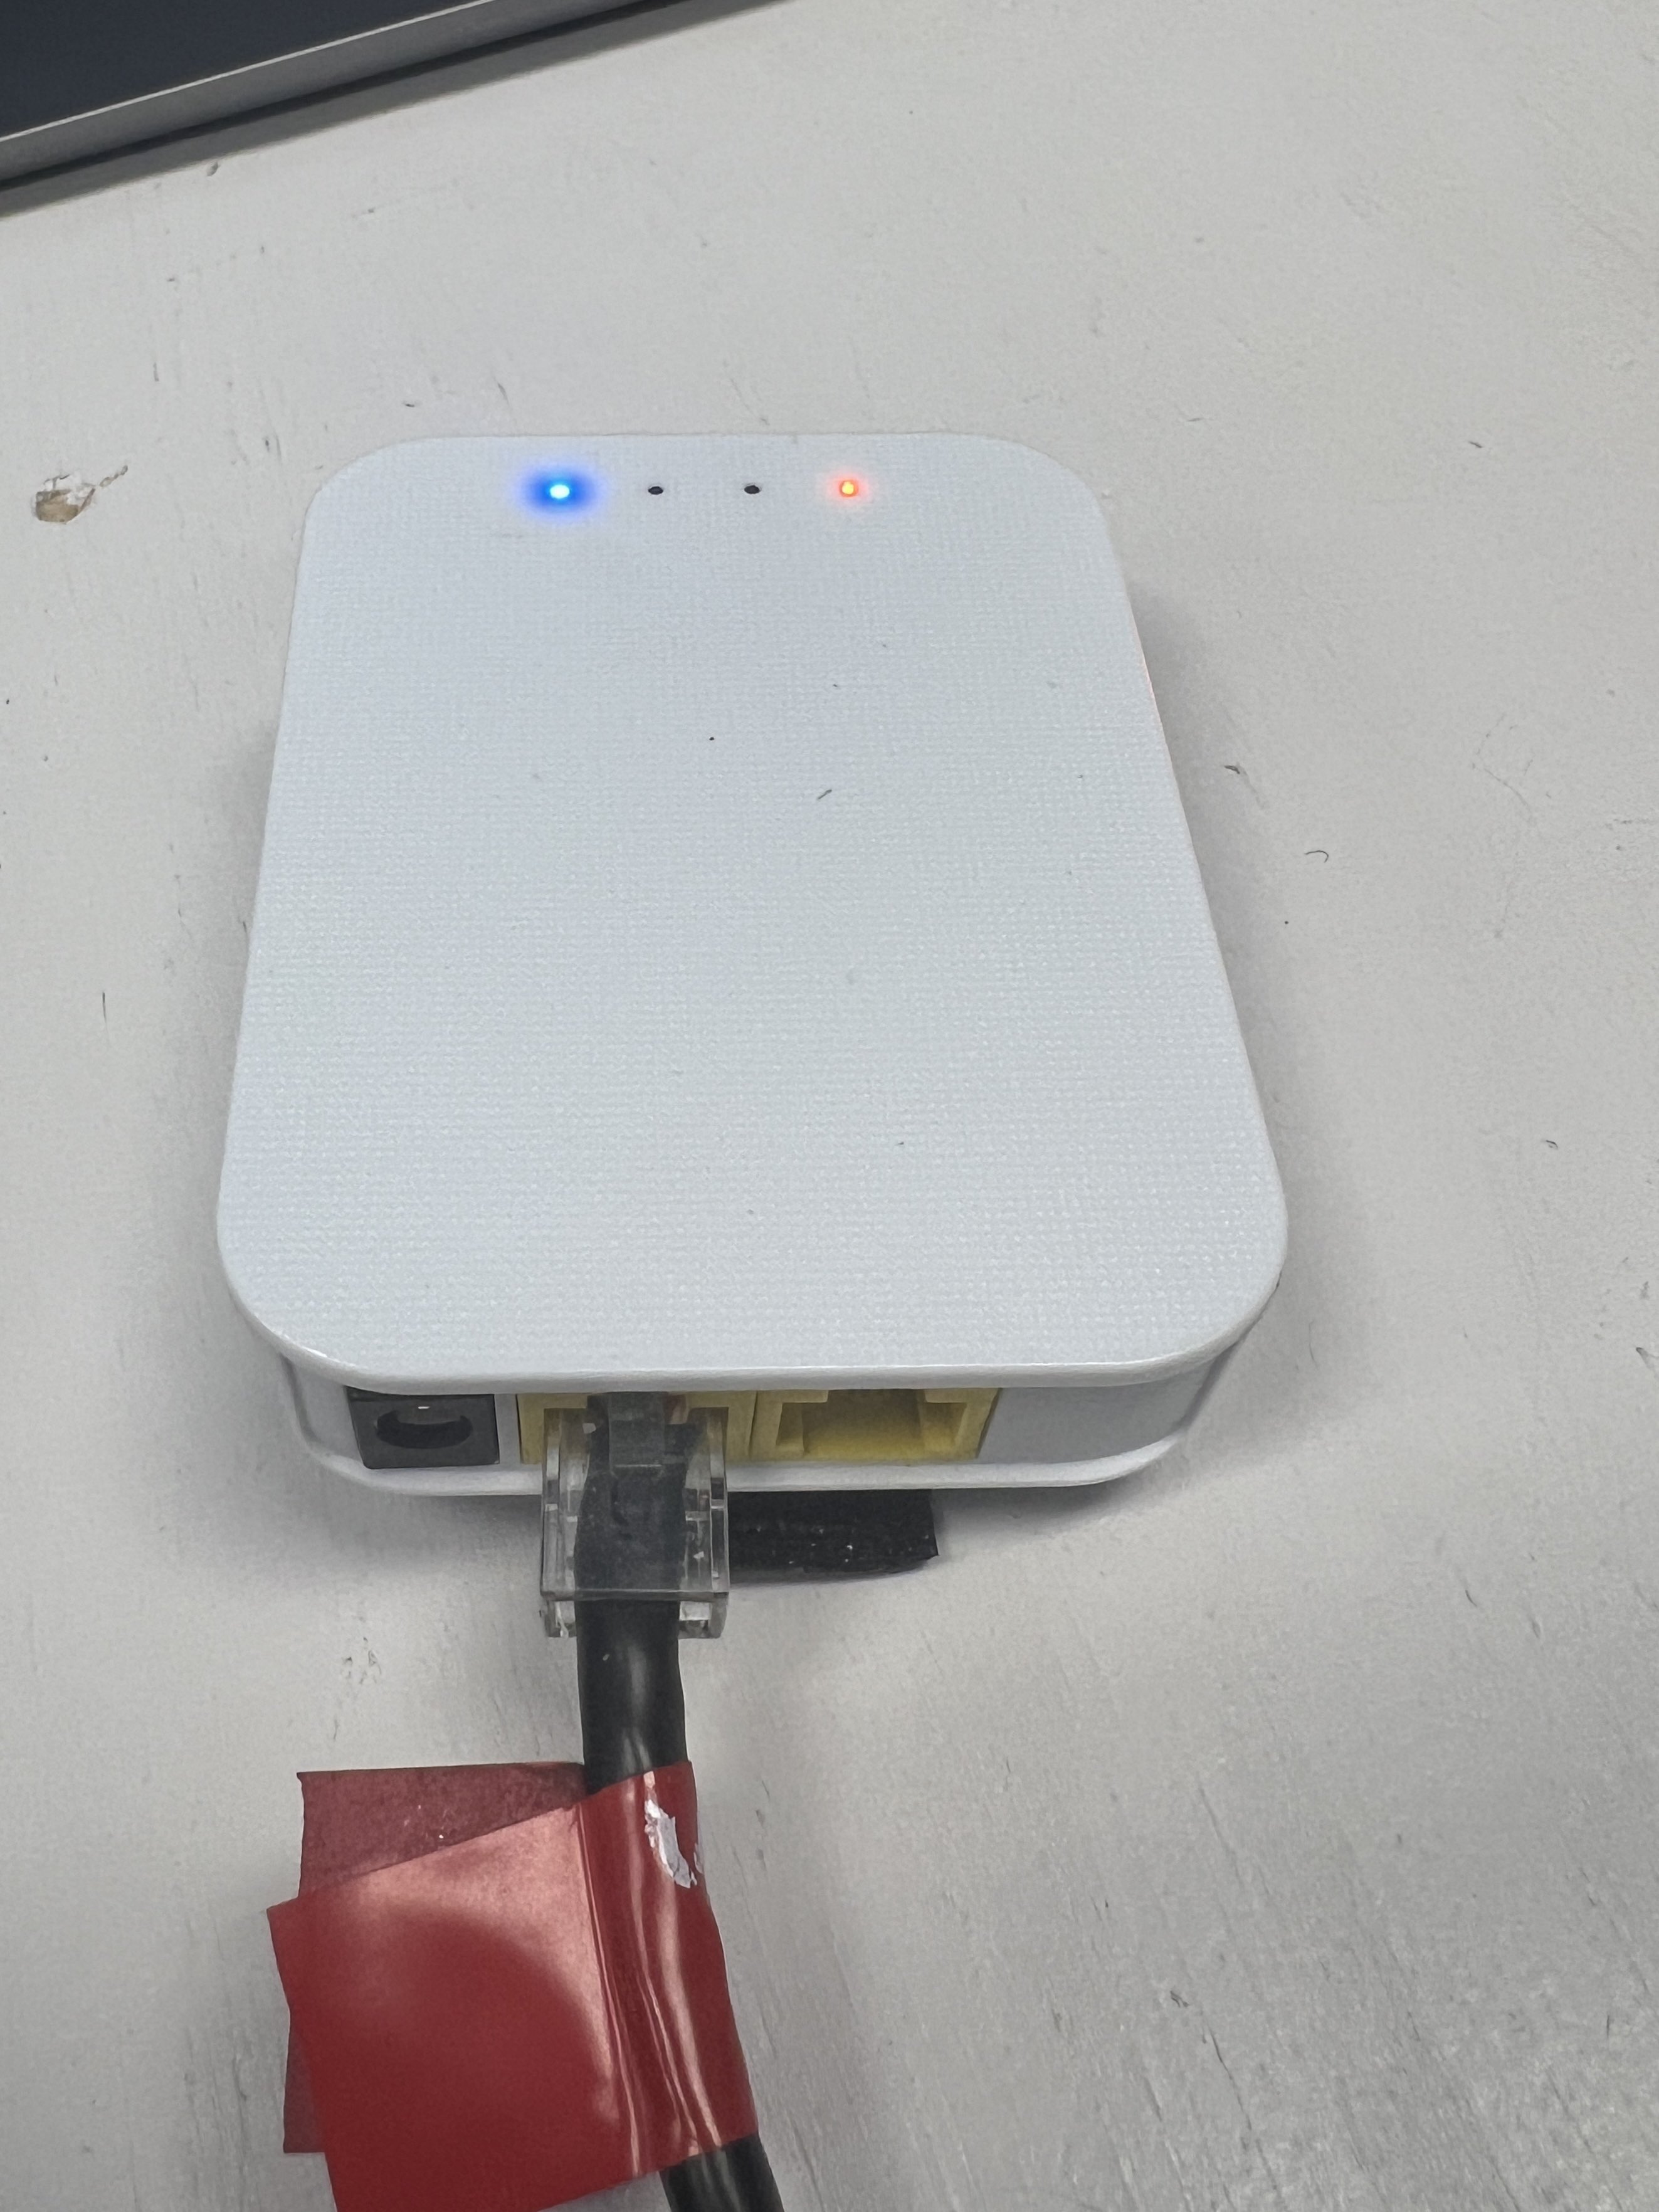
Flashing a Radio
Pre-2024 Champs Radios
Prerequisites
- Windows PC with WPILib Tools Installed
Steps
- Windows search for "Manage Network Adapter settings"
- Disable Wifi
- Connect the Ethernet from the port closest to the power (18-24v POE, image included below) to the Radio Power Module (RPM). Connect the RoboRio side of the RPM to the computer.

- Open the Radio Configuration Utility application
- Set the team number to 3506 (or the number of the team you are configuring the radio for)
- Set the robot name. This is optional, but HIGHLY recommended. The name, if specified, will be put in the Wifi network name, and makes it easier to differentiate between robots.
- Go back to Network Adapter settings and re-enable Wifi
- Reboot the robot
If you encounter any issues, check out the "Programming your Radio" guide on WPILib (https://docs.wpilib.org/en/stable/docs/zero-to-robot/step-3/radio-programming.html)
VH-109 Radios
Prerequisites
- Windows PC with vh_network_assistant installed
- Ethernet Cables
Steps
- Plug one end of the Ethernet cable into the DS port on the radio while it's connected to the robot/Boardy and the other end into the Ethernet port/dongle (dongle recommended).
- In the Windows search, look up vh_network_assistant.exe (searching for it will make it pop up) and click "Run as administrator".
- Select Ethernet 1 if you plugged the ethernet wire into the computer's Ethernet port or select Ethernet 2 if you connected through a dongle.
- Hit Configure. This will configure the ethernet port to be able to connect to the radio.
- You should get a success dialog.
- After selecting OK in the success dialog, you will see a button for "Check Radio Status."
- Click that button. If you get the dialog mentioning the VH-109 or the other VividHosting radios, check to see if you plugged things in correctly and powered things up correctly. If it still doesn't work, then try steps 1-6 until it works.
- Once you get the success dialog with the radio specs, then select the OK button, and then select Yes to go to the radio configuration settings page.
- At the top of the page, you will be able to select between 2 different options of Robot Radio Mode and Access Point Mode. Make sure to select Robot Radio Mode.
- Set the team number to be 3506.
- Set the suffix to the robot name. If the robot name is undecided, ask a mentor before picking a suffix.
- Set both WPA keys to this -> YETI3506.
- Hit Configure and wait 5-10ish minutes.
- Go back and do steps 1-7 to get the dialog with the radio configuration. If it has changed to the correct suffix, team number, and versioning, you have succeeded! If not, then try again.
Help
If you feel stuck, ask for help, or visit the VividHosting docs.
Testing Robot Code
Testing code before merging it is important to ensure it works as intended. This page discusses how to checkout the correct branch, deploy the code, test it on the robot, and merge changes.
Checking out your branch:
Go to the terminal in Intellij by clicking on this icon in the lower-left corner of your screen:
![]()
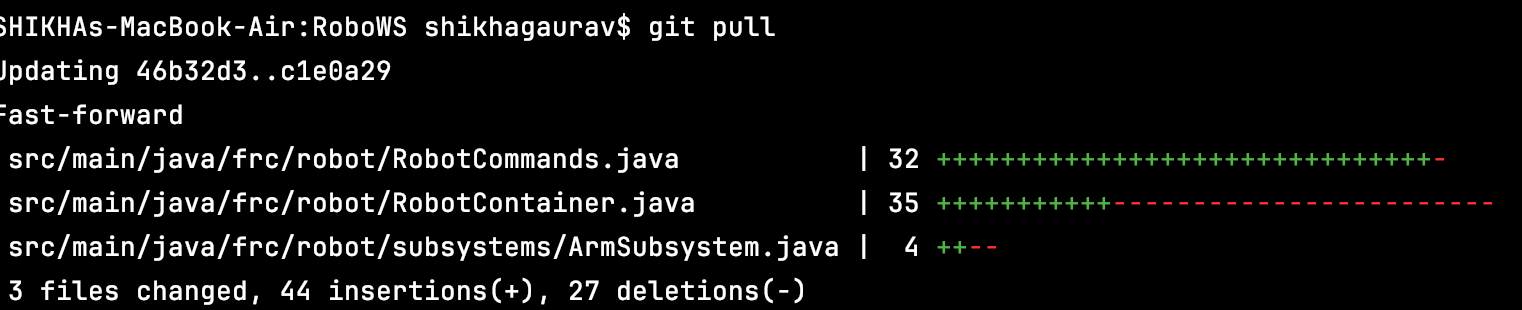
When open, type "git fetch origin" to fetch to your local repository. Then, type "git checkout [branch name]" and insert the name of the branch that contains the code you want to test. It should look like this:

You should now be on the correct branch. To ensure all of your changes are on it, type "git pull" to update your branch. It should look like this:
Congrats! You now have all the code that needs to be tested.
Deploying the code:
Now, you need to deploy the code to the robot. First, connect to the robot's WiFi. For our team, the network name will be in this format: 3506_robotName. Once connected, go back to IntelliJ and look for this in the top-right portion of your screen:
![]()
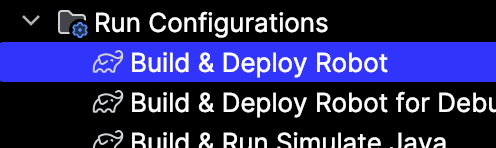
Ensure the dropdown is set to "Build and Deploy Robot." If that option is unavailable, you may have to scroll through the Gradle stting which you can find by clicking this icon:
![]()
You'll find the Build and Deploy Robot option in the Run Configurations folder:
Once you've selected Build and Deploy Robot, hit the green play button. After about 30 seconds, the deployment will be complete.
Note that the Communications and Robot Code bars will turn red on the FRC Driver Station Application while deploying, but will return to green after deployment is complete. Also, if the Communications and Robot Code bars begin to cycle red and green, it means your code is crashing and there is an issue.
Hooray! The code is on the robot!
Test it out:
To run the code on the robot, go to the FRC Driver Station application. It should look something like this:
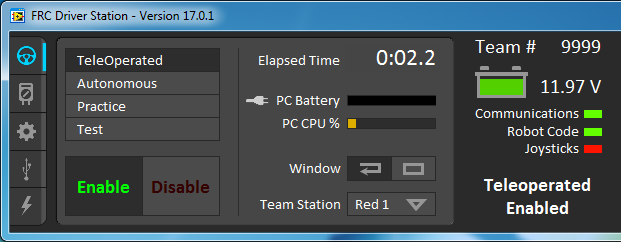
Ensure that the settings are correct. All three of the bars (Communications, Robot Code, and Joysticks) should be green. The battery should be sufficient. Ensure that you are on the correct drive setting (TeleOperated, Autonomous, Practice, and Test).
If it is in TeleOperated mode, you will need to manipulate the controller to test. If it is on Autonomous mode, ensure that the robot is placed correctly and the correct autonomous program is selected prior to enabling. Hit the green enable button to start the robot and test.
If it does not work as intended, then you will need to change some code and try again.
Nice! Your code has been tested and verified!
Merging changes:
Now that you've tested out your code and it works, you'll need to get it merged to make sure it's part of the offical robot code™.
Begin by commiting and pushing your changes. You can do this from the terminal, but it's easier to do through the IntelliJ menu bar. Click on this icon:
![]()
This will show you all of your changes. Type a commit message that details the changes made and their purpose. Make sure your changes are checkboxed. Then hit the commit and push button:

If a box pops up telling you that there are warnings, don't worry about it. However, if the box says that there are errors, then there are problems in your code that you need to fix (and maybe test) before pushing.
Your changes should now be pushed. Go to GitHub and open the repository. Then go to the Pull Requests tab:

Hit the New Pull Request Button in the top right:

This bar should pop up:
![]()
Keep the base branch development, but select the dropdown on the compare branch and change it to the branch with the the changes on it. Then hit the Create Pull Request Button and fill in the necessary information. Once completed, submit your pull request.
Once checks are completed, it may mention merge conflicts. GitHub provides ways to resolve these, so make sure those are fixed and any changes are pushed.
Once a mentor has reviewed it, they may request changes that you will need to go in and complete (and maybe retest). Once it is approved, it will be merged and will be part of the offical robot code™.
Yay! Good job testing!
Setting up Motors
Overview
There are a couple of steps involved with setting up your bot's motors, and this page will cover these steps.
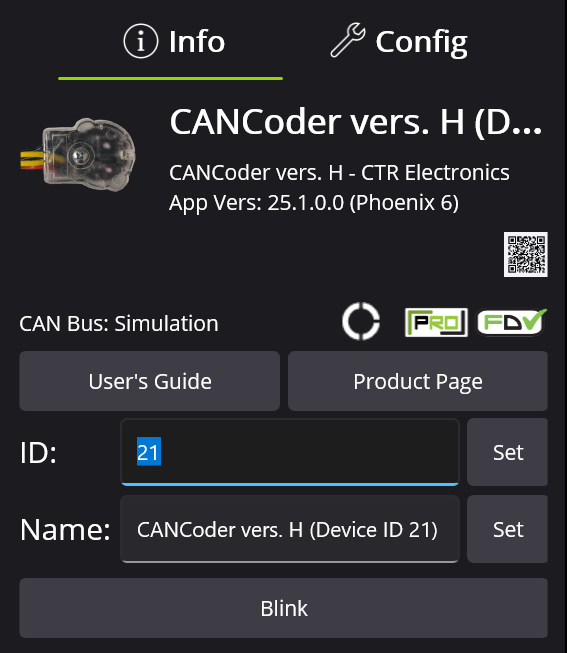
Updating ID and Name
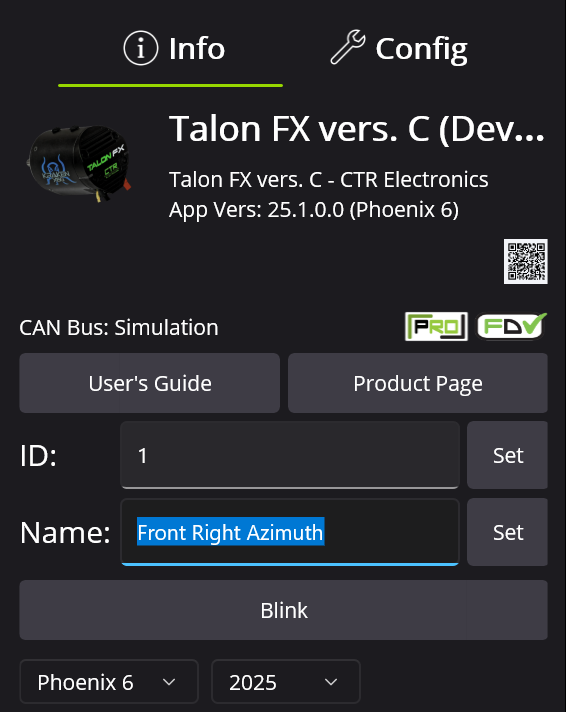
Updating the ID and name of motors contributes functionally to address the motors in code and organizationally to understand the purpose of each motor. You can update the ID number of the motor by typing text in the following box:
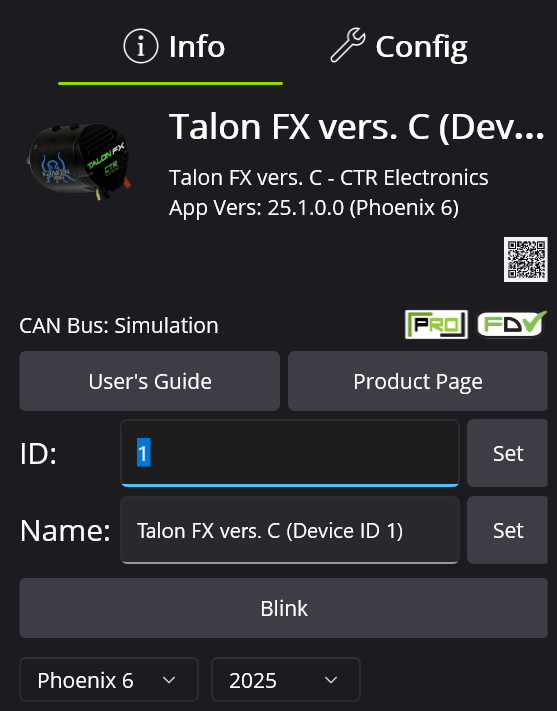
You can update the name of the motor by typing text in the following box:
Motor Inversion
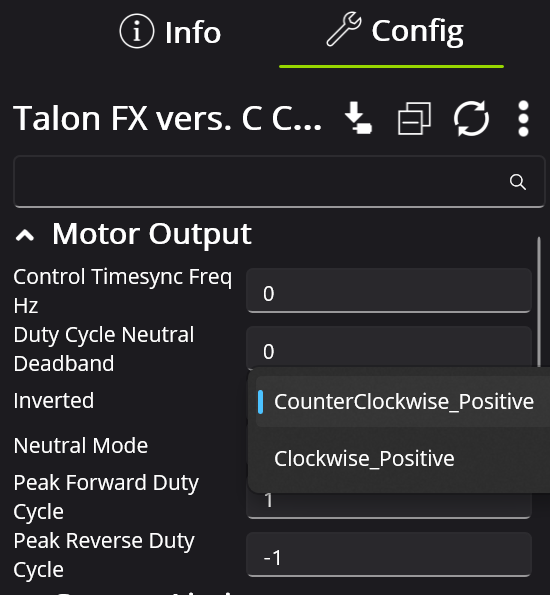
Sometimes, you need to switch the motor direction to ensure that the "forward" direction is positive. Also make sure that the Cancoder moves in the same positive direction as the motor it is assigned to. You can switch this in Phoenix Tuner as such:
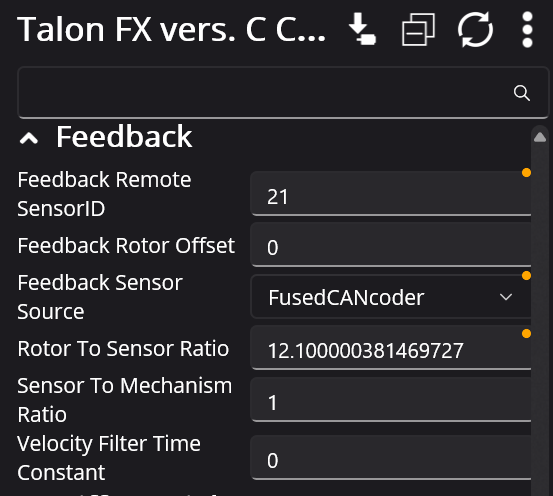
Cancoder Settings
Some motors require cancoders, which have IDs of their own. You can update the cancoder ID by navigating to the cancoder itself and changing the ID number here:
Then change the motor configs to ensure it is assigned to the correct cancoder:
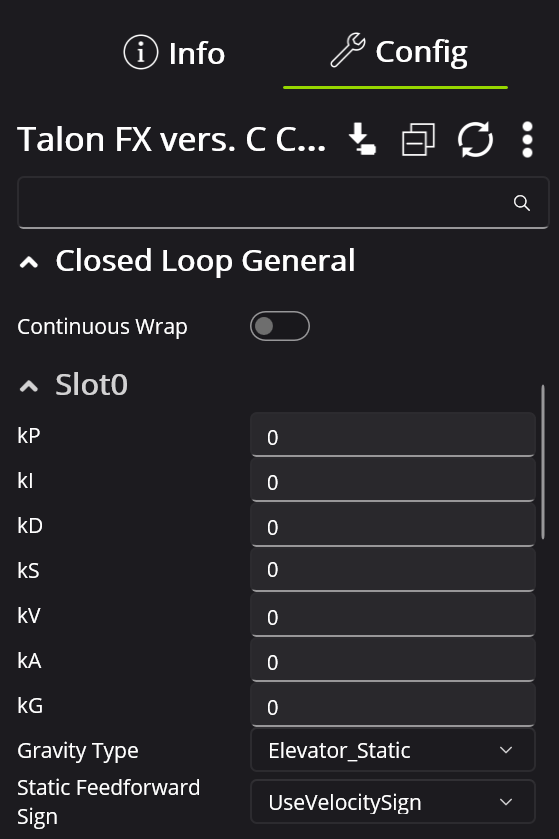
Tuning Configs
The tuning configs are located here:
Drivetrain Motors
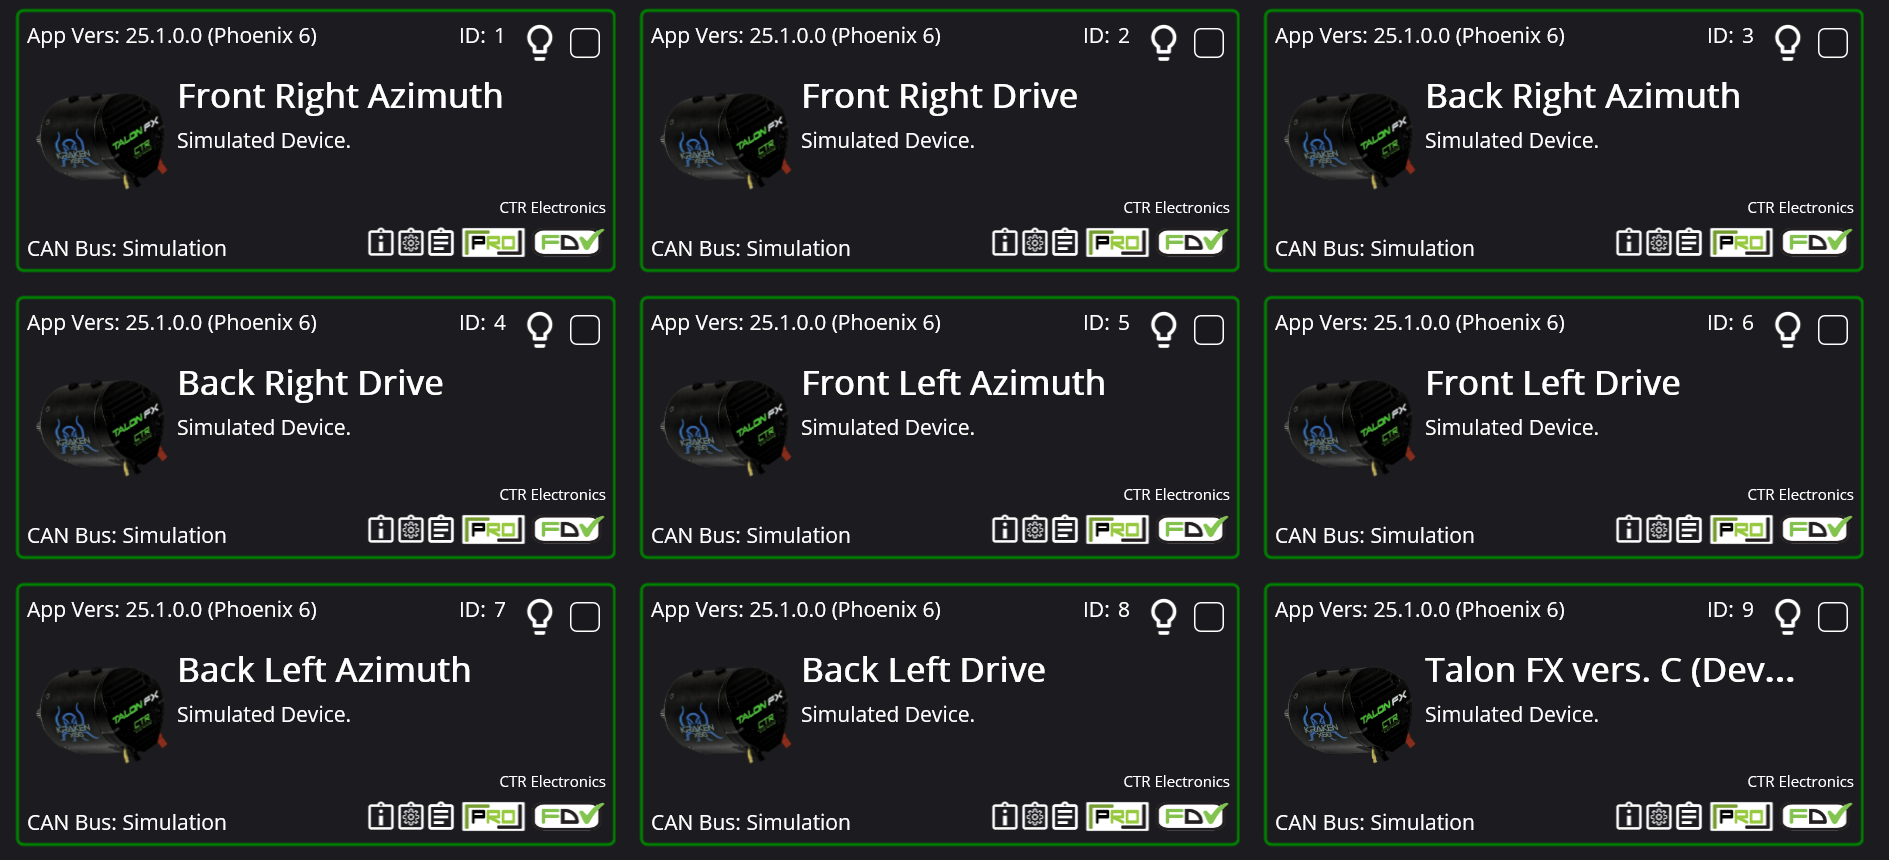
For the sake of organization and easy access, we ID our drivetrain motors sequentially from 1-8. This is because Phoenix Tuner displays devices in order of ID, and therefore keeps the drivetrain motors at the top of the page:
Update Configs in Code
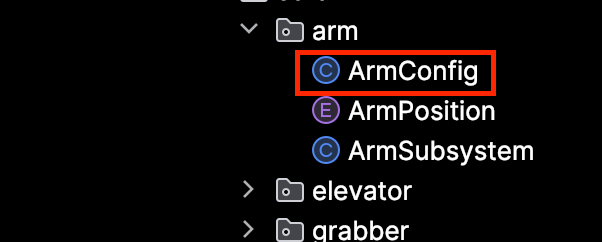
Changing the configs in Phoenix Tuner is important to make sure they are correct, but after this, you need to update the configs in the code. Configurations in Phoenix Tuner reset to what is in code on power cycle, so it is important to keep the configs in code up to date. For example, if the motor I am trying to update is the Arm motor, navigate to the following config file:
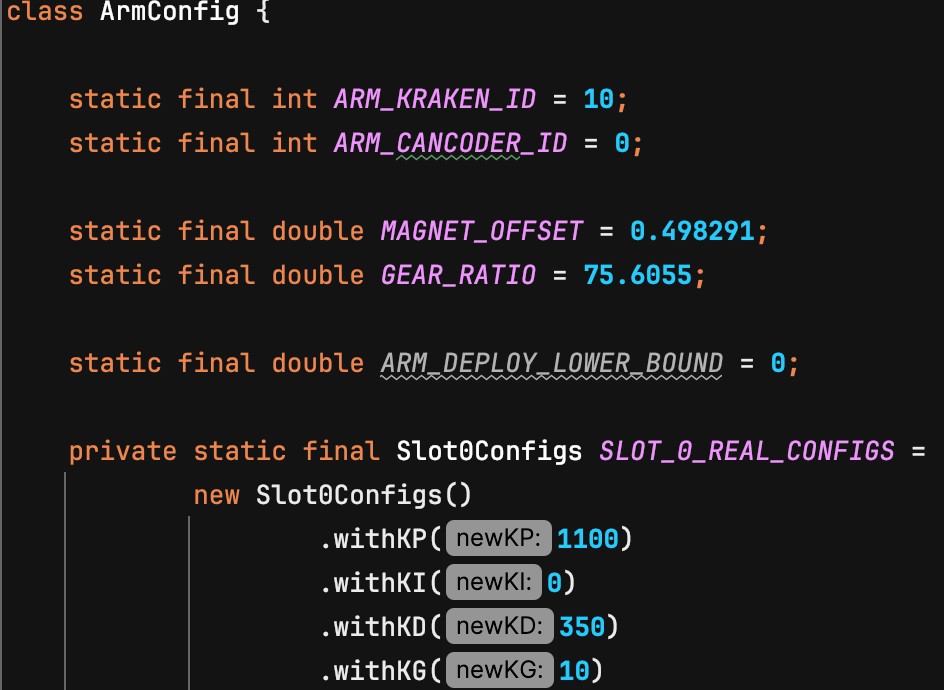
Then find the settings you want to update and change them:
Update Firmware
Make sure your motors are using the latest firmware version, usually the border around each device as pointed by the red arrow would be yellow if the firmware needed updating. To update, click the little checkbox in the corner and the upward facing arrow that appears in the top right of your screen.

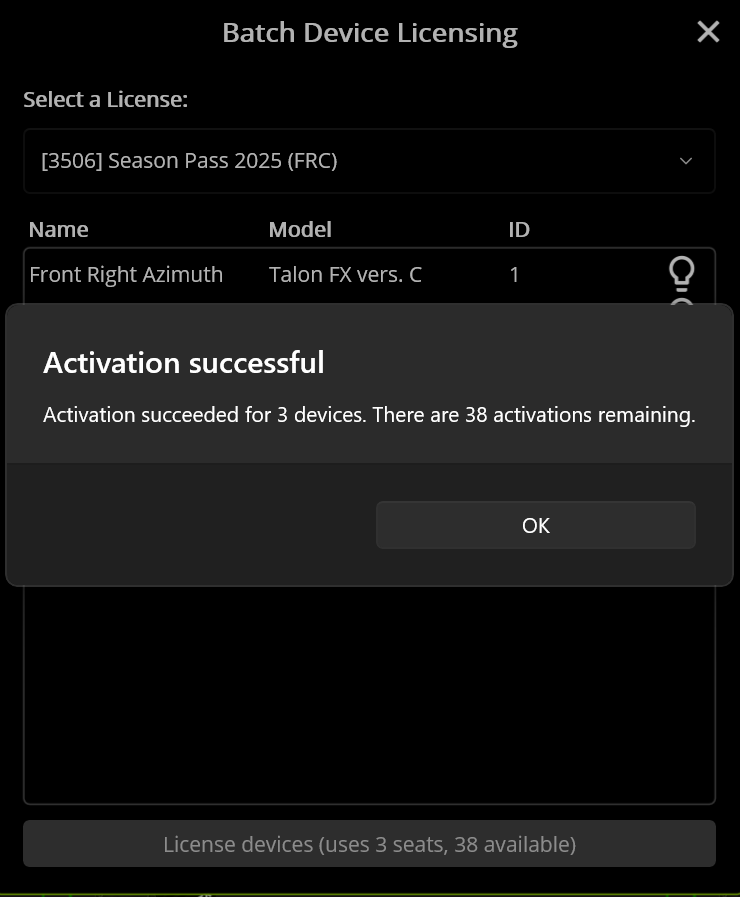
Licensing Motors
For much of the tuning YETI does, the motors must be Phoenix Pro Licensed indicated by the little PRO icon in the corner.
To license a motor, first unsure you are logged in to your CTRE account by checking under Profile on the side panel. The login details in the pinned messages of our Controls channel in Discord. Once logged in you will see what licenses are available to our team. There are only a certain number of license seats per year/season, but it is well over enough for the number of motors we use.
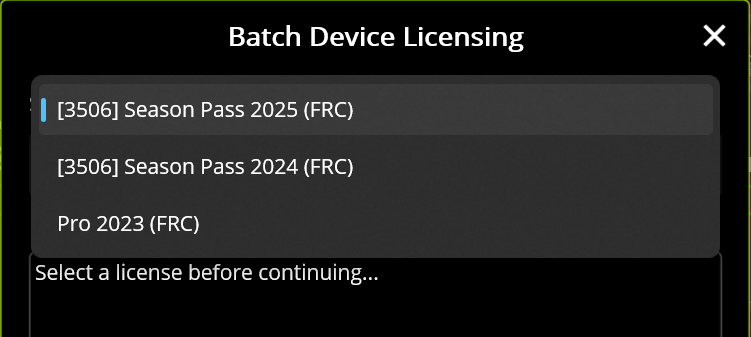
The actual process for licensing is kind of convoluted. You have to be connected to the robot to access the motors and select them, and click the person looking icon in the corner.

That'll bring up this box where you select the current year's pass.
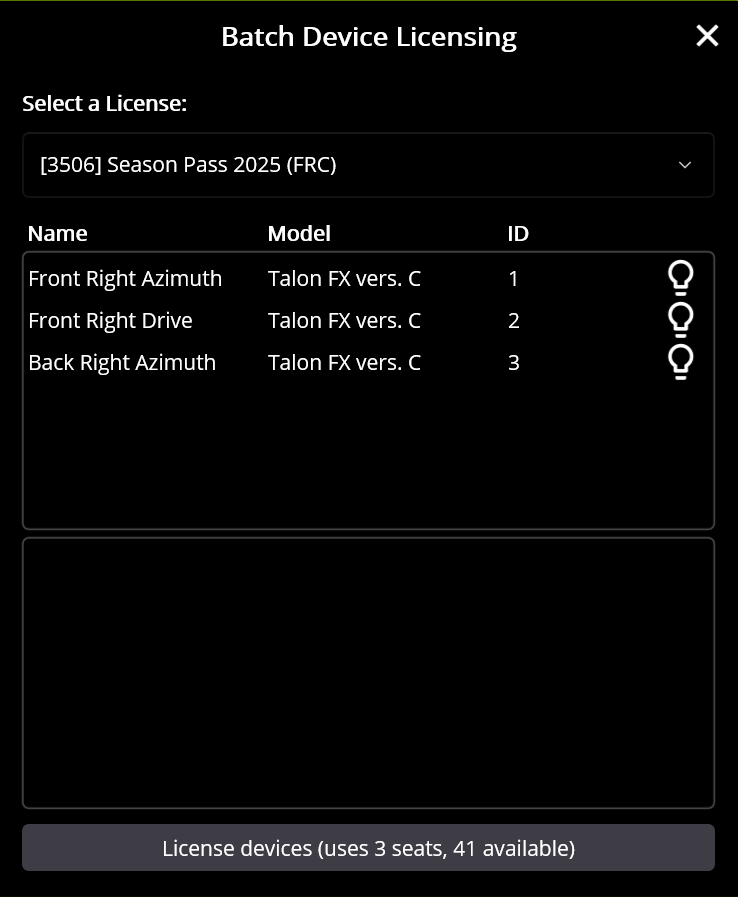
Then it displays the motors you have selected, make sure these are the right ones and connect to the Internet before you continue.
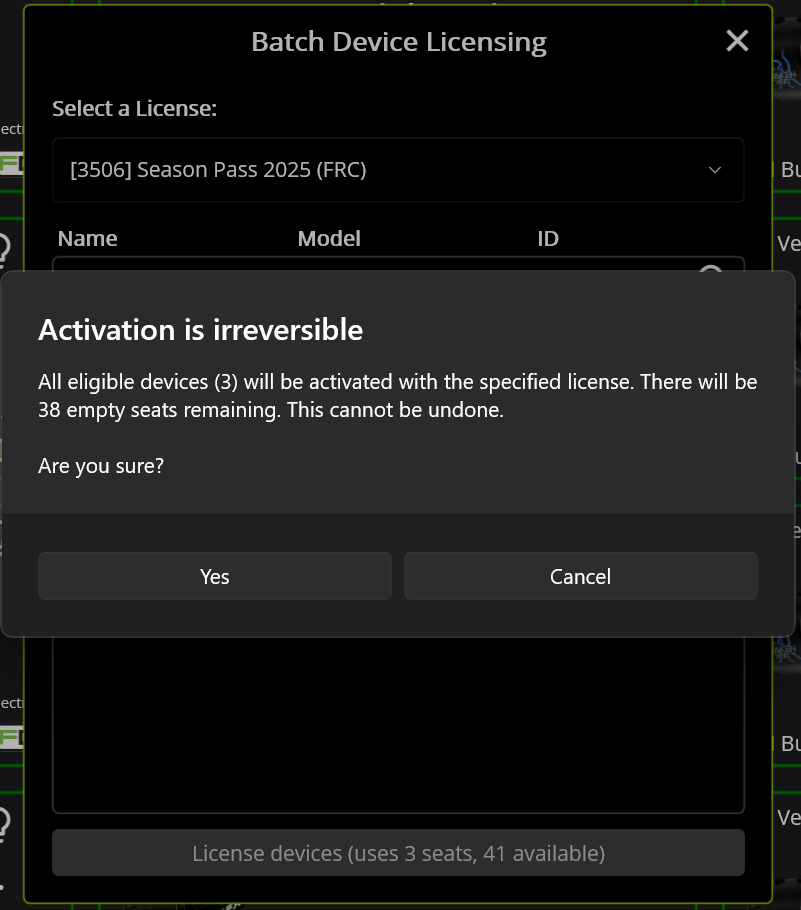
Once you are sure, allow the pop-up to strike fear into your heart
Success!
Re-zero code for drivetrains
This is just a random article that's meant to help you out with zeroing your drivetrain.
If you are using the CommandSwerveDrivetrain from your CTRE Tuner Constants, you have it easy!
All you have to do is use drivetrain::seedFieldCentric for your code!
However, if you're using the AdvantageKit drivetrain setup, you have it slightly different.
We re-zero the drivetrain by using the poseEstimator in the AKit setup.
The appropriate code for this is: poseEstimator.resetRotation(0). However, the number you pass in matters here. If you're on the Red alliance side, you would pass in 180. If you're on the Blue alliance side, you would pass in 0.
Hopefully this clears things up for you. If not, ask in #programming in the discord server and we'll be happy to help you out!
Setting up a new robot (Roborio)
Rio and Radio setup
- Flash rio
- If it's a rio 2, use balena etcher
- If it's a rio 1, use the roborio imaging tool
- Set the roborio's team number
- Although there is a roborio team number setter tool, it sucks and sometimes doesn't work. Use the roborio imaging tool to set the team number regardless of it's a rio 1 or 2
- Flash radio
- Connect to the radio over ethernet
- Go to http://radio.local
- Set the team number
- Set the robot name
- Set the password to YETI3506
- Hit apply
- Power cycle
- Deploy code
CTRE Setup
- Connect to robot
- Verify CAN busses are all good
- All devices should be flashing orange
- Make sure all IDs are unique
- Devices of different types can have the same ID. Devices of the same type cannot have the same ID
- e.g. A Kraken X60 and a Pigeon can both have ID 1, but there can only be one Kraken X60 with the ID of 1
- Devices of different types can have the same ID. Devices of the same type cannot have the same ID
- Update CTRE firmware
- License motors
- Name motors
- Set IDs
- Sync with code
- Confirm motor directions
- Sync motor directions with CANcoders
- Zero CANcoders
- Save CANcoder offsets in code
- Deploy code
- Power cycle