Getting Started with Robot Development
This chapter details what software you need to install to write software for our robots provides starting points for learning on your own.
- What you need to install
- Learning Robot Code
- Common Command Functions
- Resources
- Intelligently using IntelliJ
- Getting started with a Romi
What you need to install
Git
Git is a popular version control system (VCS) for developing software. If you are interested in becoming a Software Engineer or writing code in general, learning to use git is an extremely important skill. You can download git here. When installing, just choose all the default recommended options.
We use GitHub to host and collaborate on our software projects, so you will need to make a GitHub account on github.com. Once you have an account, post your GitHub username in the #controls channel of our discord and we can add you to our GitHub organization which you can find here along with every software project our team has ever worked on.
WPILib
WPILib is the suite of software, known as a library that we use to actually control the components on the robots. WPILib has their own guide for setting up your development environment, however since their guide is designed for everybody across FRC, it has a lot of information not relevant to our team. Following the guide below should get you set up for developing robot programs for YETI. If you run into any issues in your setup, you can ask questions in the #controls channel of the YETI discord, and check out the WPILib guide as it may have the solution to your problem.
NOTE: This guide is for Windows, macOS, and Linux computers. You will NOT be able to write robot programs with ChromeOS.
Download the latest version of the installer from the WPILib Github. Scroll down to Downloads and download the appropriate installer for your operating system.
Read this if you use a mac
Before installing WPILib, mac users will need to install XCode Command Line Tools. These are tools developed by Apple for C++ development which WPILib requires to run. To do so, open the Terminal app on your mac and run the following command
xcode-select --installYou may need to run this command administrator privileges, in which case run the following command and enter your password when prompted. Note: When typing in your password in the terminal, it will look like nothing is happening, but this is just the terminal version of how websites show dots instead of letters in password fields.
sudo xcode-select --installNext, you need to install the appropriate installer for the processor your mac uses, either an Intel or M series (arm64) chip. If you are unsure which your mac uses, do the following:
- Click the apple logo menu in the top left of your screen
- Click about this mac
- If it says you have an Apple M1/M2/etc. chip or an Apple A18 chip, download the arm64 installer. otherwise download the Intel version
- Open the file you downloaded
- Run the WPILibInstaller
- Click Start
- Choose Everything
- Select the top right option that says Skip and don't use VS Code
Why the option that says not recommended?
Selecting Everything will install all the development tools you need to code an FRC robot. The way you actually use those tools to write your code is up to you. All the other options will install a dedicated instance of VS Code, a very popular code editor that can be used to write just about any kind of program. If you already have VS Code installed, it will still install a new version. This is one reason I do not recommend this path, as it can be confusing what version of VS Code you are using.
The other reason is because here on Yeti, we use IntelliJ to write our robot code. This is because IntelliJ is specifically designed for developing Java programs, and so has many useful features that VS Code lacks out of the box. Additionally, I have found that Java development in VS Code is simply much buggier because it is not specifically designed for it while IntelliJ is.
Install for this User or Install for all Users? (doesn't apply to mac)
If you share your computer with anyone else, for example a parent, you should install for this user. If your computer is just yours, you should install for all users. The reason being is that installing for all users requires administrator privileges, which you may not have if this is not your computer. The difference does not matter too much, but installing for all users may create less problems in the future in terms of other software dependencies or updates.
IntelliJ
Here on YETI, we use IntelliJ to write our robot code. This is because IntelliJ is specifically designed for developing Java programs, and so has many useful features that VS Code lacks out of the box. Additionally, I have found that Java development in VS Code is simply much buggier because it is not specifically designed for it while IntelliJ is.
Install
- Download IntelliJ Community Edition (NOT Ultimate)
- Scroll down a little on this page to get to the community edition install
- Run the installer and install IntelliJ
- Open IntelliJ
- When you open IntelliJ, it will begin processing your workspace. The progress bar is in the bottom left.
Setup
Java
Note that this part requires you to have a Gradle project open at the moment. Read this if you don't have one open.
If you don't have a Gradle project open, you can use YETI's sim-sandbox.
Go to the sim-sandbox repository on the YETI GitHub, or use this link: https://github.com/yeti-robotics/sim-sandbox. Then, click on the "Use this template" button in the top right hand corner. Click "Create new repository," and pick a name for it. Make sure to check the box that includes all branches! This will create your own repository with all of the template files to start.
Next, open up IntelliJ and head over to File > New > Project from Version Control. Select the Git option, and then paste in the URL of your repository, which you'd get from pressing the green "Code" button when you go to the repository in your browser, and copying the URL that you find in the little dropdown beneath it. It should look something like this:
https://github.com/YOUR_GITHUB_USERNAME/REPO_NAME.git
YOUR_GITHUB_USERNAME should be replaced with your GitHub username, and the REPO_NAME should be replaced with whatever you decided to name the repository when creating it. Once you hit the "Clone" button, this will download everything onto your device.
- Open settings
- Expand Build, Execution, and Deployment on the left
- Expand Build Tools
- Select Gradle
- Set Distribution to Wrapper
- If on Mac, follow this:
- In the Gradle JVM dropdown, select Download JDK
- Set Version to 17
- Set Vendor to Amazon Corretto
- Click Download
- If on Windows, follow this:
- In the Gradle JVM dropdown, select Add JDK from Disk
- Navigate to C:\Users\Public\wpilib\(your WPiLib version)\jdk
- Select that jdk folder
- Hit OK
FRC Plugin
- Open settings
- Select Plugins on the left
- Select the Marketplace tab at the top
- Search for and install the FRC plugin
Next steps
You can view a list of additional resources here, including links to learn Java. For a guide for learning robot code, we have a roadmap for the FRC Ladder series here.
If you are interested in getting started developing for a Romi robot to practice robot code, we have a guide for setting that up here.
If you are interested in continuing sim-sandbox development and finishing the full simulation setup, follow this guide.
Learning Robot Code
FRCLadder
FRCLadder provides a series of videos that together serve as a great introduction into robot code. We've selected some below that are particularly relevant to the programming YETI does.
Note: The hardware and APIs available have changed quite a bit since some of these videos were published. However, the concepts and theory behind them remain the same.
Introduction to FRC Programming and Basic Drivetrain Code
How PIDs Work and How to Implement Them
Part 1: Dead Reckoning, Bang Bang, and using kP
Part 2: Using kI and kD
Supplemental: A practical example of tuning a PID loop and how each value affects movement
Common Command Functions
Here we have listed some of the most basic and common functions we use when defining commands to control the robot. This is not a comprehensive list. You can read more about this API and discover more functions at the links below.
- The full API documentation for the
Commandclass - The full API documentation for the
Commandsutility class - The full API documentation for the
Triggerclass - WPILib docs on more command compositions
- WPILib docs on structuring command based projects
Base command functions
These functions work great as a base for a sequence of actions you want to define.
-
run(action)- Repeatedly runs an action until interrupted
runEnd(runAction, endAction)- Repeatedly runs an action until interrupted, then runs a second action
runOnce(action)- Runs an action once. that's it
startEnd(startAction, endAction)- Runs an action once and another action when interrupted
Examples
A function that takes in a number representing the power to run the arm motor at. When the command ends, the motor will stop. Note that there is nothing actually specifying when the command ends, only what happens when it does.
// ArmSubsystem.java
public Command moveAndStop(double power) {
return runEnd(() -> armKraken.setControl(new DutyCycleOut(power)), armKraken::stopMotor);
}Modifier command functions
These functions work great to enhance a command's functionality. They can refine when a command ends and join a command with others.
andThen(command)- called on a command to run another command when the first one finishes
alongWith(command)- called on a command to run another command in parallel with the first one
until(condition)- called on a command to end it when the condition is true
withTimeout(seconds)- called on a command to end it after a specified number of seconds
Example
We have modified the function from the previous example with a timeout. Now we have specified when the command should end. In this case, after two seconds.
public Command moveAndStop(double power) {
return runEnd(() -> armKraken.setControl(new DutyCycleOut(power)), armKraken::stopMotor).withTimeout(2);
}Binding commands to buttons
These functions use the Trigger api to start commands when some condition is true. The most common use case is starting a command when a button is pressed. You can read more about triggers here.
onTrue(condition)- Starts a command when the condition changes from false to true
whileTrue(condition)- Starts a command when the condition changes from false to true, and then cancels the command when the condition changes back to false. You can use this when you want a command to run only while holding a button.
onFalse(condition)- Starts a command when the condition changes from true to false
whileFalse(condition)- Starts a command when the condition changes from true to false, and then cancels the command when the condition changes back to true
Example
Line 3 of this example shows how to run the command we made in the previous example when button 1 on the joystick is pressed. Since we pass in 0.5 into the moveAndStop method, the arm will move at 50% power. The command will then stop after 2 seconds just as we defined it. Note that the configureBindings method is one that is preexisting in RobotContainer. We do not make this for every binding.
// RobotContainer.java
private void configureBindings() {
joystick.button(1).onTrue(arm.moveAndStop(0.5));
}Resources
Java
Java is the programming language we use to write the code that enables the robot to do anything useful or interesting. You have know how to write software in Java to be able to program our robots.
If you don't have any experience programming, it can feel daunting. You have to learn how to think in a specific way using a language that you don't know yet. Fortunately, there are many resources available. The free Java course on CodeAcademy is a great way to learn Java at your own pace. You'll start from the basics and learn everything you need to know to program effectively.
Git
Git is a version control system for tracking changes across files in a project (aka repository). It is what enables collaborative software development and is used by every programmer. Github is a website that hosts git repositories. There a lots of programs and apps to manage git for you, but my preferred way is the command line. CodeAcademy has a good course on git as well.
You can access all of the code YETI has ever written on our GitHub page.
Some repositories worth looking at:
WPILib
Also highly recommended is the Command-Based Programming for getting familiar with the concepts and APIs. Specifically these pages;
My presentation on some basic WPILib concepts
A textbook on robot development by team TER3M Robotics
Control Theory
Teaching Rocks to Think is a great blog about Programming applied to FRC.
There are five blog posts pertaining to control theory.
- Systems & Control Engineering
- Mathematical Models of the World
- PID & Controller Design
- Tuning PID - This one is really cool! It has an interactive guide to tuning a PID loop
- Supplemental - Vertical Arm
Intelligently using IntelliJ
Overview
IntelliJ is the IDE that we recommend for robot programming on YETI. This page will go over how to use IntelliJ effectively and efficiently. Reading this will make you epic at navigating and organizing your project
Fuzzy Find
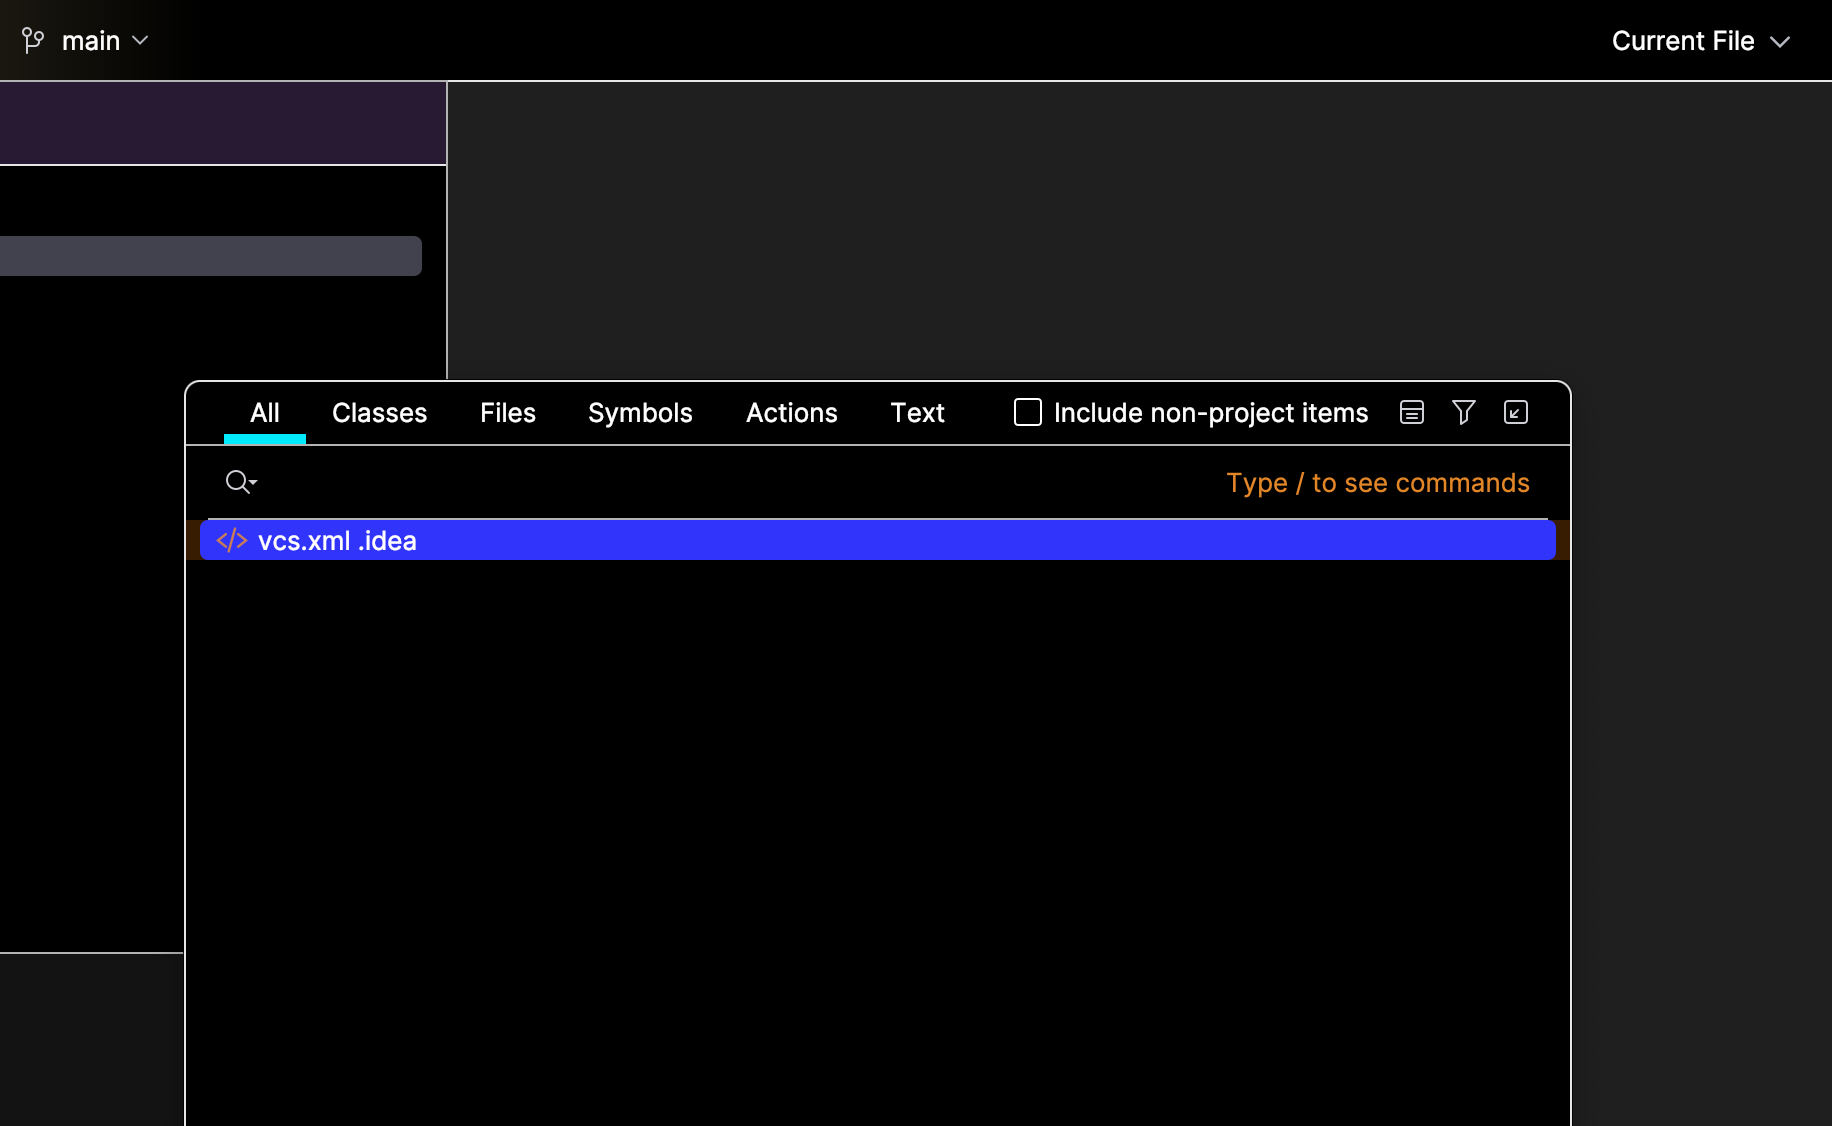
Fuzzy Find in IntelliJ enables you to quickly locate files, classes, or symbols. It guesses what you are looking for by keywords or parts of words to find what you are looking for. This can make coding faster because you don't have to spend time browsing files to find what you want.
You can use fuzzy find in IntelliJ by double-clicking the Shift key. When you do this, the following search bar will pop up, and you can just type a keyword or part of the item you are looking for, and IntelliJ will find it for you:
Gradle Stuff
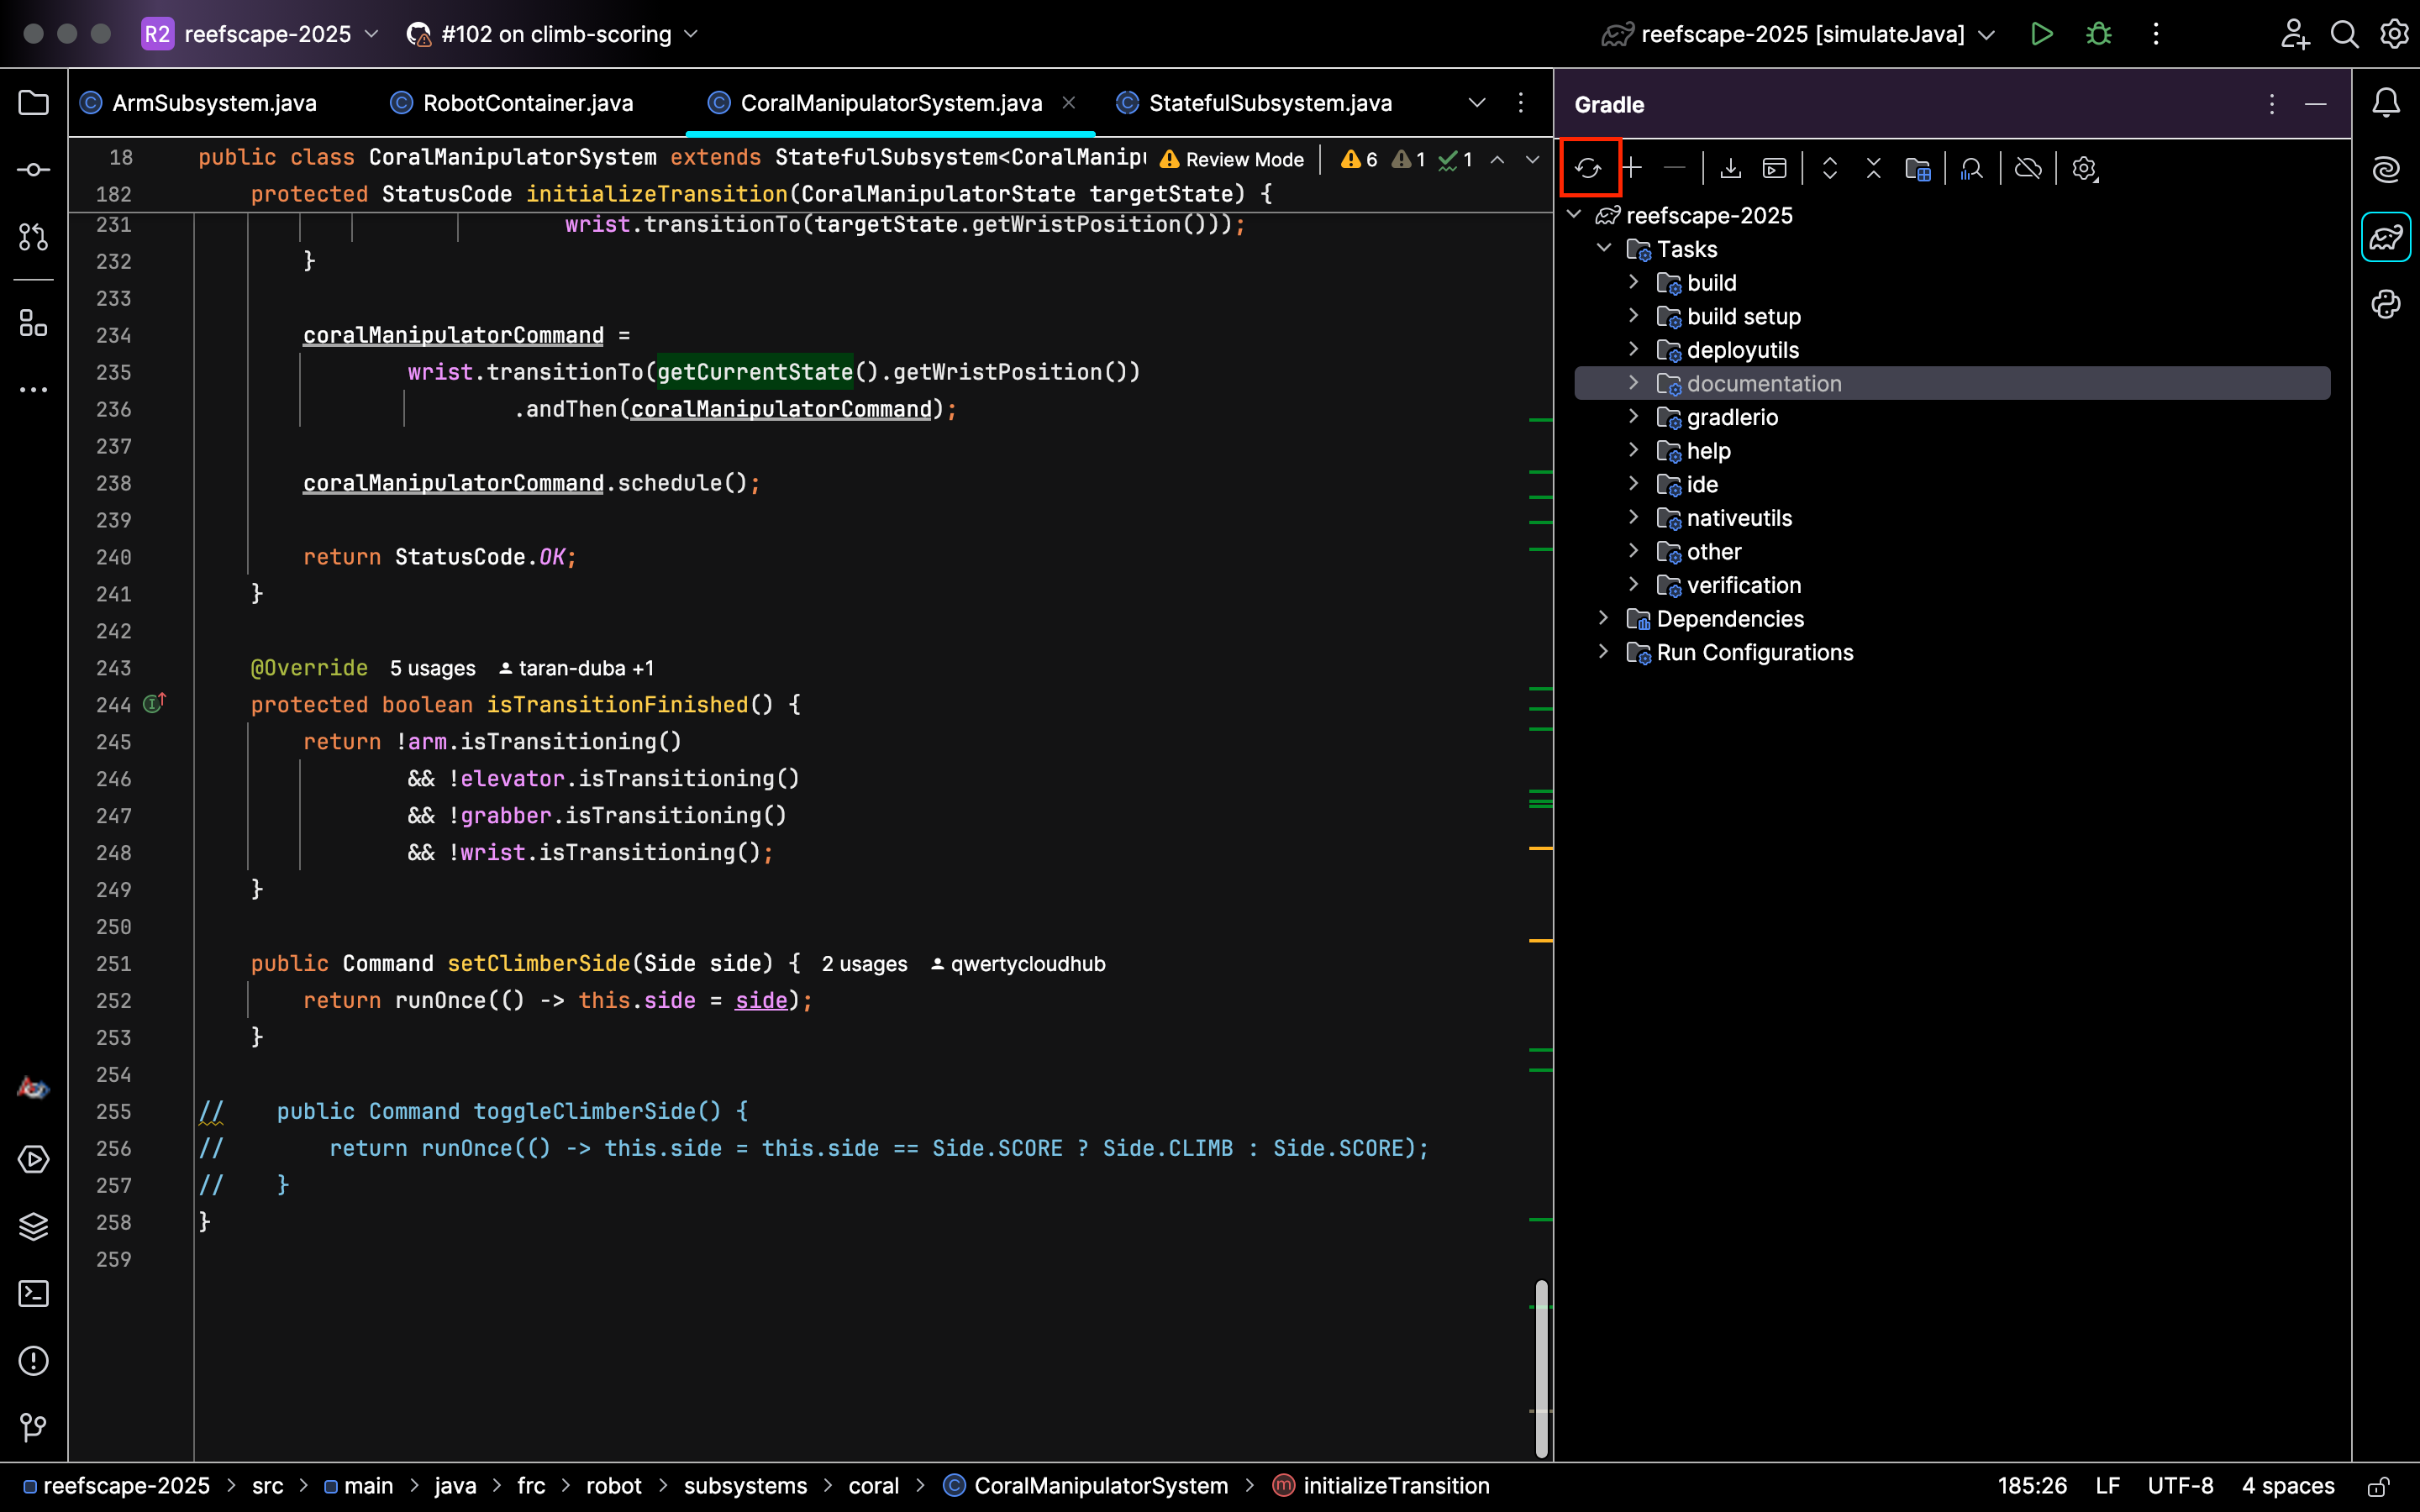
You can access this Gradle tasks menu by hitting the (tootin') elephant on the top-right side of your screen:

The ones you'll likely use the most are listed below:
- build: This is under the build dropdown in the menu. This compiles the code.
- deploy: This is under the deployutils dropdown in the menu. This deploys the code to the roboRIO.
- simulateJava: This is under the other dropdown in the menu. This will launch the simulation window and let you simulate your code.
The Gradle refresh lets you refresh your project to sync up any changes to your Gradle config settings. In addition, it can also fix compilation errors. You can do this by hitting this button in the top-left corner of your Gradle menu:
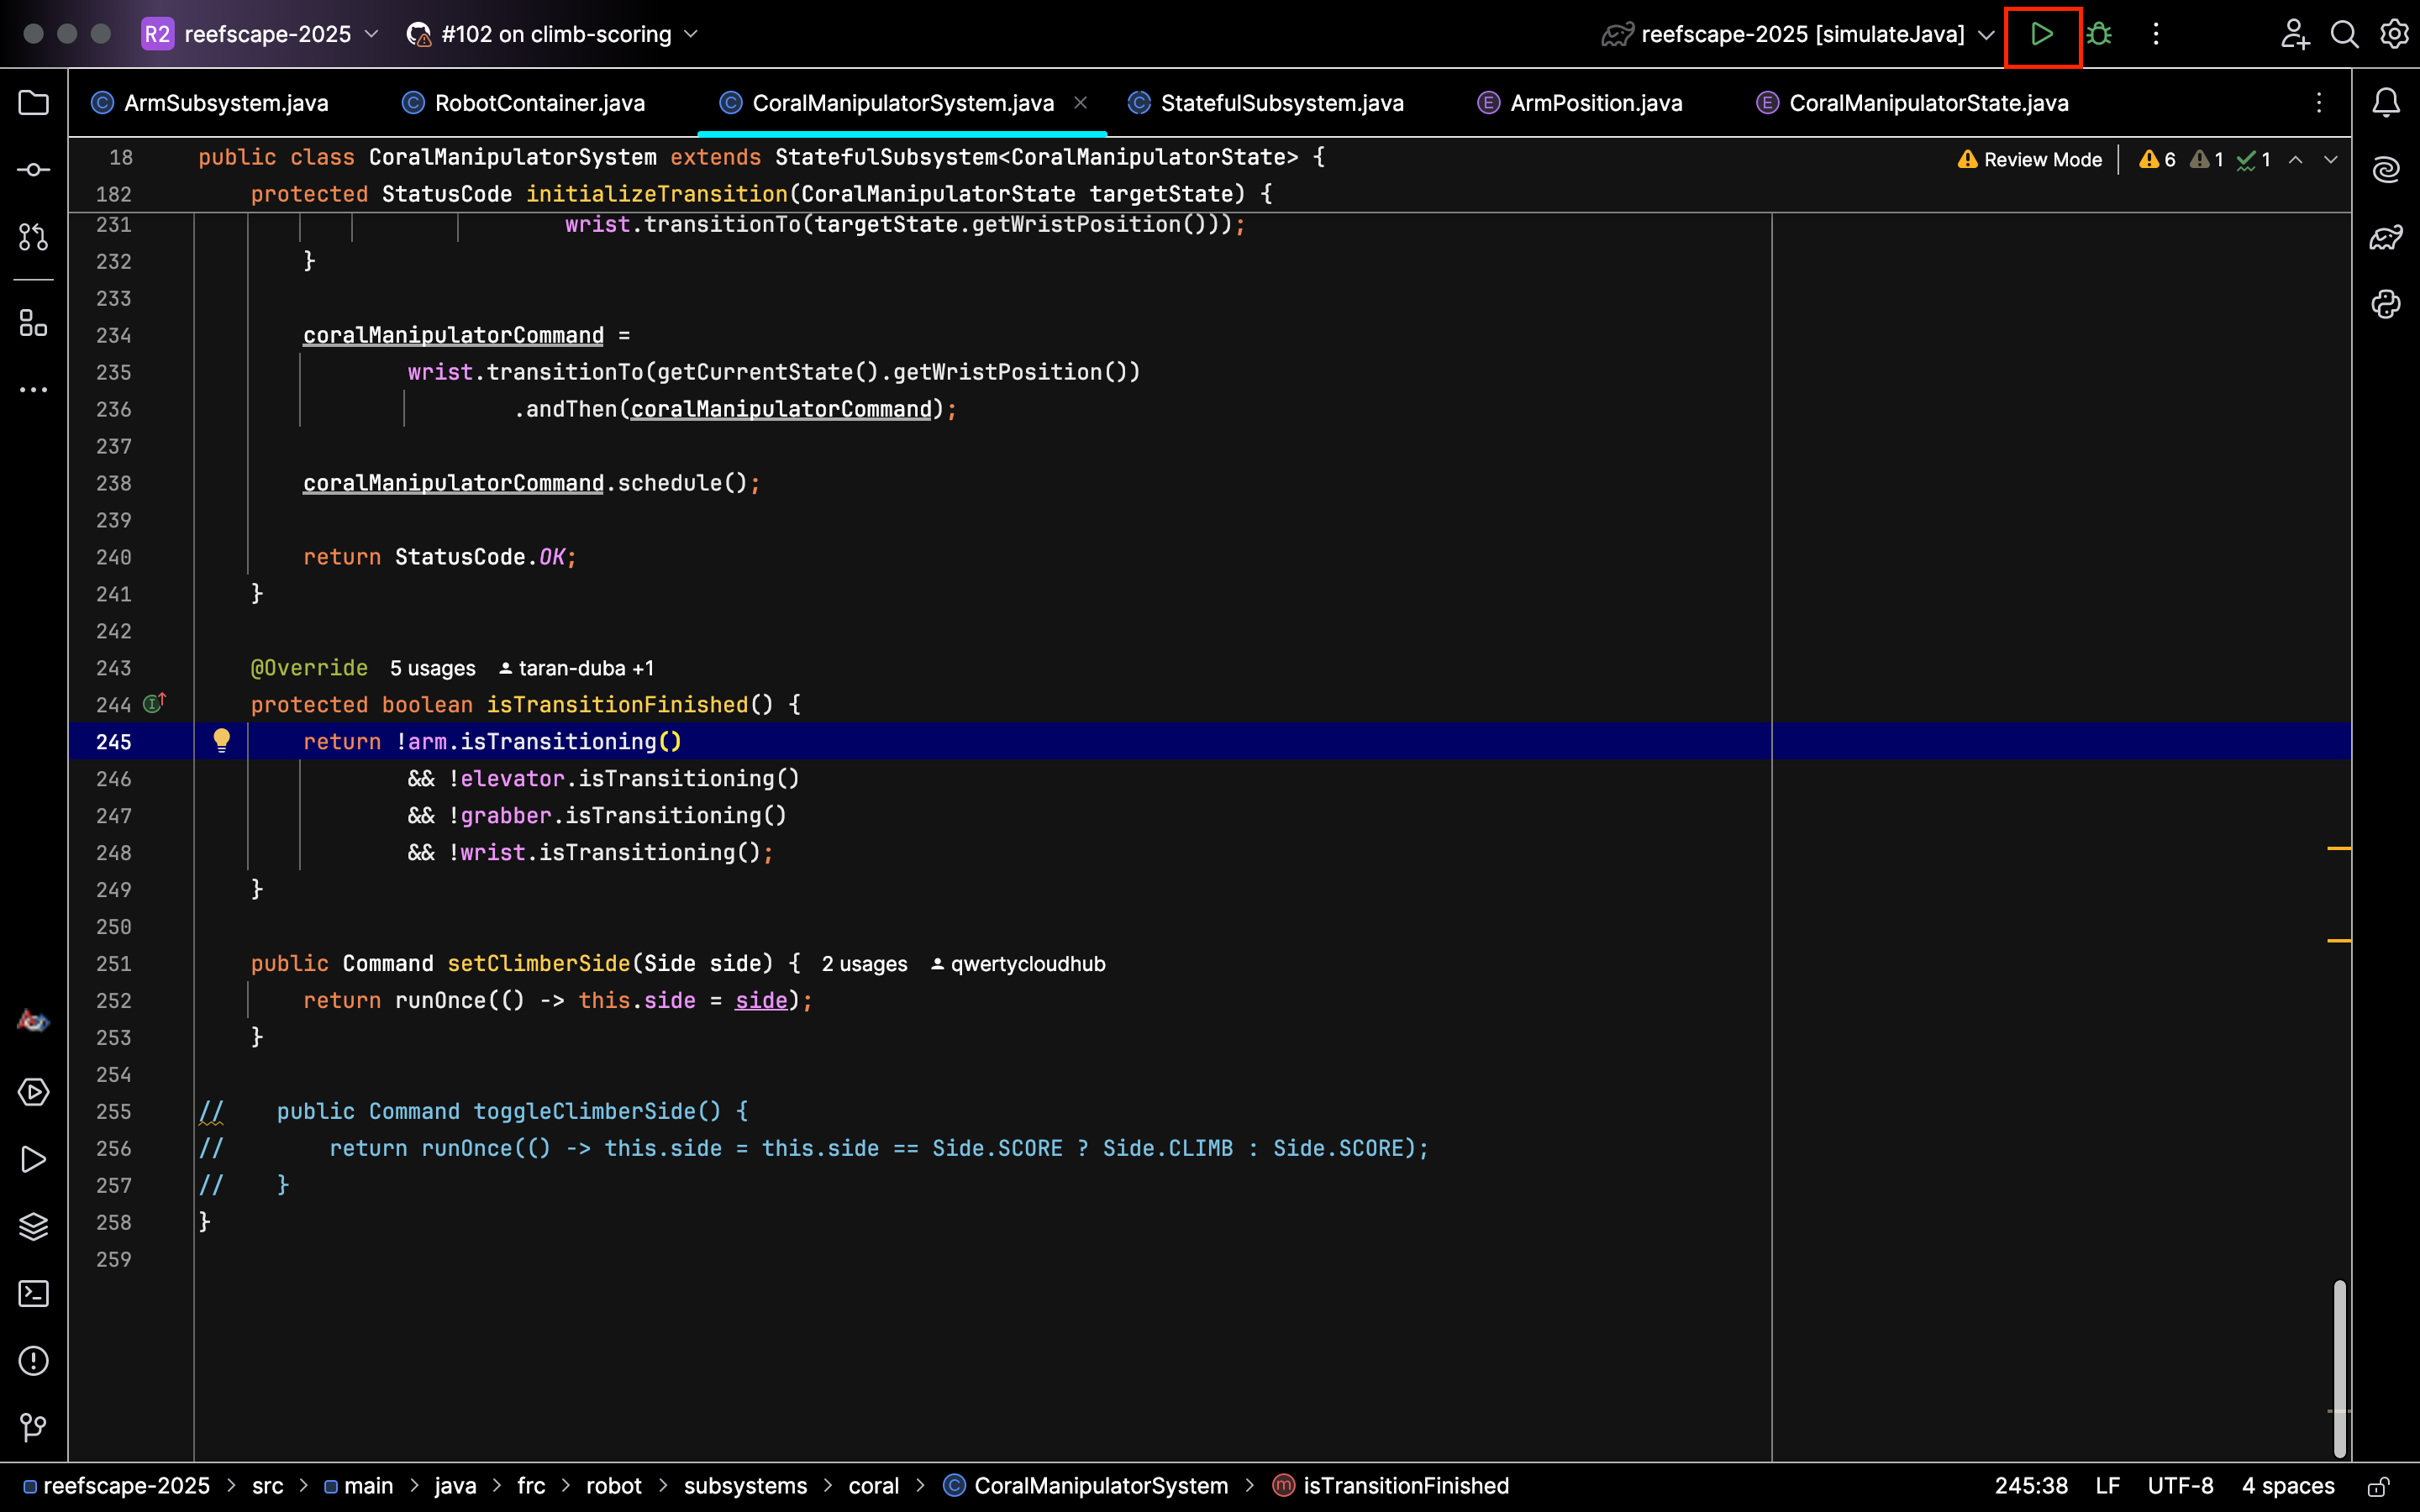
Note that after running a Gradle task, you can easily run it again by hitting this play button:
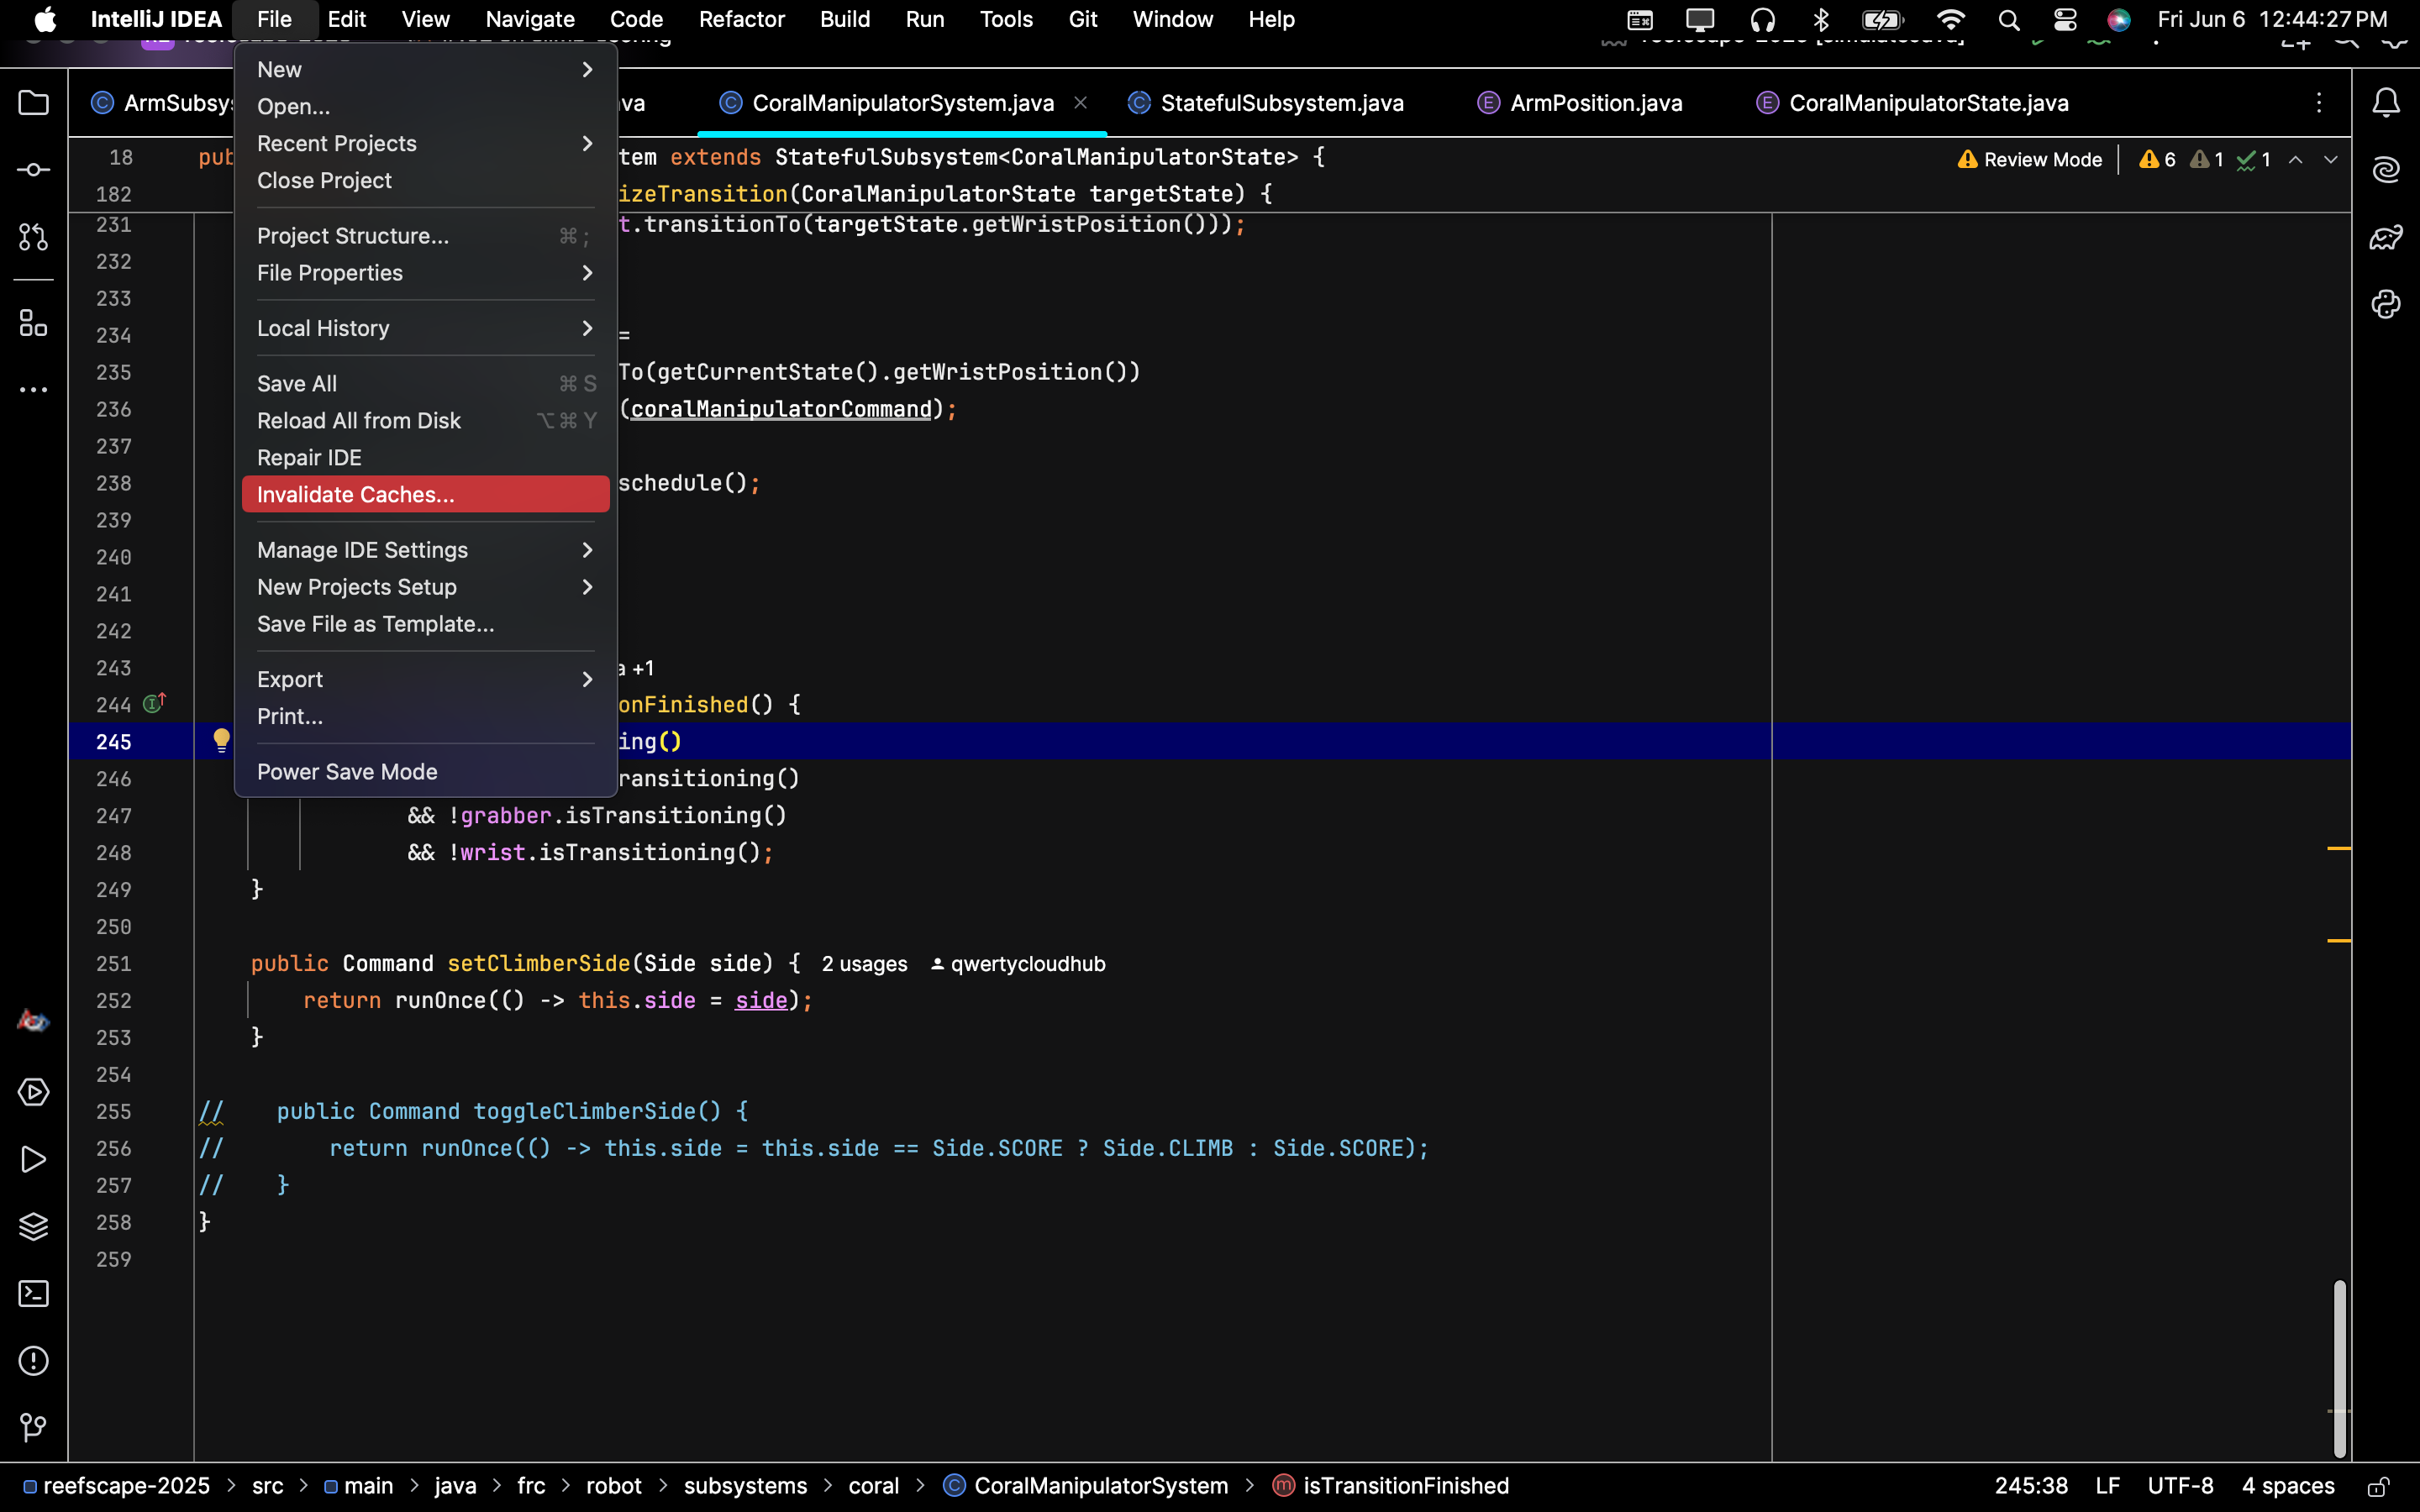
Invalidate Cache
If you are having problems building, you may need to invalidate caches and restart the IDE to fix problems related to outdated or corrupted caches. You can do this by hitting File > Invalidate Caches as shown below:
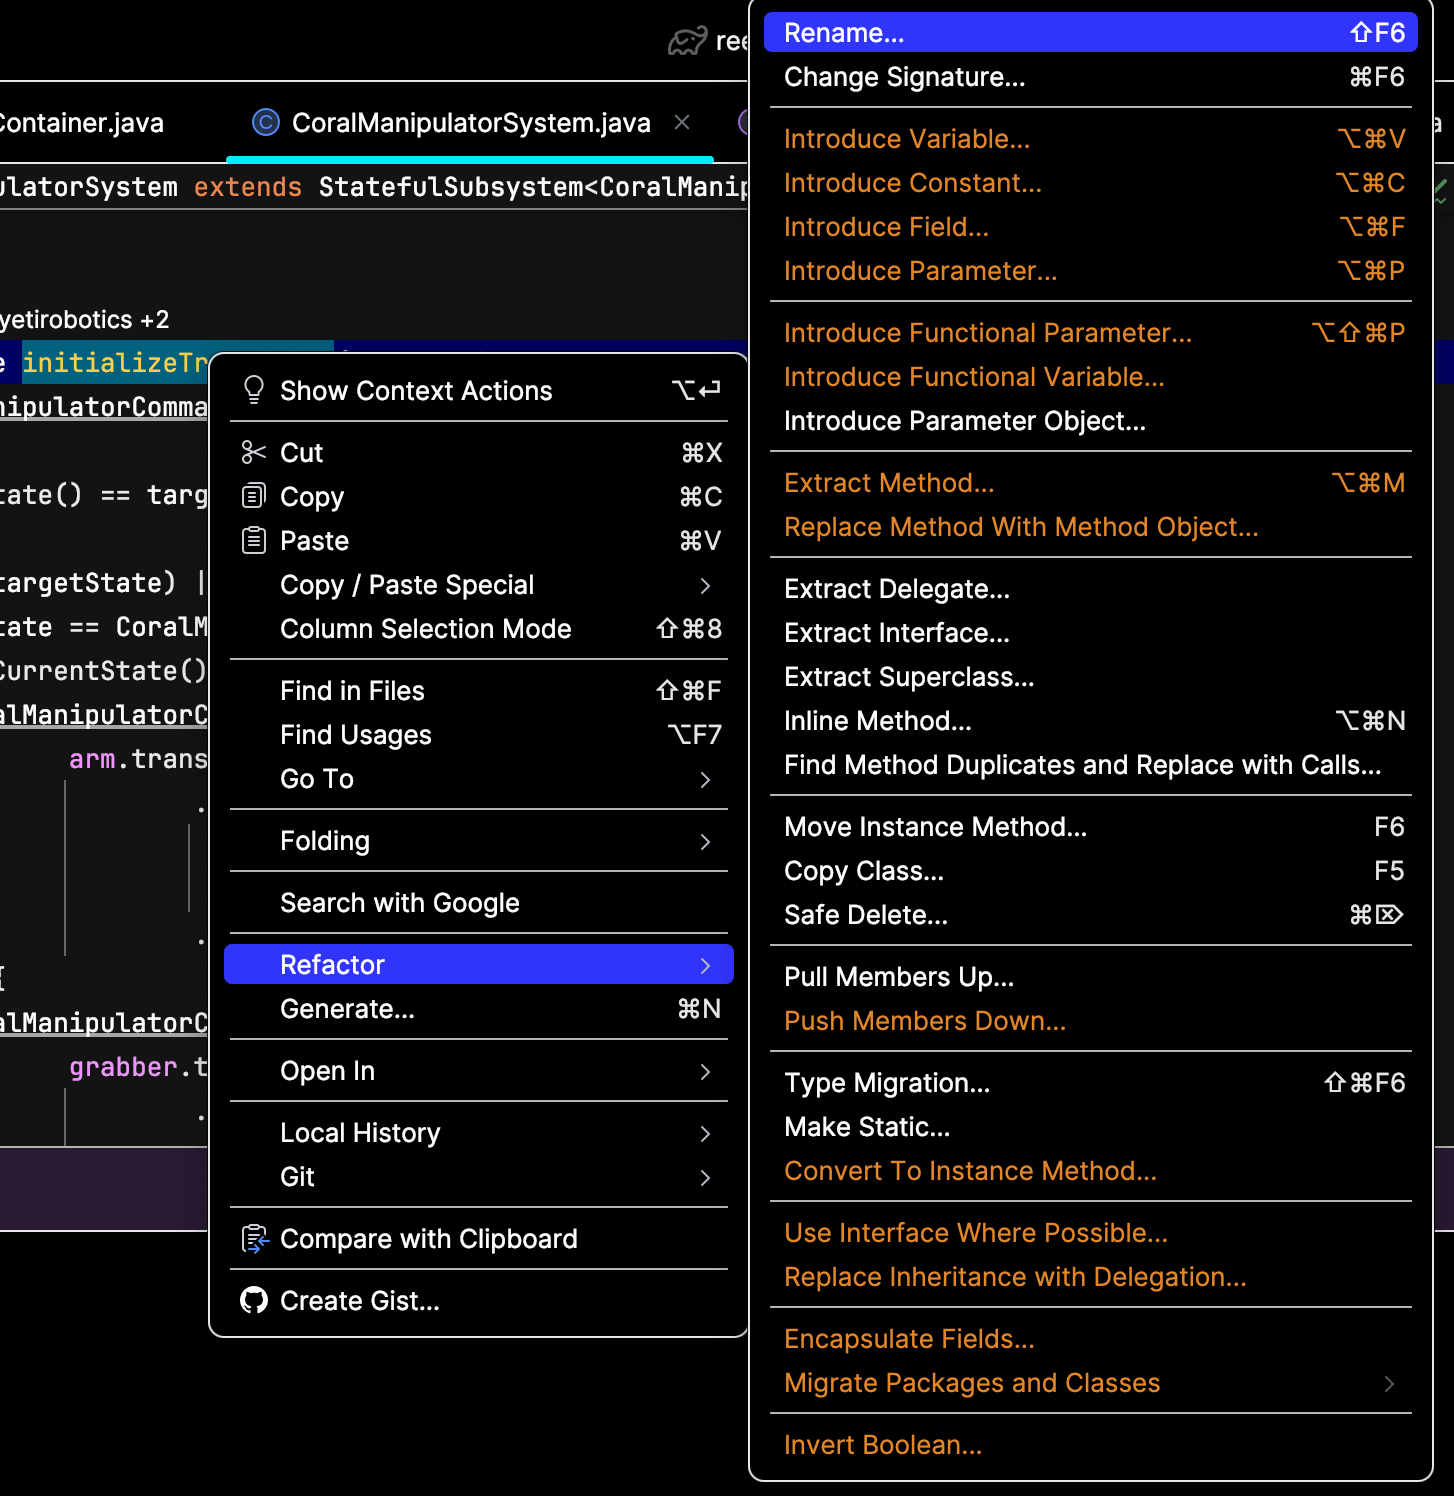
Renaming Things
When you're renaming symbols, make sure you don't make the fatal (and suuuuuper goofy) mistake of only renaming one instance. This will lead to problems that can only be solved by throwing a magic ring into a volcano. Instead, right-click whatever you want to rename and hit Refactor > Rename, and type whatever you want the symbol to be renamed to. This will rename all instances of the symbol and ensure that you don't have to go on a whimsical adventure involving a cool archer elf. Below is the menu you will need to use:
Ctrl-Click
If you are using a Mac, replace Ctrl with Command
One of the most powerful tools IntelliJ will bestow upon you is the Ctrl-click. If you hold Ctrl while clicking on a piece of code, it will take you to its definition and show usages of it. Below is an example:
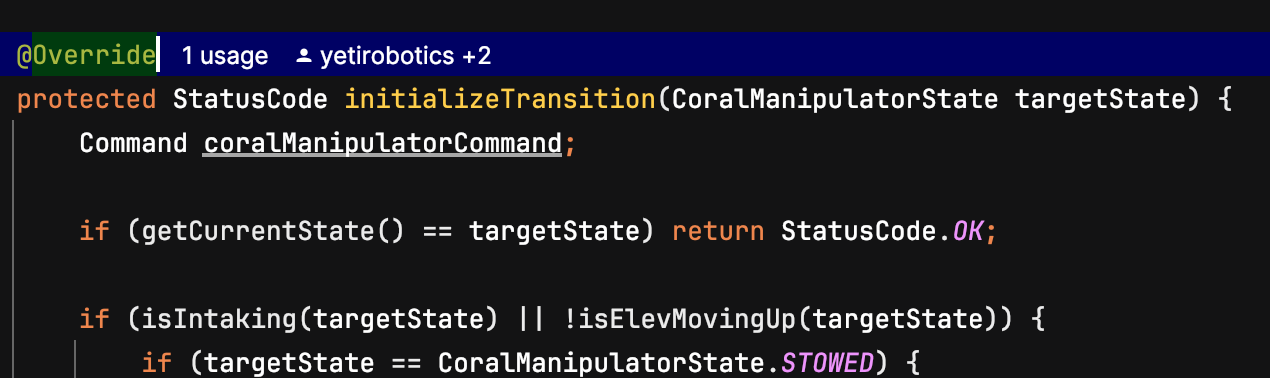 Before the ctrl-click
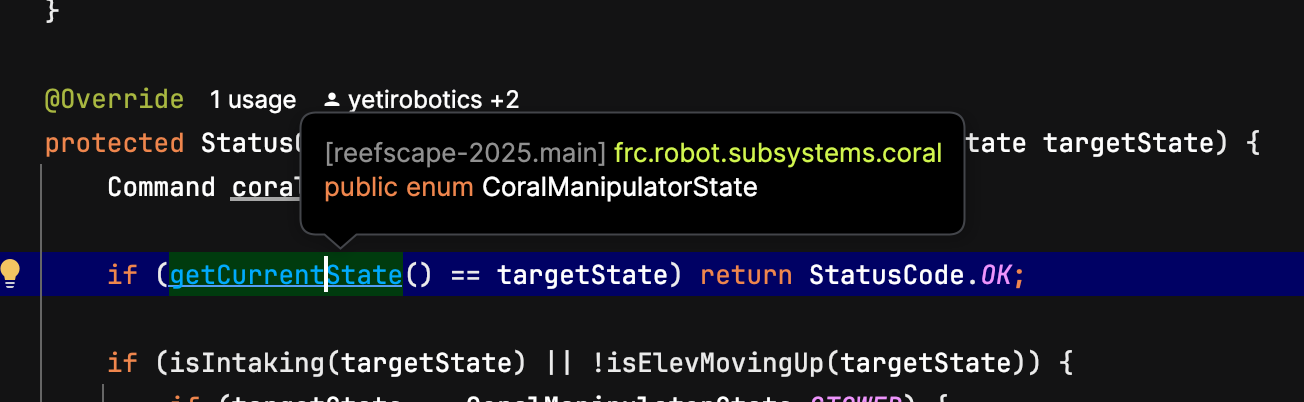 While holding Ctrl
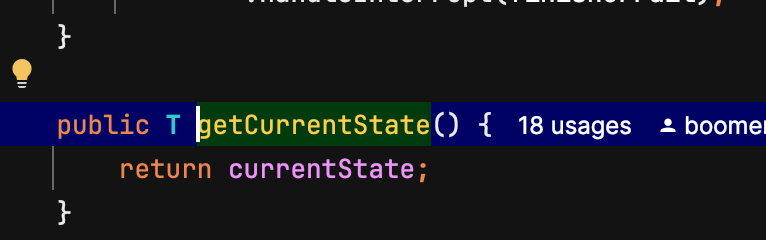 It takes you to the definition!
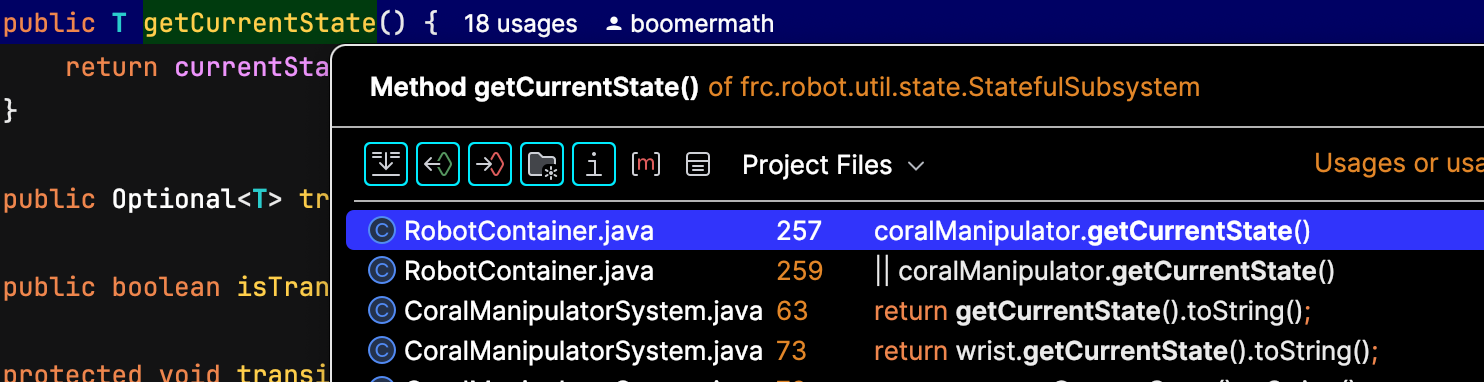 Ctrl-clicking the definition shows the usages!
Now you can Ctrl-click to your heart's content!
Git Actions
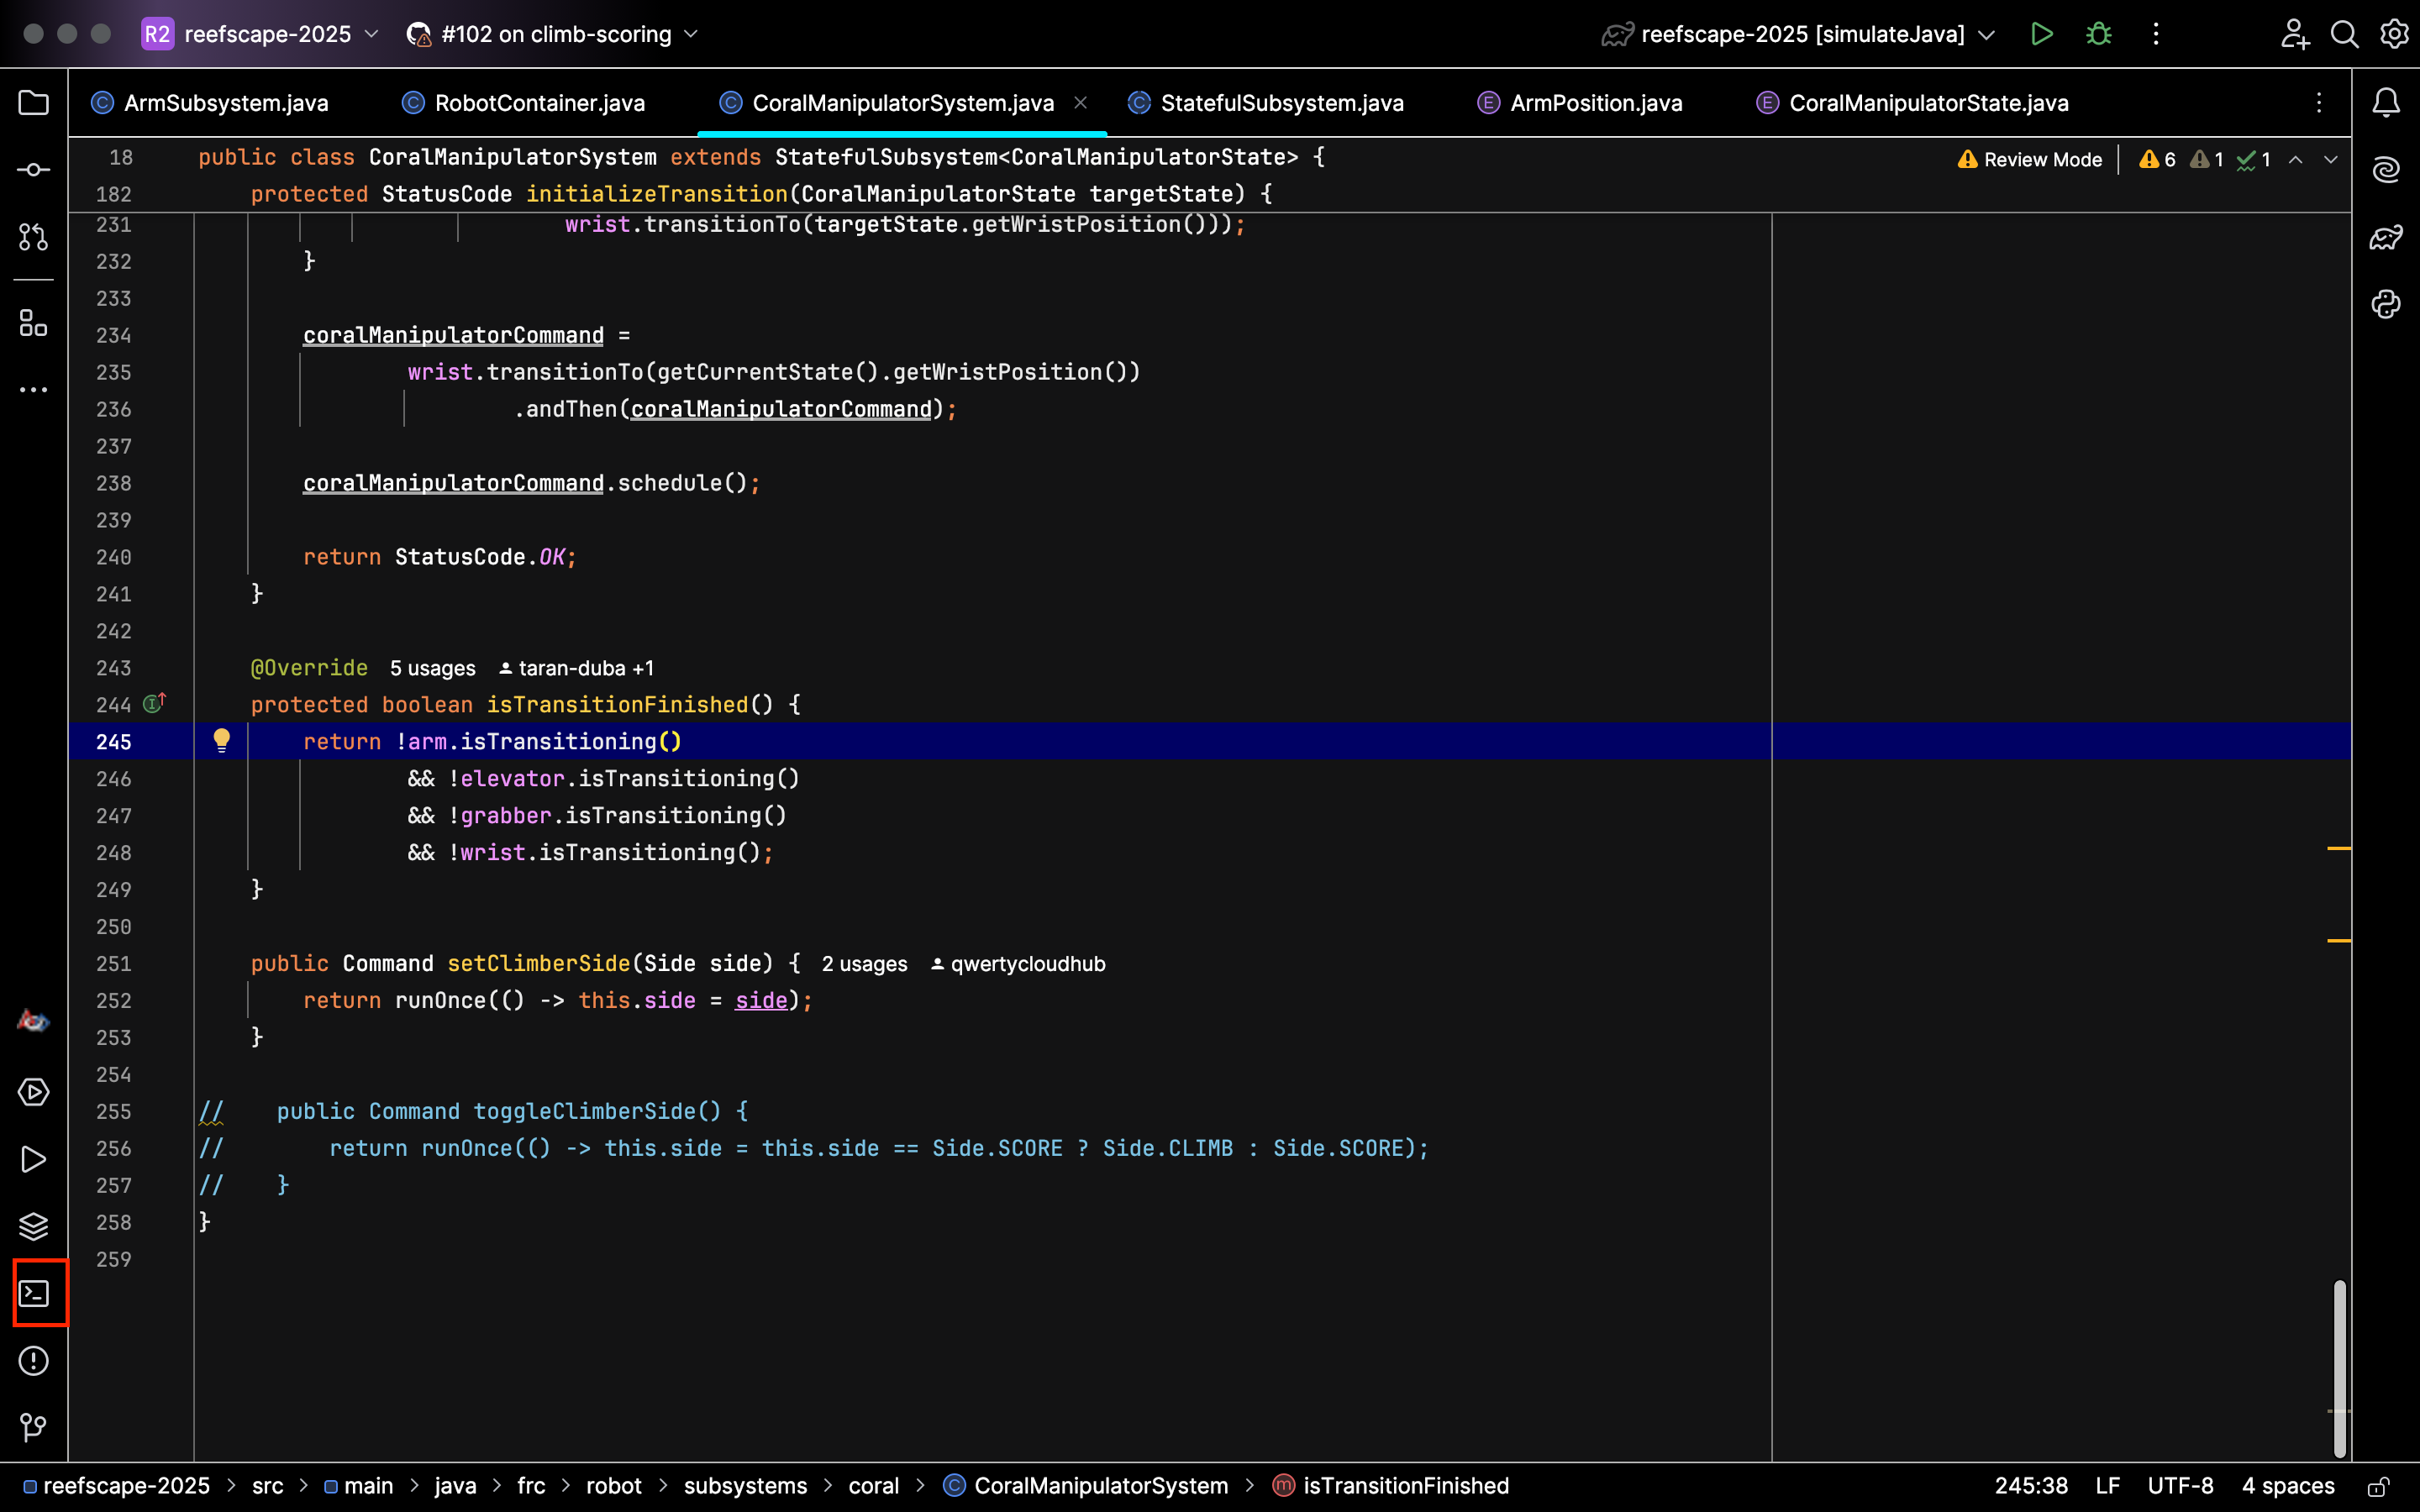
So you wanna work with other programmers on a project? On YETI, we use Git and GitHub for organizing contributions between programmers. You can access some Git actions from the IntelliJ icons, but some things are easier to do with the terminal. Note that you can access the terminal by hitting the button below:
The following list outlines the Git actions that you'll likely use frequently.
- Pulling: There are two ways to pull and update your project
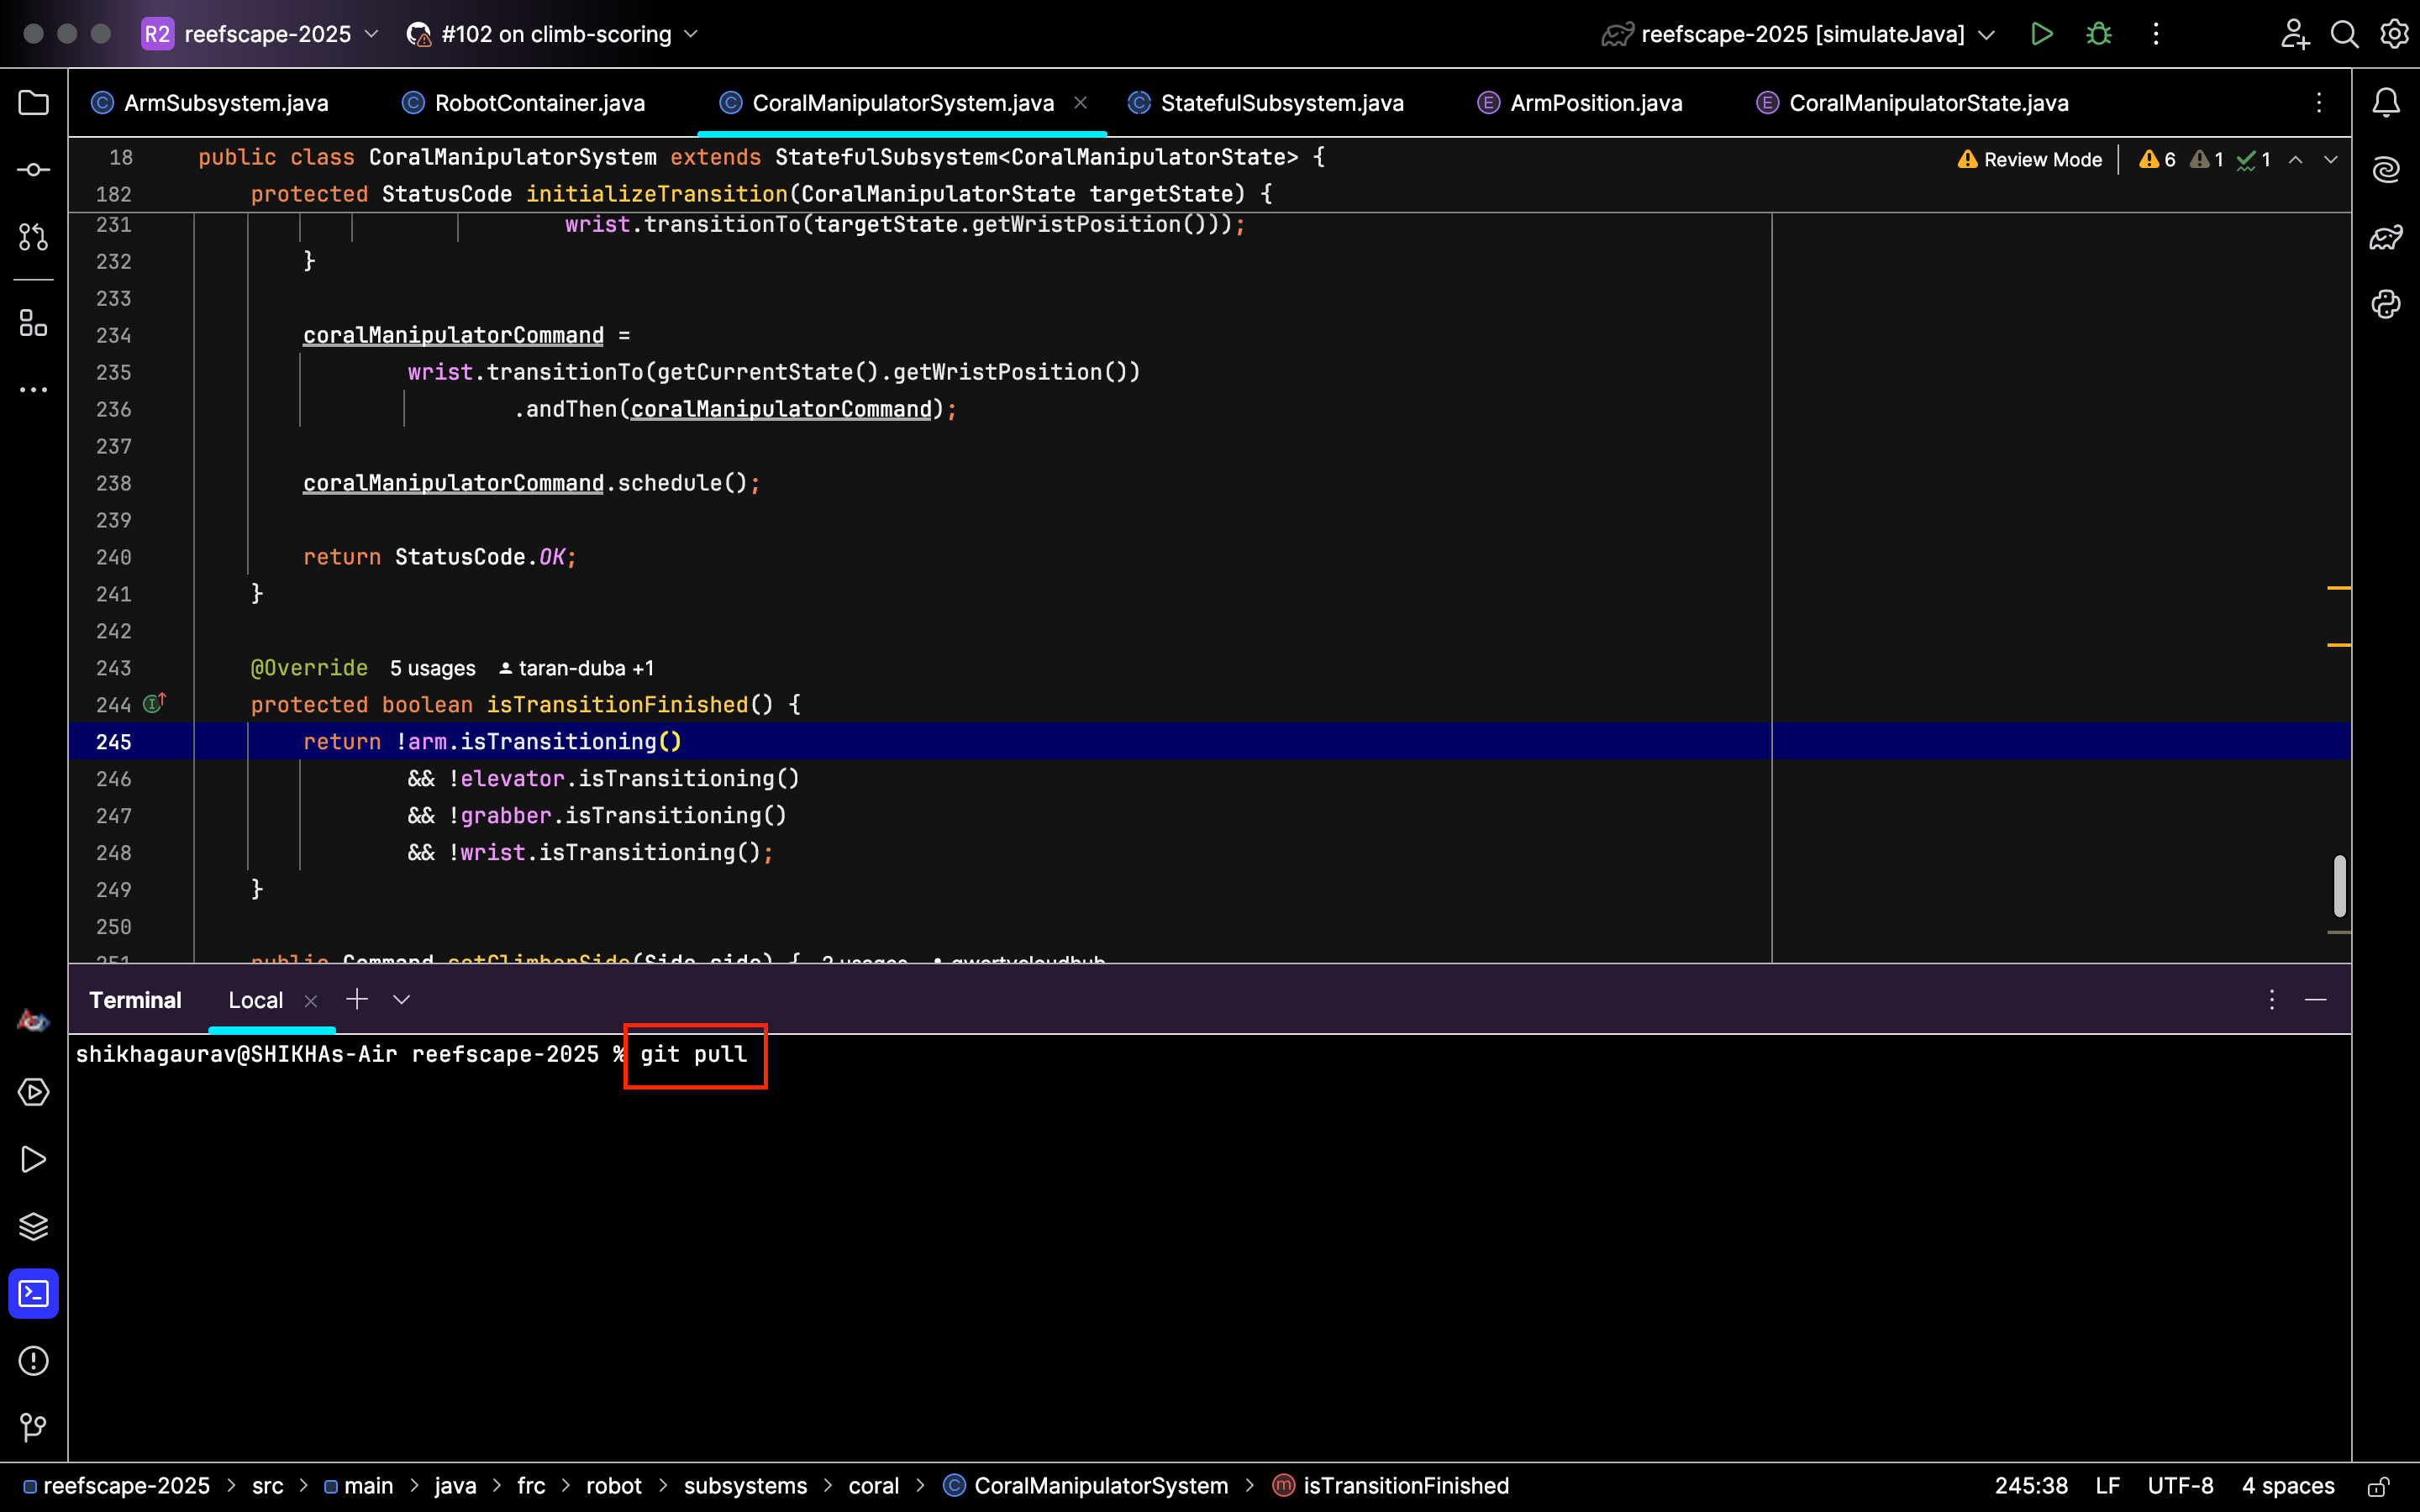
- Use the terminal and type in git pull:
 Then hit enter, and your local branch will be updated.
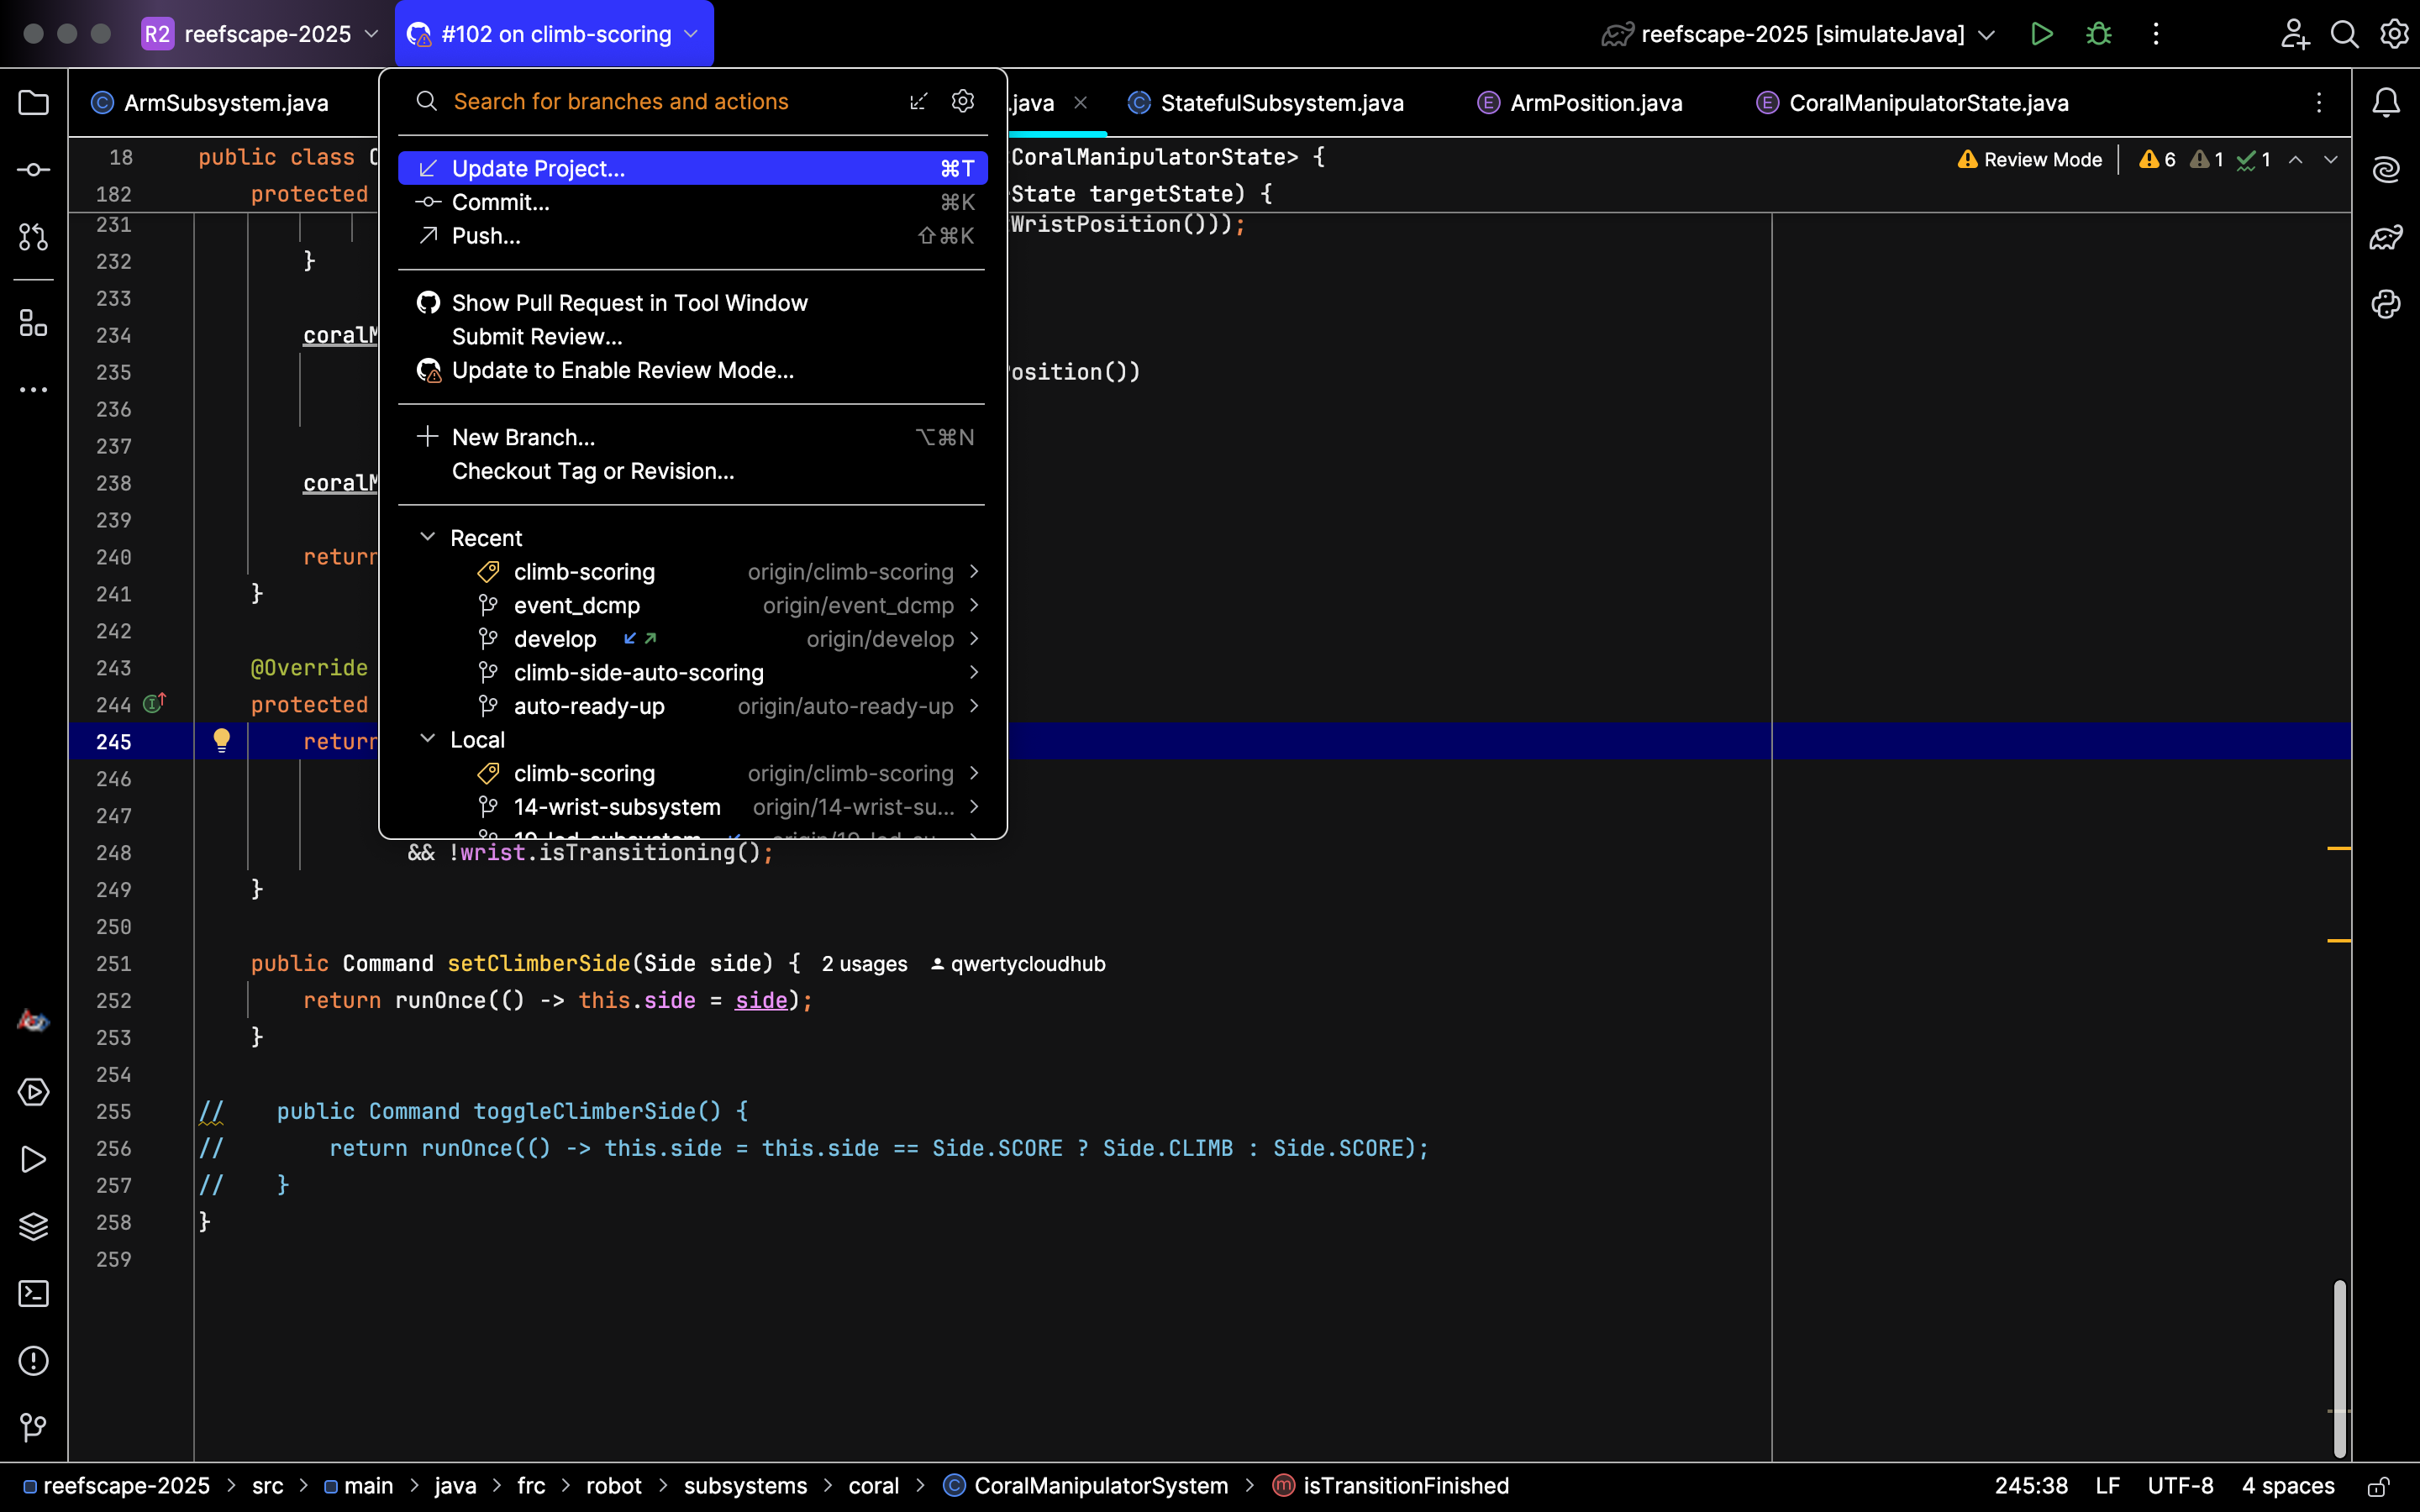
 - Select the branch name and then hit Update Project:

- Use the terminal and type in git pull:
- Committing: Committing is usually easier through the IntelliJ icons than through the terminal. Follow these steps:
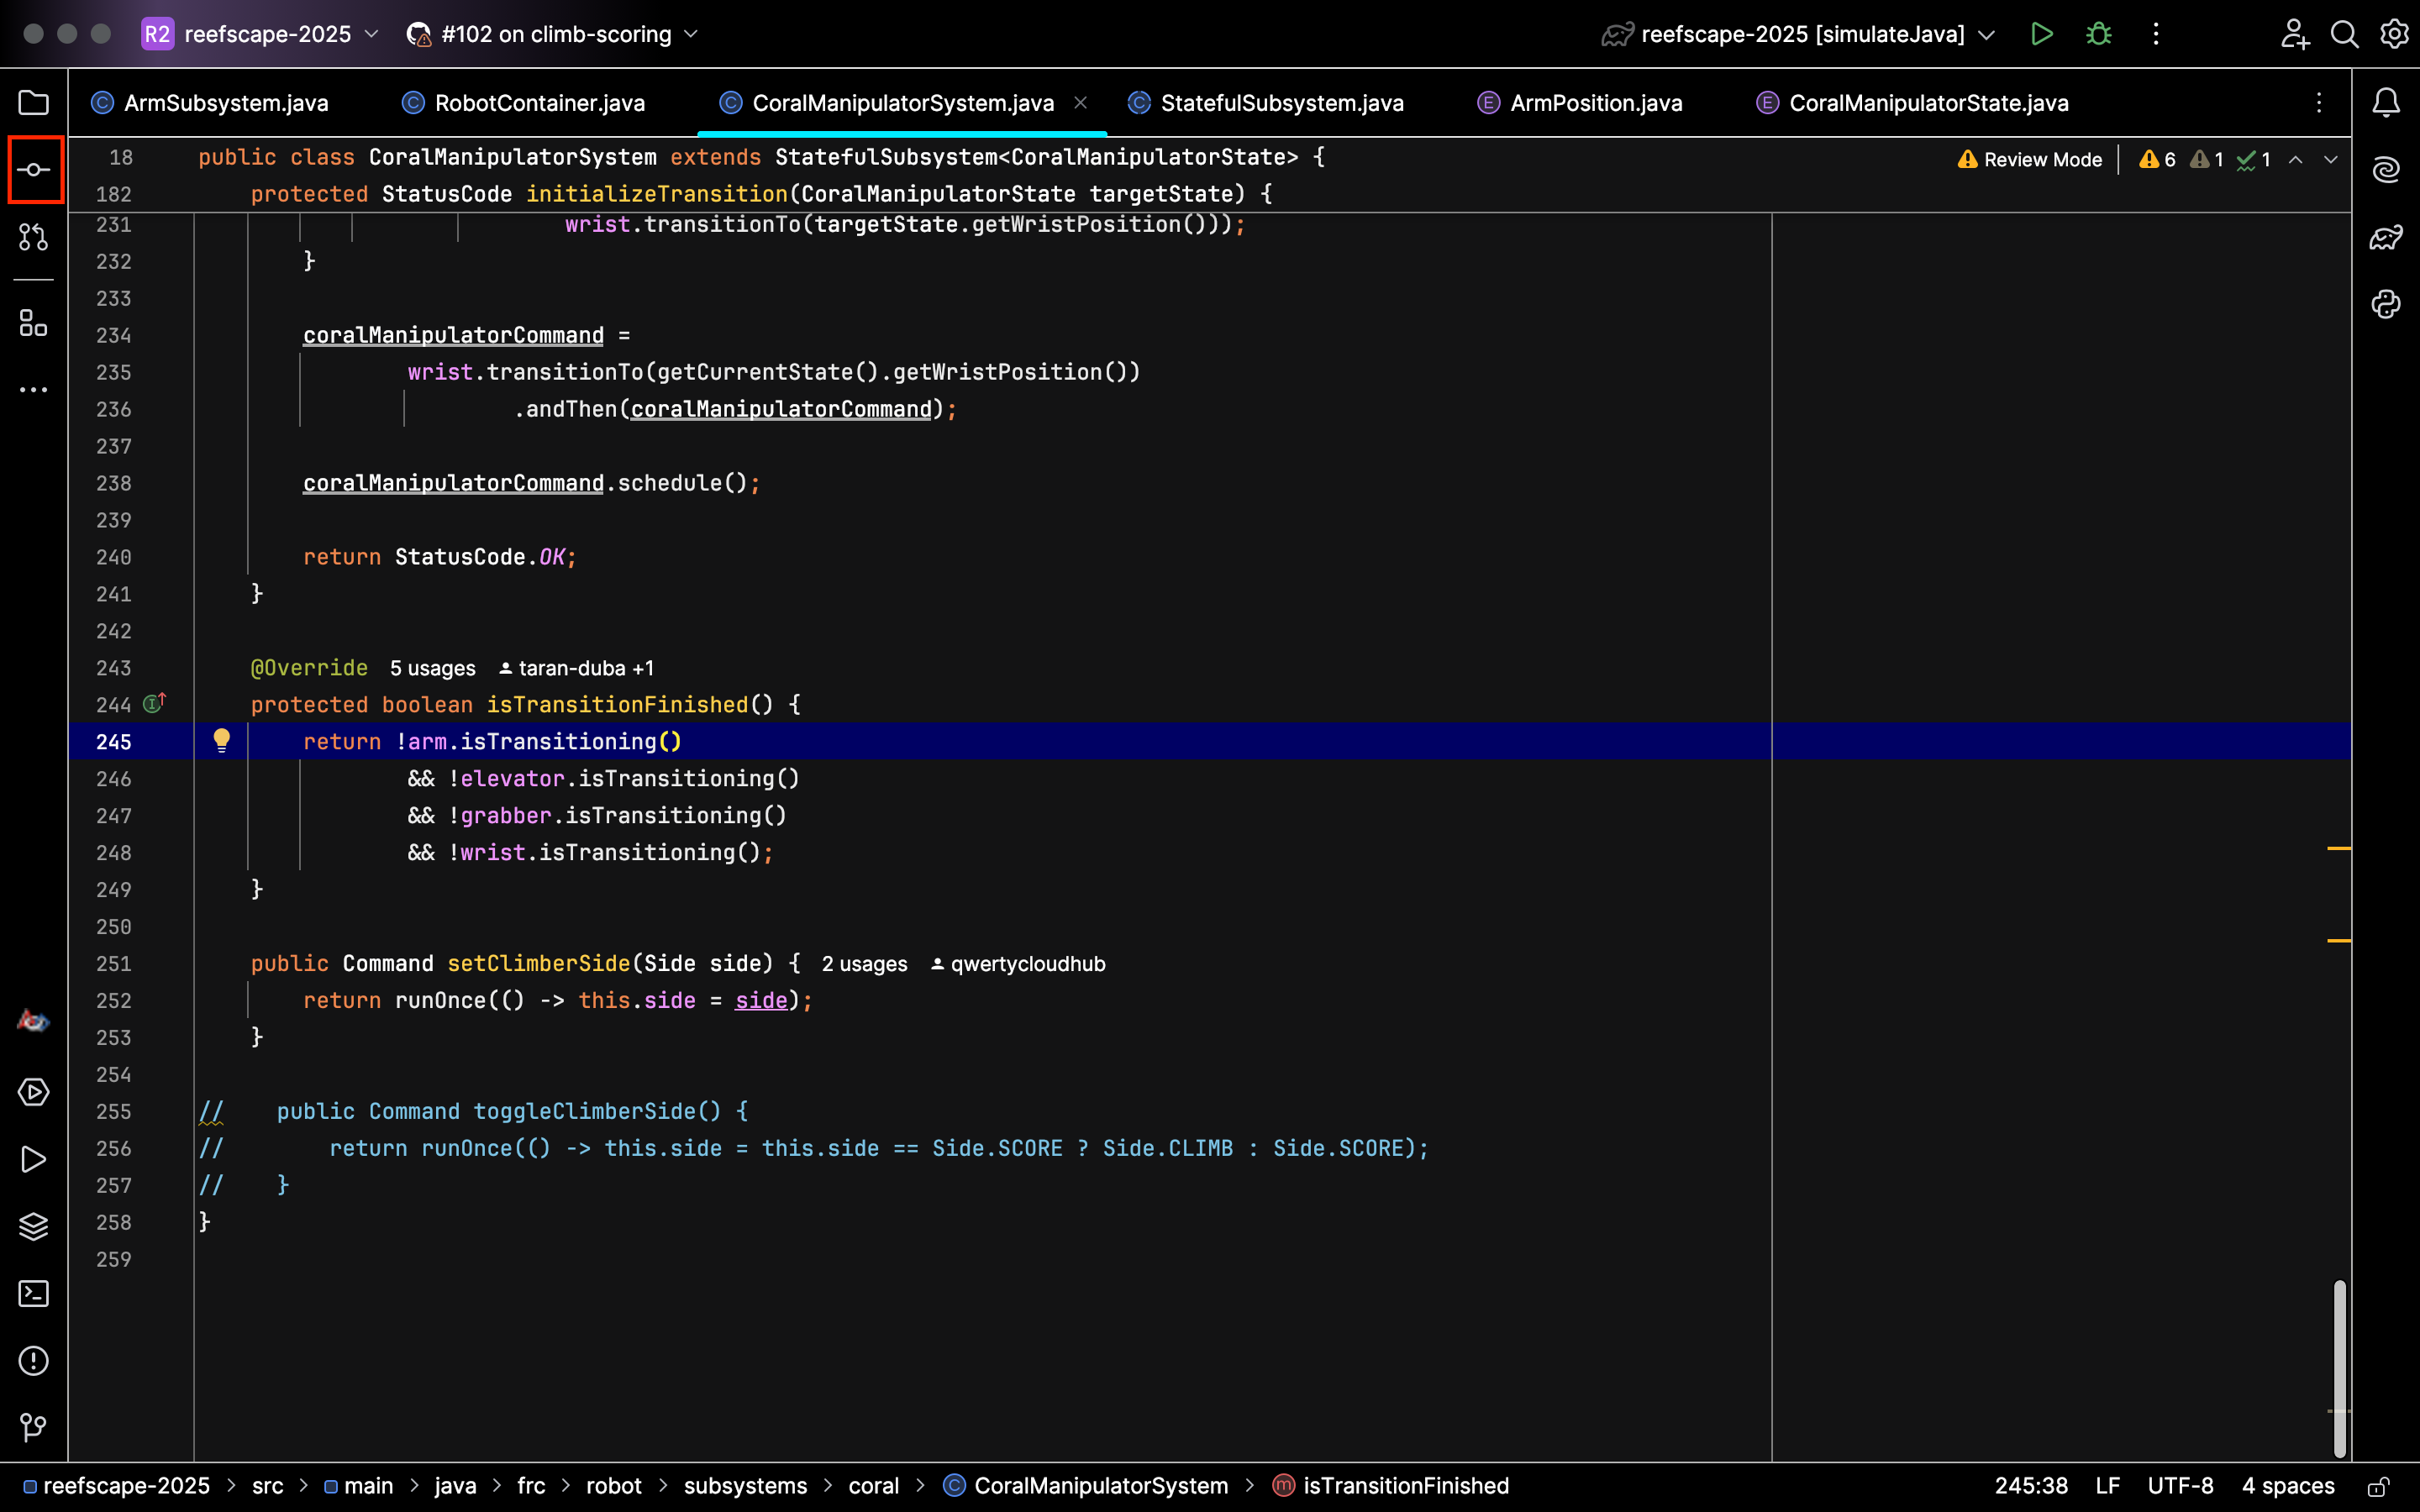
- Start by hitting this button:

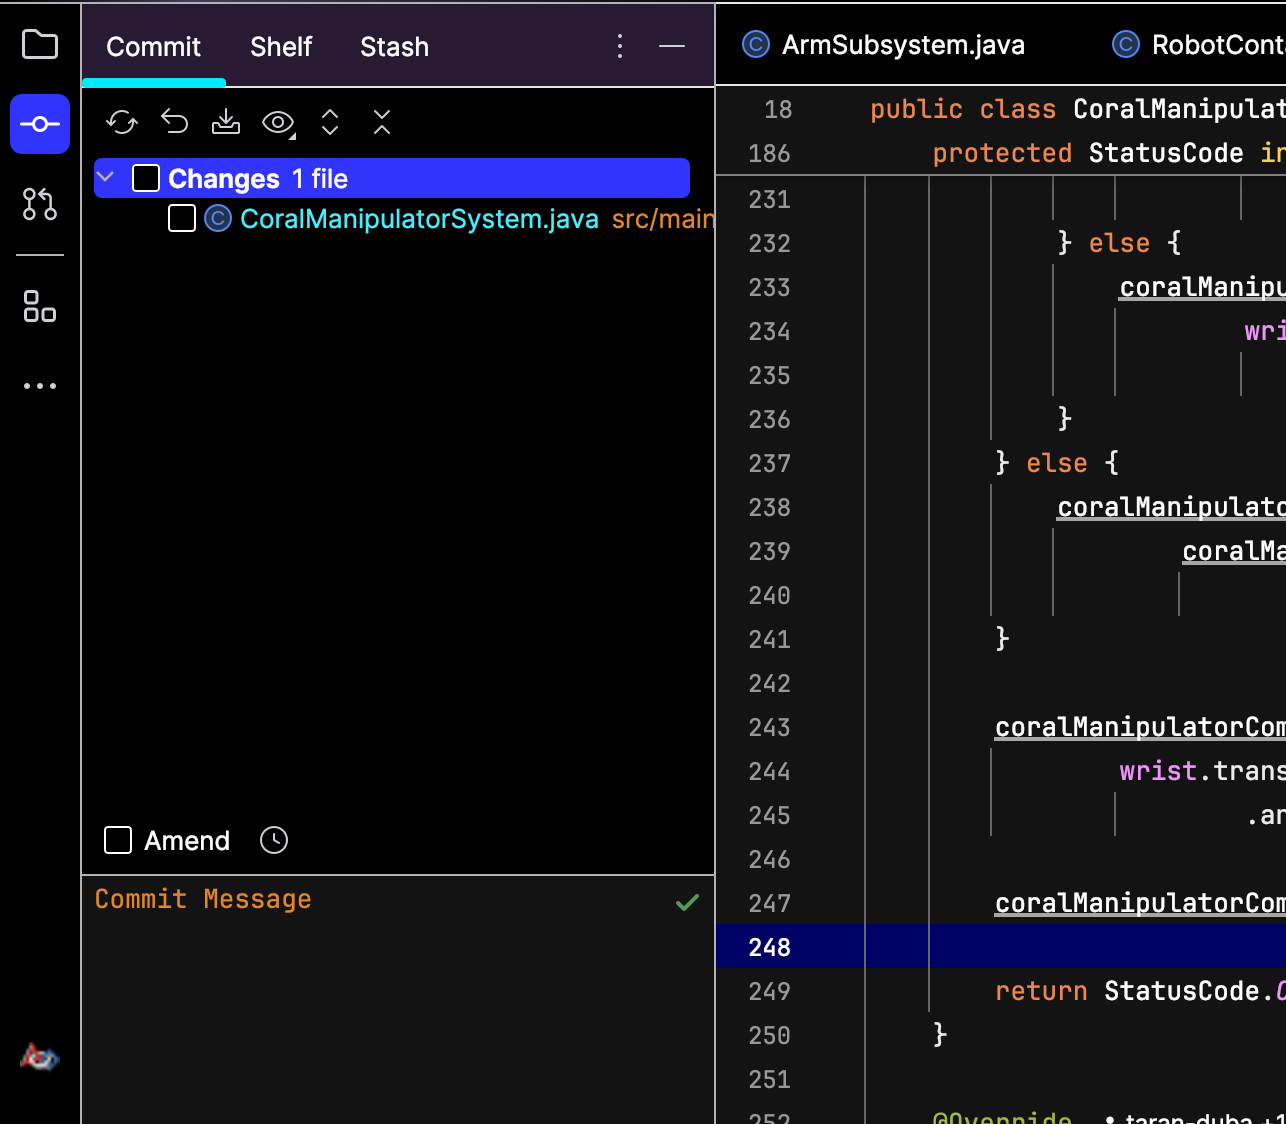
- The menu will show the files that you have made changes to:

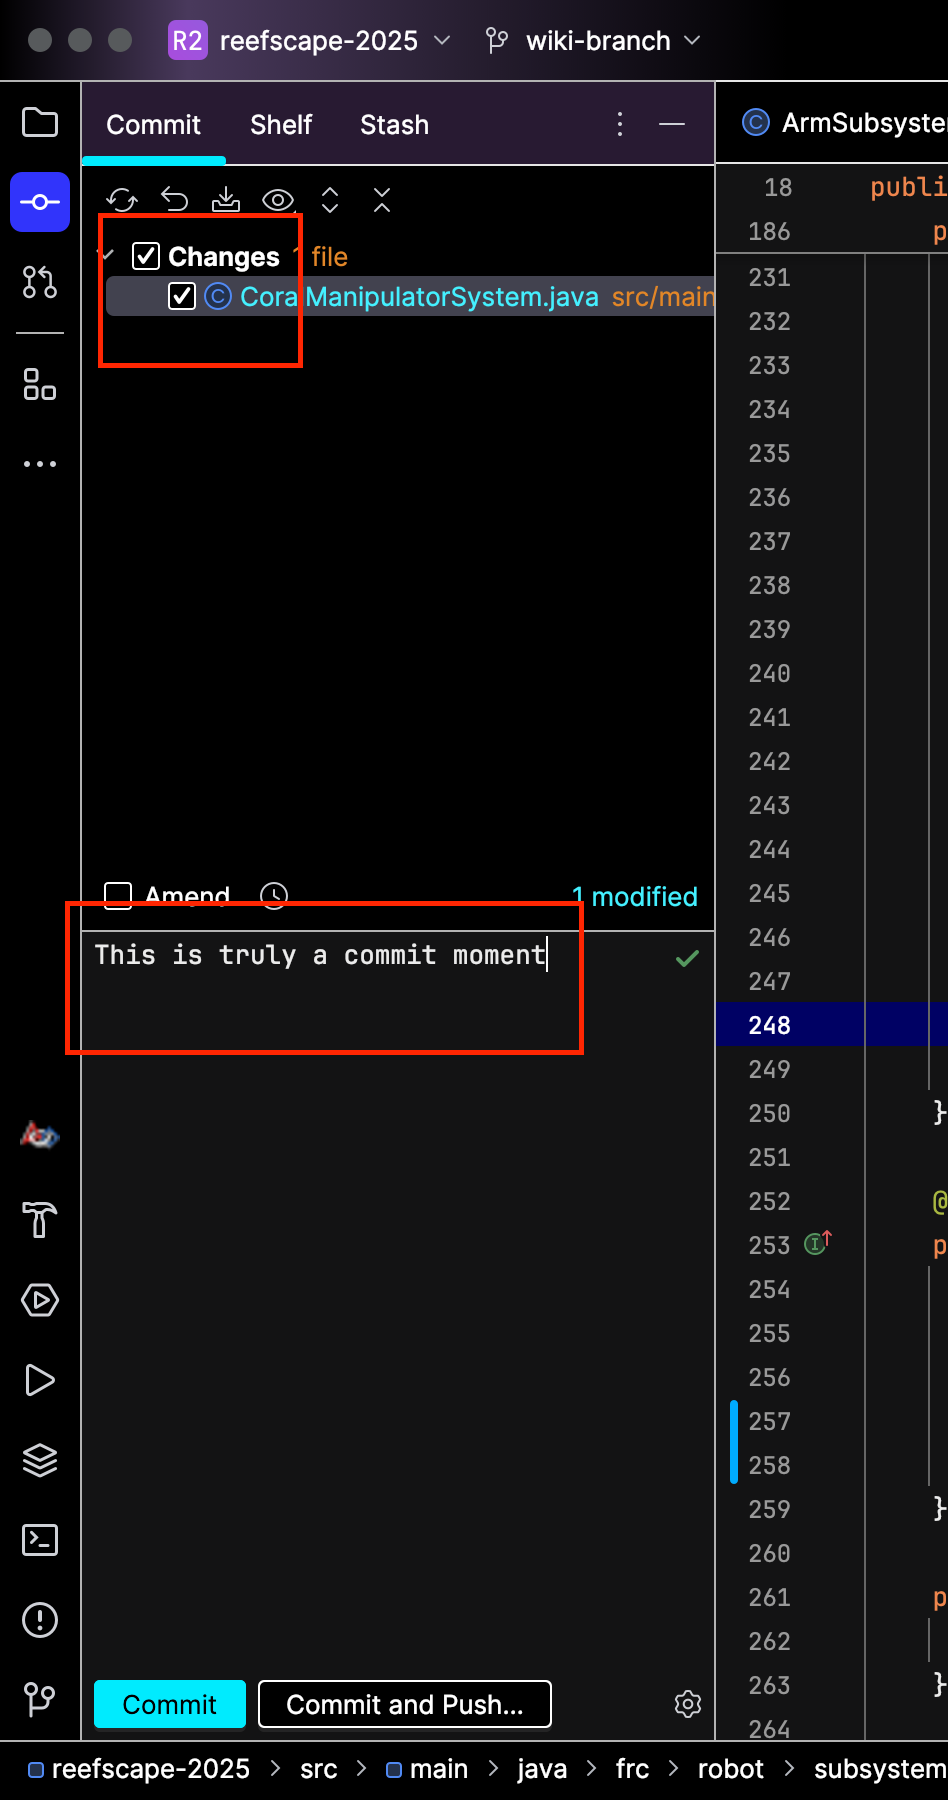
- Check the box to stage the changes and type out a commit message describing the changes you made:

- Then hit commit to save your changes locally, or hit commit and push to send your changes to the team repository. Your changes will show up in the repo: .


- Start by hitting this button:
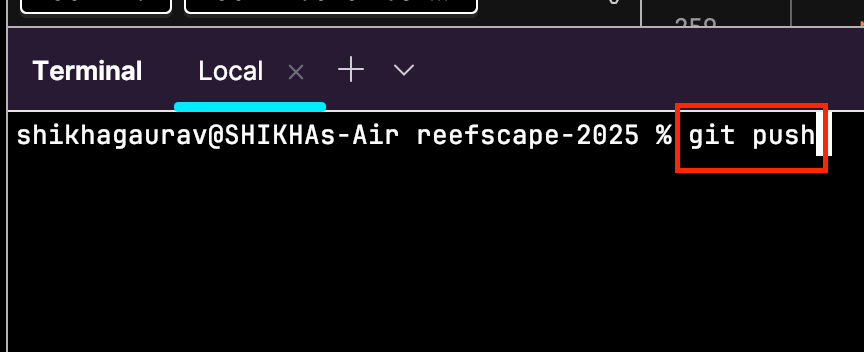
- Pushing: Simply type git push into the terminal and hit enter. The commits you have will be pushed to the repo:


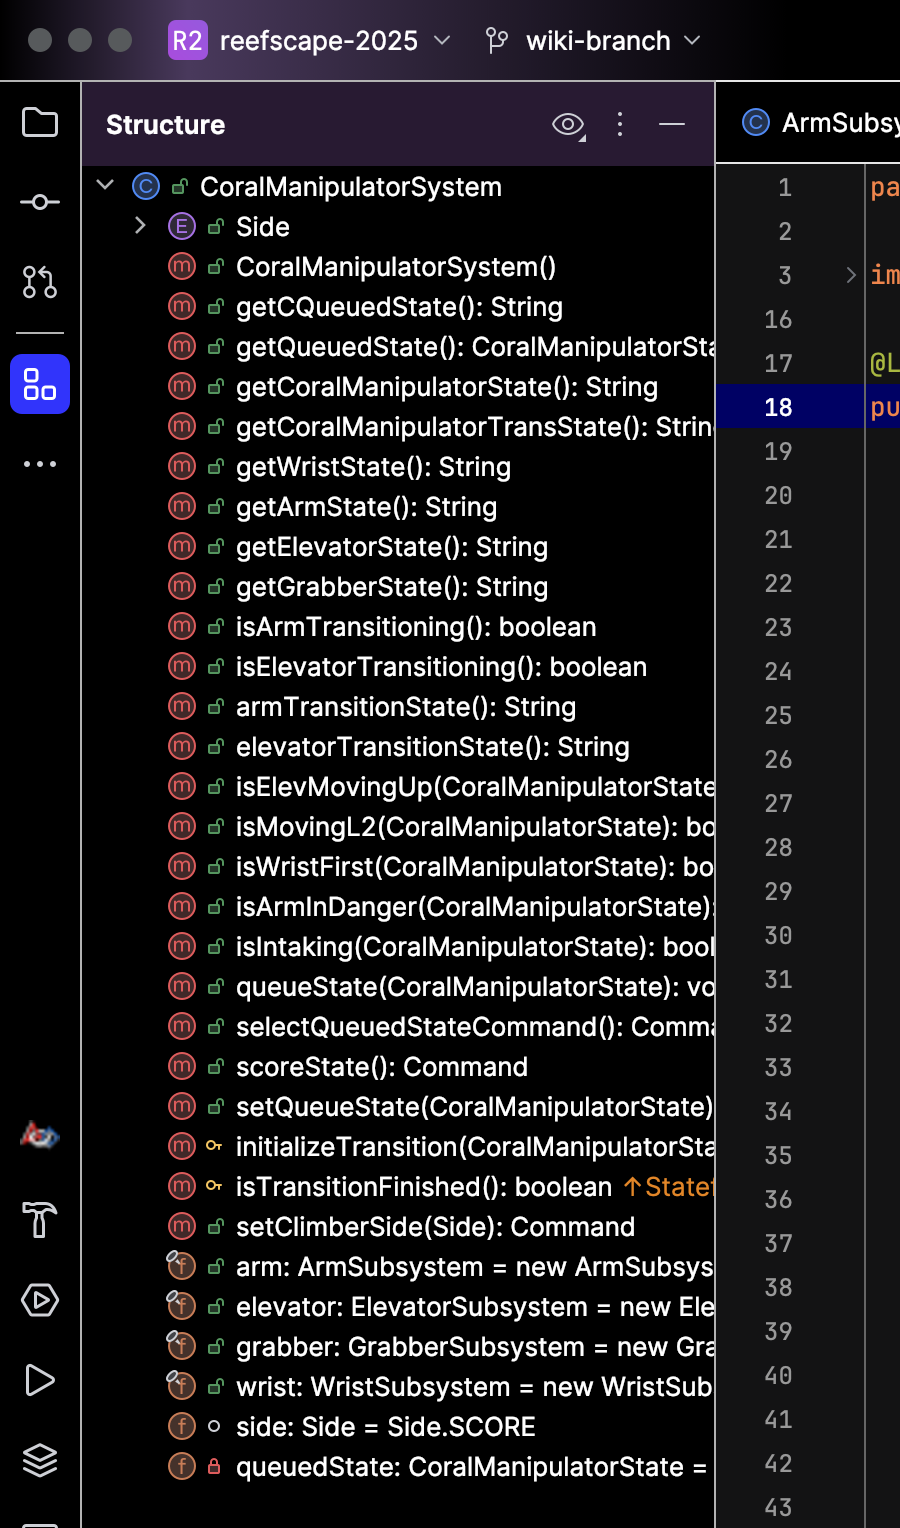
Navigating with the Structure Tab
One of the best ways to navigate the structure of your project files is by using the Structure tab on the top-left side of your screen:

This will open the following menu and let you easily look through the structure of your file:
Getting started with a Romi
Romis are small robots that you program the same way you program the big robots we build for the season. they are a great way to get familiar with how commands and subsystems work. you can read more about romis here.
to get started programming a romi, make sure you have installed all the tools you need for robot development.
we have a starting template for programming the romi on our github here. to get started with it, follow these steps:
- click the use this template dropdown in the top right, then Create a new repository
- make sure your personal github account is selected as the owner
- give the repository a name. anything your heart desires
- click create repository
- you now have your own personal romi project
setting up on your computer
- you should now be on the page for your own romi repository. copy the url of this page
- open intellij
- open the file menu in the top left
- under the new dropdown, select Project from Version Control
- paste in the url of your repository
- choose where you want your project to be on your computer
- click clone
- in the new window, wait for the project to finish loading. the loading bar is in the bottom right
- test that your project is set up correctly by clicking the dropdown in the top right next to the green play button and selecting Build & Run Romi via Simulate Java
- click the green play button
- a new purple and black window should open up. if it doesn't or you see an error message, put a message in the #controls channel to ask for help