Getting Started With CacheCAD
CacheCAD is what we use to manage our files in solidworks. Here is how to use it effectively.
1. Installation
Use this installation link: https://drive.google.com/file/d/1BaY2dzd9njdK8UrvhdGPG2ClQ6J_iNNR/view
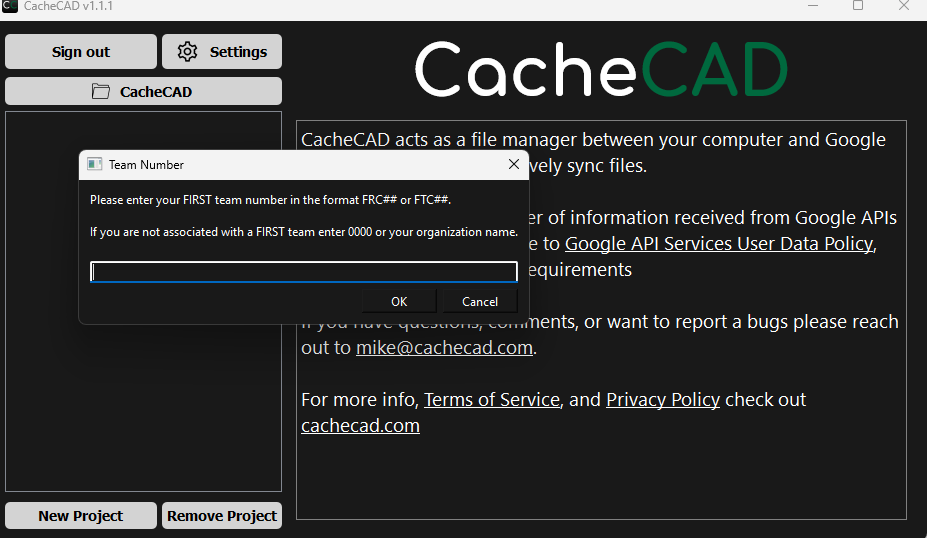
After installing, you should see this image:
Type "FRC3506" in the field (or FRC{your team number} if you are not on YETI Robotics).
Make sure to sign in with your google account in the top left or when prompted.
2. Making Projects
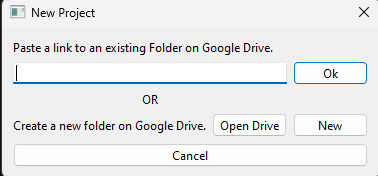
A project allows us to manage our files with google drive. In order to make a project, click "new project" and paste a google drive folder link to the field here:

3. Managing Projects
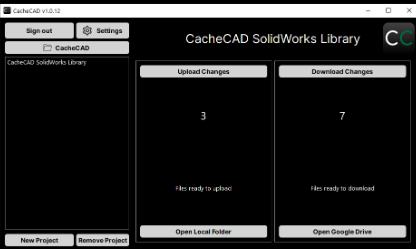
After making a project, it should appear in your left menu. Double click it to see something like this:

Upload Changes - Changes that you have made in Solidworks and have not gone to the Google Drive yet.
Download Changes - Changes other people have made and you have not downloaded yet.
Before working, ALWAYS DOWNLOAD CHANGES! This prevents your work from being overridden by others, which is incredibly frustrating. If you can, download at home to save bandwidth at robotics.
In order to save something to CacheCAD, it must be saved locally in your CacheCAD folder, then your Project folder! To access this, click the "📂CacheCAD" button in the top left of the CacheCAD UI, which will take you to the main CacheCAD folder.
To access an individual project's folder, click "Open Local Folder" in the bottom middle. When saving from SOLIDWORKS, always "save as" and navigate to this project folder when saving, or it will not upload it when you upload changes!
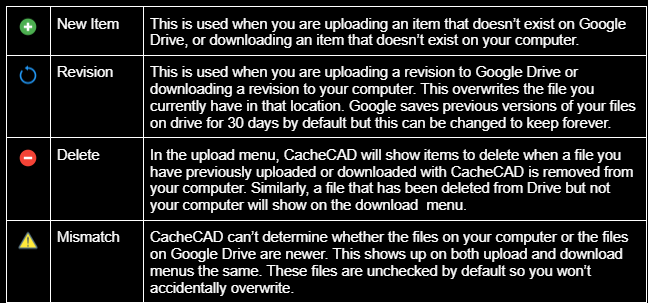
When clicking upload and download changes, you can select which changes you would like to make by ticking the boxes. There will be 4 icons next to the changes, which are the following:

Double check the symbols before messing with files.
If it was not clear before, ALWAYS DOWNLOAD YOUR CHANGES BEFORE WORKING! I cannot stress this enough, work will be deleted when you do not download changes.
When in doubt, ask a veteran, mentor, or see the user guide here.
No Comments