
How to render a photo?
Now that you have gone through all the steps needed to render a good photo it's time to get the final product!
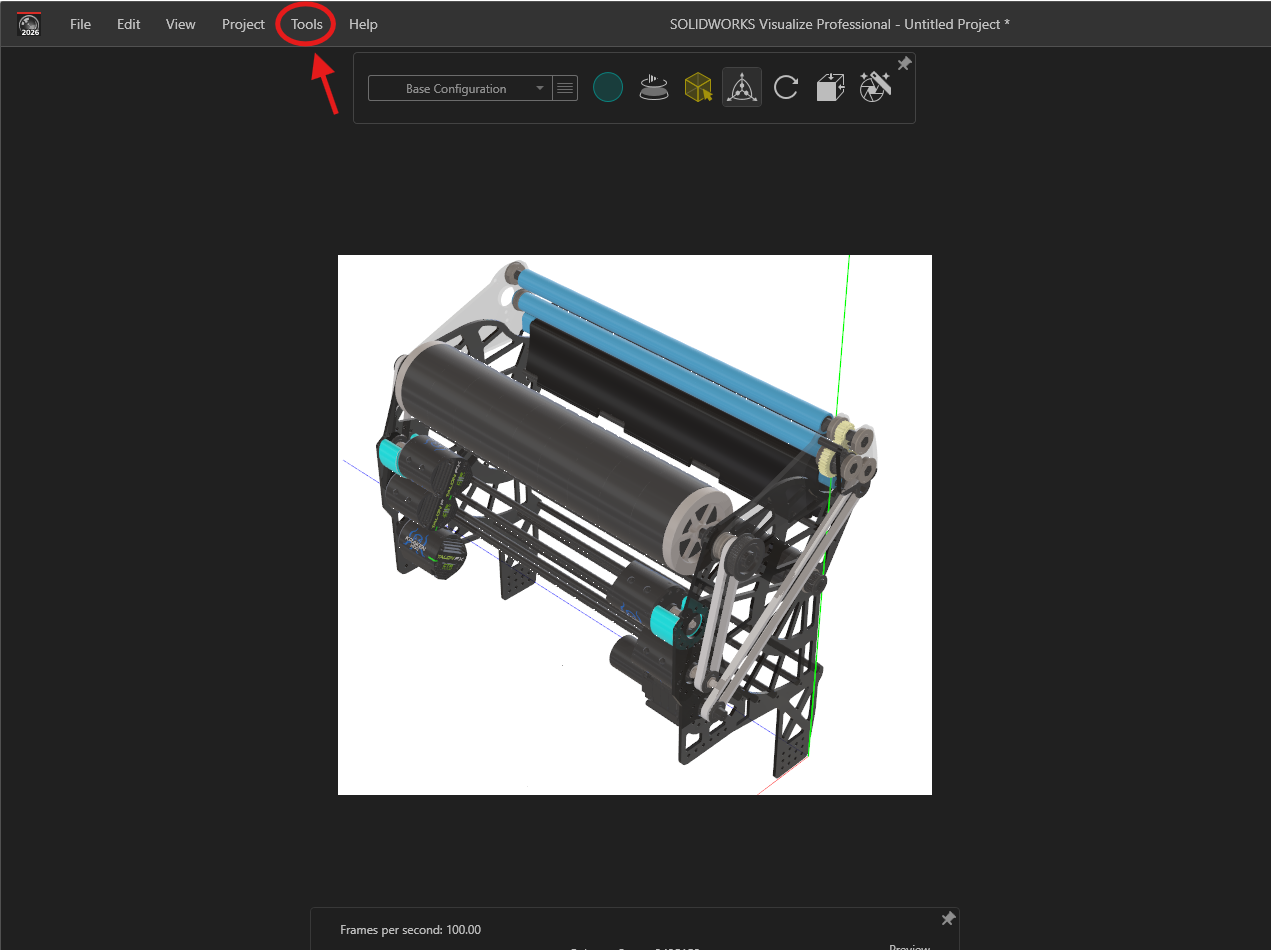
1. On your normal visualize screen you will see a button called Tools in the top left of the screen.
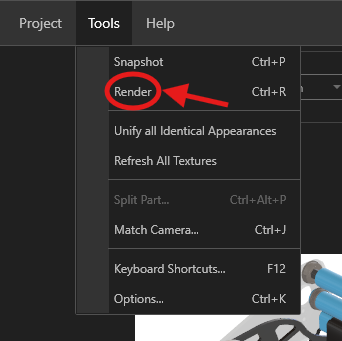
2. When you push the tools button a couple of options will show up including a button called Render which you will click.
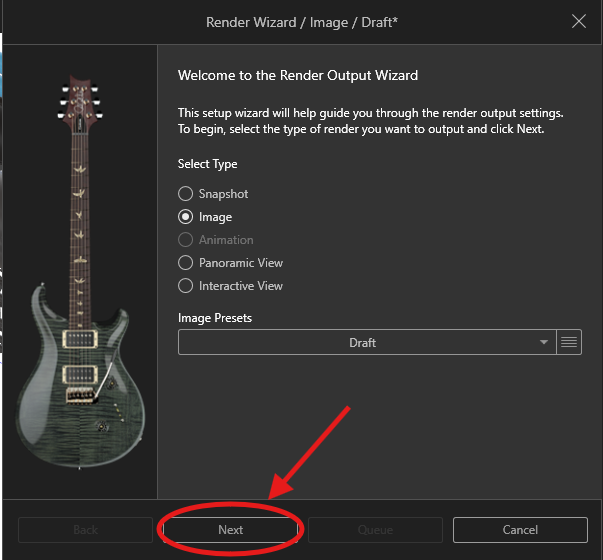
3. That will cause a pop-up to show up, click next.
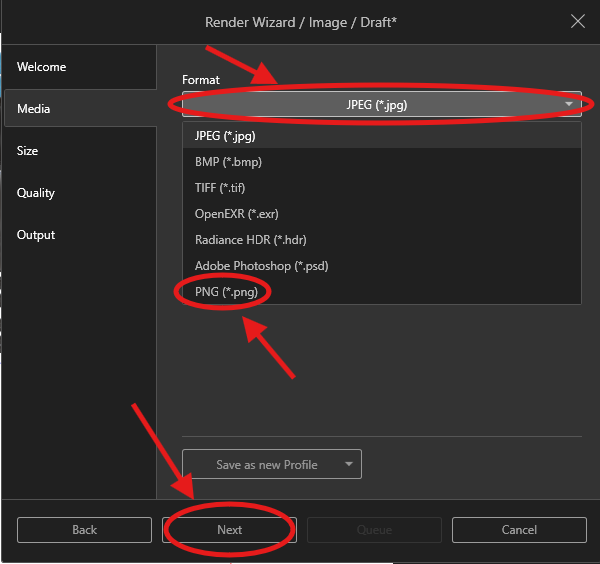
4. Next click on Format, then select the PNG option, finally click Next.
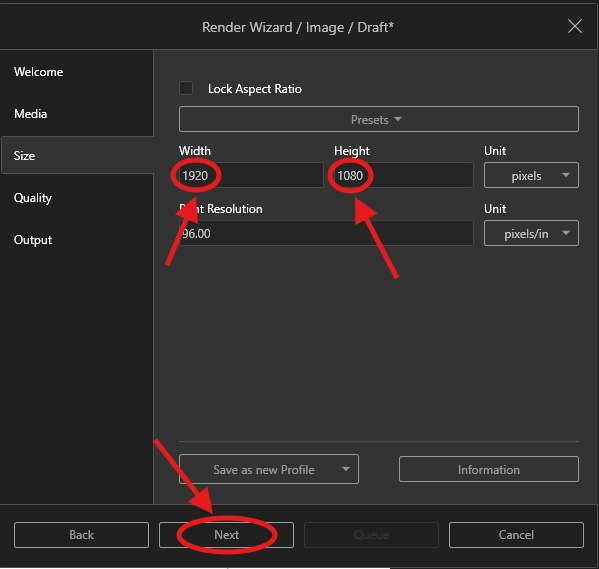
5. On the next page change the Width to 1920 and the Height to 1080 as you see in the photo below.
Then click Next.
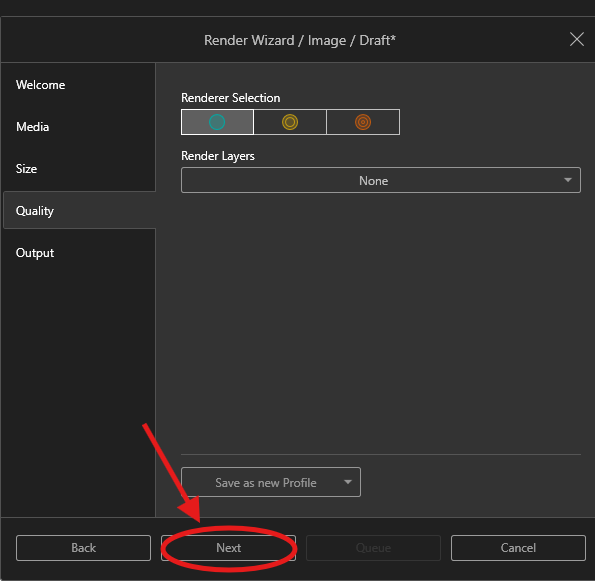
6. Then click Next on this page.
7. Lastly name your file and make sure you have the correct output folder.
Then click render!
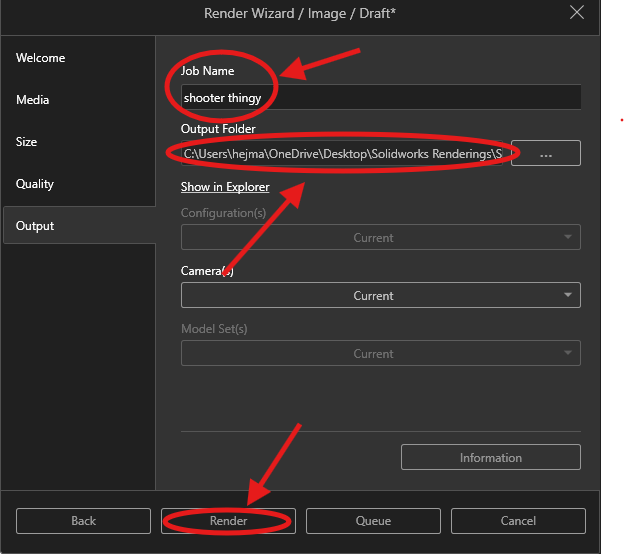
The changes you make in Steps 4, 5, and 7 will save for the project but as soon as the program is closed you will have to reinput those values again.
This will start rendering the photo and show a preview of what you have taken in the output viewer.
The output viewer shows the final photo that has been saved to your computer along with all the photos that you have rendered in this project.
Eachand each render that you take shows up as a separate tab and the left side of the screenscreen.
To take multiple renders you can switch back to the original page by clicking on the tab next to output viewer.
To delete unwanted or extra renders click on the X button on the tab you want to remove, that will remove it from the project and from your folder.
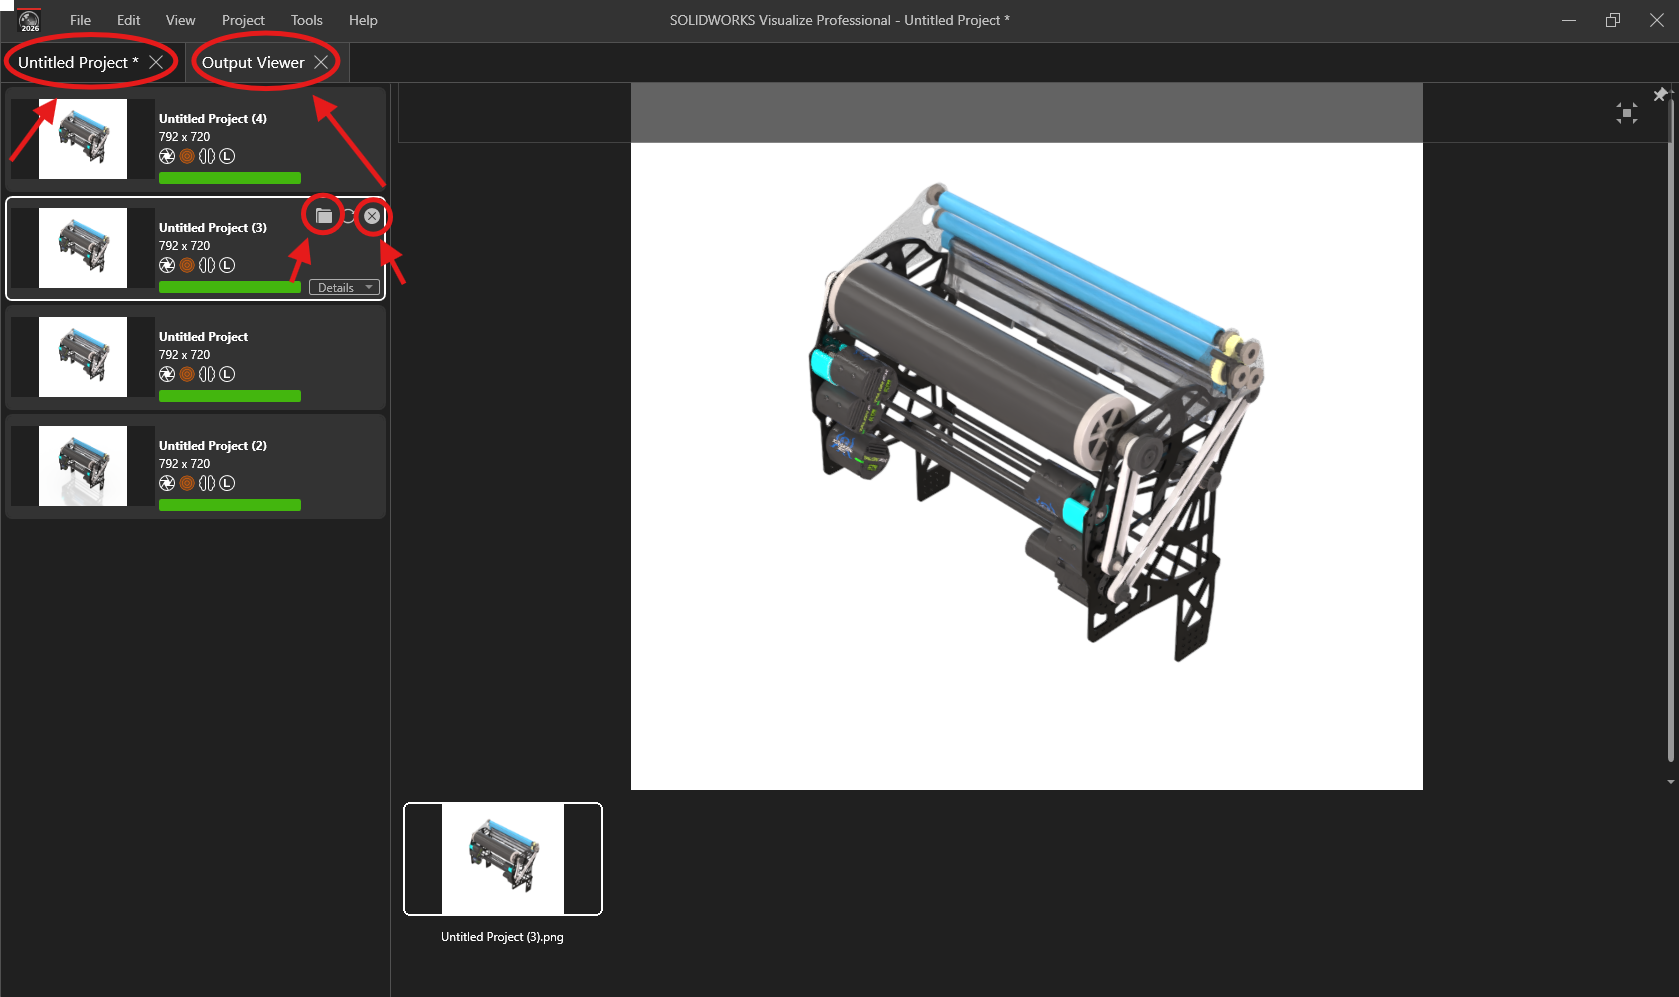
To find the folder that your photos are in you can either click the folder icon on the tab you are on or go to the output folder you have selected to save your photos in, in that folder you will see the SOLIDWORKS Visualize Content folder, open that folder then inside that open the images folder.
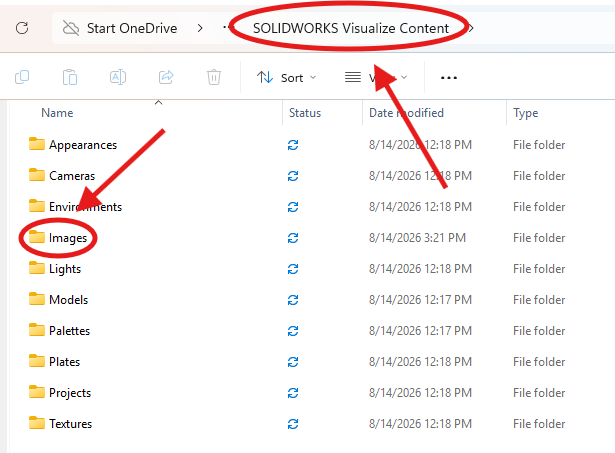
In the images folder you will see all the photos you have rendered.
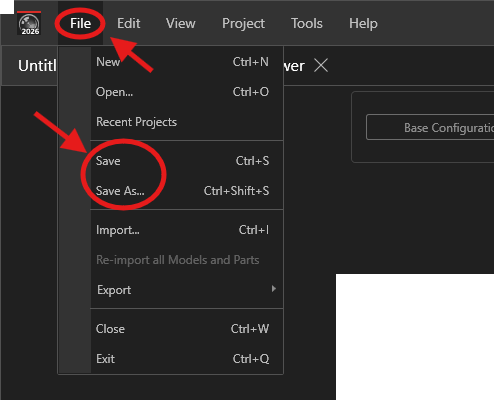
You can save the Visualize project by clicking File and Save that way you can save the changes you made and make more renders later.
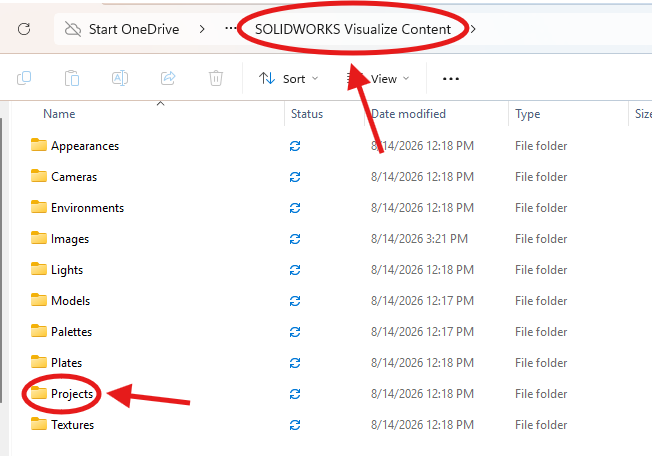
Those projects will be saved in the SOLIDWORKS Visualize Content folder under the projects folder
Congratulations, this is everything you need to know for YETI rendering!