Drivebase Design
Drivebases
On all of your strategy priority lists, the number one priority should be to drive. This is how to design a drivebase capable of driving well.
1. Drive Type
-
Swerve - 4 wheels, 2 motors each (if you aren't 4414) with one for spinning the wheel and one for aiming the wheel. In 2022-25, these became popular and the standard to be a competitive robot, as the only current holonomic drive which does not need omni wheels, which lose traction and power due to slidiness. Typically two methods of mounting: corner mount (which leaves a gap in the frame and pushes modules further in corner), and tube mount (which brings the module further in and supports the module on the sides entirely).
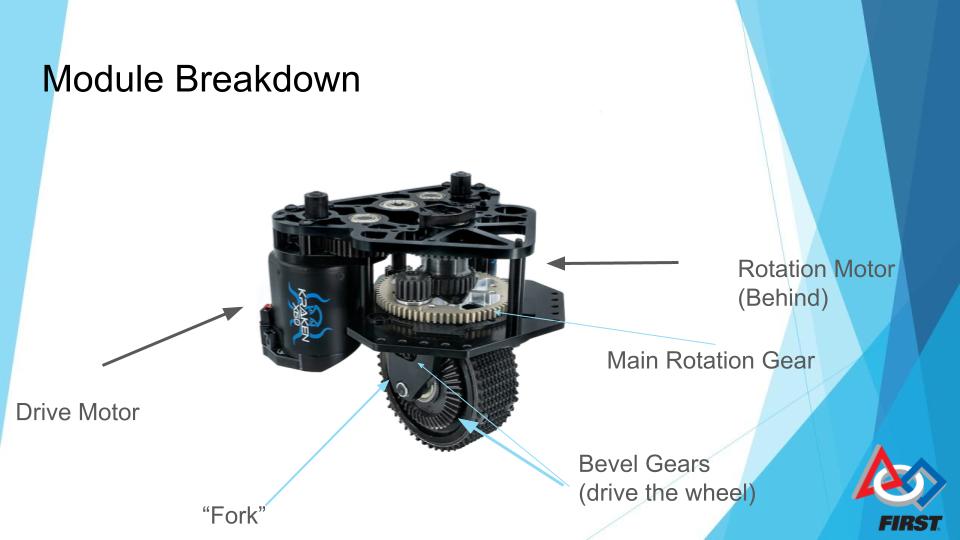
Usually multiple different module types, including
-
Non-Inverted like MAXSwerve seen here. As of 2025, we have never used this style.
-
Pros: Takes up the least space inside drive base assembly, easy to access motors, often lower weight due to less sheet metal.
-
Cons: Easy to access motors for other robots, making them difficult to guard, higher CoG, and take up more space vertically.
-
Inverted Symmetrical like SDS Mk4i seen here. This style has been used on Borealis, Himalaya, K2, Kitty, and Avalanche’s Zelda.
-
Pros: Hides motors from other robots on field under plates, lower CoG
-
Cons: More difficult to access motors, takes up a lot of space inside the drive base, heavier.
-
Inverted Asymmetrical like Swerve X2t seen here. This style, so far, has been used on Beluga and Avalanche’s Frostbyte.
-
Pros: Still hides motors but allows you to push space to one side of the module.
-
Cons: Usually heaviest, difficult to access motors (often more than all other modules).
When to use Swerve:
-
Any game with precise alignment
-
Games with flat field
-
Games with tight choke points and small endgame zones like 2023 (swerve made triple balancing significantly easier).
When to not:
-
Terrain games (unless one of you wants to make pneumatic swerve modules)
- Can't afford it.
- That's it, swerve is amazing for about everything.
-
Tank Drive/West Coast Drive - 4+ wheels (most common is 6 or 8) arranged in two rows on either side of the robot. Either has a middle wheel slightly lower than all of the other wheels or omni wheels on the corners to prevent skidding. Powered by two gearboxes, one on either side, typically with 2+ high powered motors on either side (in the past, we have used 2 or 3 CIMs on either side or 2 Falcon 500s (very similar to Kraken x60s but made by VEXpro)). We have used tank drive on almost every robot 2022 and before.
-
West Coast Drive - A fancy name for tank drive with wheels only supported on the outside (cantilevered)
-
-
-
- Pros - Better for handling terrain (eg. 2016), easy to build (you get a pretty good one in the Kit of Parts)
-
-
one in the KOP every year
-
-
-
- Cons - Cannot Strafe, need to sacrifice speed when turning, have to do a J-turn, much more difficult to drive (unless you are lance).
- Cons - Cannot Strafe, need to sacrifice speed when turning, have to do a J-turn, much more difficult to drive (unless you are lance).
-
-
-
Mecanum Drive - 4 mecanum wheels (omni wheels with 45 degree rollers), one motor on each wheel. Moves and strafes by the differential between each wheel. We only ever used on Wampa (2011), but many FTC teams use it.
-
ngl this is the worst drivebase type, it’s basically a cheaper swerve but guaranteed to be slower since you sacrifice most grip and power due to all-omni drive. For the most part, if you have to run a mecanum drive instead of swerve, just run a tank drive base. You are likely lower down on the pick list, and tank will give you more reliability and defense capabilities (which mecanum does not have because of low grip and speed).
2. Math and Things - One of the most important parts of your drive base is the gear ratio to the wheels. Most COTS gearboxes will have multiple gear ratios to choose from, but you have to buy the right one. When buying a drivetrain gearbox, a low reduction typically means that the motor has a higher free speed but lower acceleration (lower torque). This is better for full-field sprints, but not as good for defense and shorter sprints, especially with high weight robots. High reductions typically have a lower free speed but more acceleration (higher torque), which is good for pushing things, short sprints, etc. However, it is slower on a long sprint. Do calculations with the ratio you intend to use, sprint speed (eg. coral station to reef for 2025, Double Station to grid for 2023, source to midline for shuttling in 2024). Use one of the following calculators:
A. Recalc Drivebase
B. JVN's Mechanical Design Calculator - Make a copy of the most recent
spreadsheet.
3. Mechanical Design - It is important to do all of the following:
A. Make the wheelbase (the area in between the wheels) as wide as possible
within your frame perimeter, helps with balance and tippiness.
B. Design your drivebase to be higher or lower off the ground depending on your
robot. Make it lower if you don’t want to run over things, but if you want to do something like an under-the-bumper intake, make it higher. In general, make it as low as possible to keep CoG lower.
C. Add center support struts if needed, use to mount your superstructure.
D. Make drivebase tubes thicc, banana bars are the last thing you want. At minimum 1/8" wall thickness.
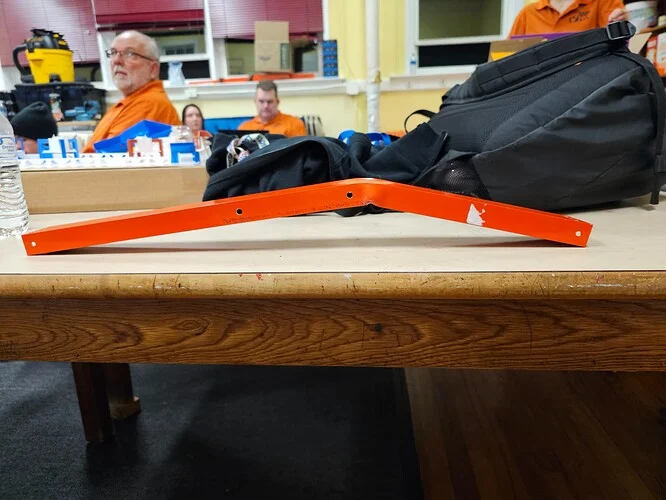
FRC 9496 LYNK's intake frame bar after a heavy collision. At the time, it was made of 1/16" wall Aluminum.
E. Bellypan - In order to keep the electrical work to a minimum, do the following:
I. add mounting holes for major devices (PDH, Main breaker, roboRIO, etc.)
II. Pocket the belly pan (in a grid if possible), to add ribs for zip tie points.
This is also a good method to save weight if needed.
III. Add grommets in center struts to allow for wires to pass through.