Elevator Design Guide
Elevators - Goal Tall but Robot Short, What Do?
Arguably the most important subsystem to learn for an FRC robot is the elevator, as a solid elevator can make a season run that much smoother. It is typically paired with another subsystem in order to function, usually an intake/end effector of some kind. There are many different (and good) ways to create an elevator, so I will be going over as much as I can.
Essentials
Most elevators in FRC are made of aluminum extrusion, largely 2”x1” or 1”x1” box tubing. There are examples of teams doing other types of elevators (see team 148 in 2018), but mainly teams use 2x1 or 1x1. In that 2x1 and 1x1, you need to use a Bearing Block, or a small part bolted to your elevator with bearings in order to allow the elevator to slide up and down.

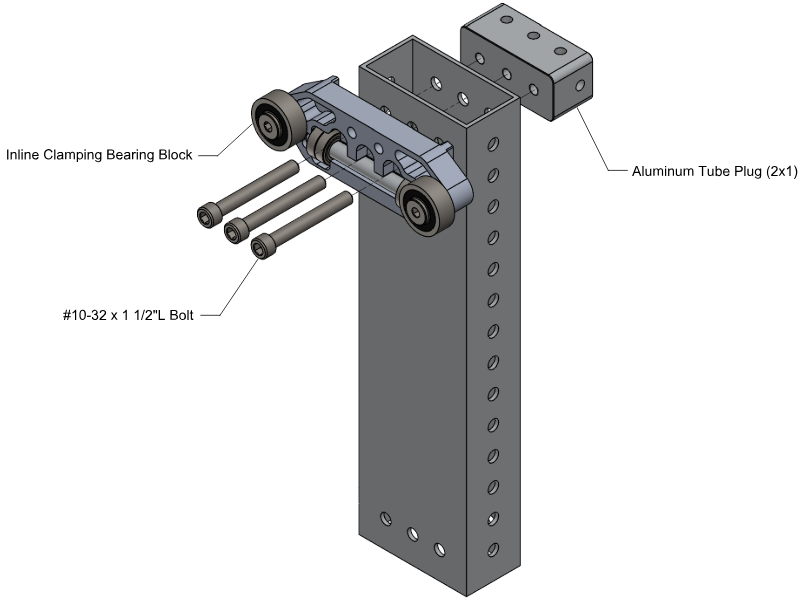

Various types of bearing blocks from West Coast Products. We have used the 1” face clamping blocks (left) on lots of our recent elevators, but have also used the large silver inline blocks (right) on Beluga.
You ALWAYS need contact with all of your bearing blocks in order to reduce friction and remove play, which is one of the main reasons to overbuild your elevator. Different elevator blocks have different spacing between tubes, which is important to take into account when designing stages. As the elevator is driven up, there should be 2 bearing blocks (min) on either side contacting between either stage, usually one on one stage and one on the other on intermediate stages and two on either side for an enclosed final stage.
Design
Elevators have many different configurations that are all important to go over. One of the main considerations with an elevator is Stages, or how many moving rectangles are on your elevator to enable its extension. Most elevators have 1-3 stages, but more have been done.
West Coast Products’ GreyT cascade elevator in 1, 2, and 3 stage configurations, respectively.

Stages should never extend beyond each other, but based on the nature of your elevator you should have some Stage Overlap (the distance between the top of one stage and the bottom of another. You can have less depending on how well-built your elevator is to keep contact and prevent swaying, but a good rule of thumb is about 20% of your stage (ex. 30 inch stage height = 6 inch stage overlap).
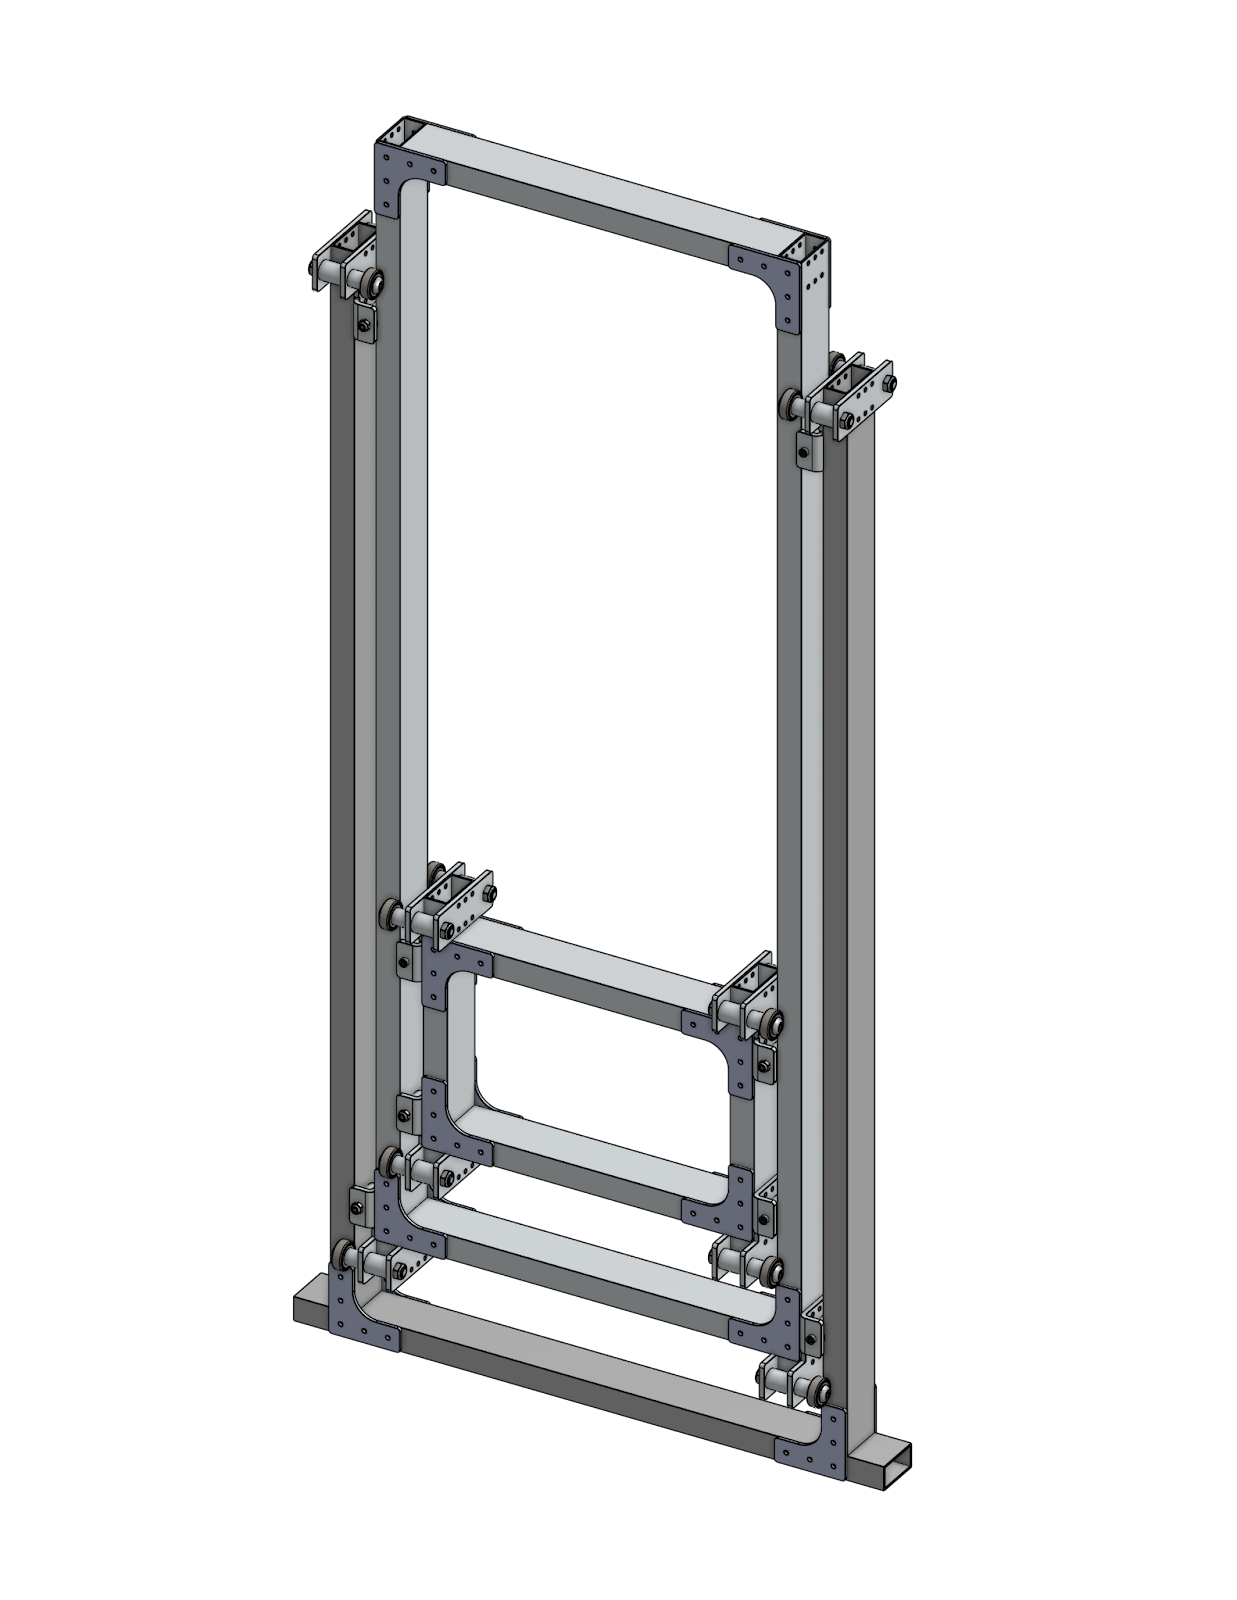
Elevator stages should always be supported on all four sides somehow, never make a stage without a top crossbar of some sort! This can be achieved in multiple ways:
-
Spacers into 2x1 - Heavy and flimsy, also limits options with elevator blocks on top. Seen on the GreyT Cascade Elevator from West Coast Products, on Himalaya, and on Kitty, which uses smaller 2x1 as spacers.
Source: WCP GreyT single-stage Drawings
-
Fully enclosed (mostly for middle stages) - a full rectangle enclosing the next stage between the top and bottom bars using tube plugs or gussets. Common on middle stages or single-stage elevators especially. we have used this on mid stages in robots like Polaris, Beluga,
Source - Chief Delphi, The Thrifty Bot. Pay attention to the first stage on both.
-
Aluminum support plates - Connect across the two struts to connect away from the internal rigging. Relatively lightweight and good for elevators not needing rigging supported by the top bar (like belt in-tube continuous)
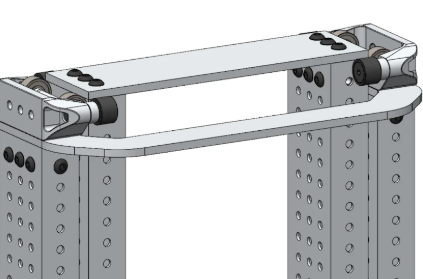
Source: Swerve Drive Specialties.
-
Aluminum side plates + crossbar - Best for base of elevator, leaves a good spot for rigging hardpoints and top sprockets. Usually a 2x1, 1x1, or a long standoff works if there is no need for rigging. Seen on the Thrifty COTS cascade elevator and Beluga.
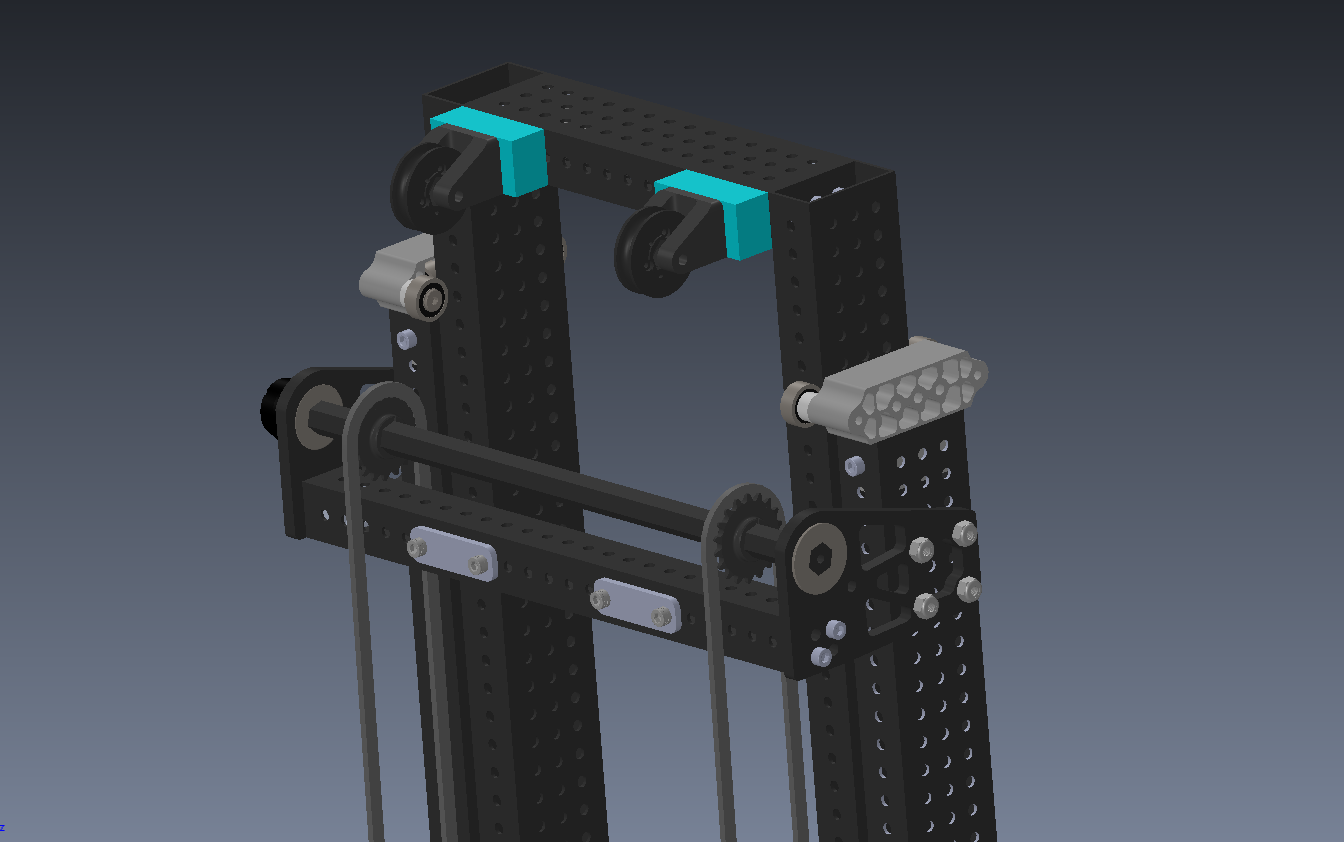
Source - Beluga CAD, using two 3/16" Aluminum plates to hold a 1x1 support, rope hardpoints, and ½” hex crossbar for rigging
Rigging - “I have aluminum boxes, how go up?”
Rigging describes how an elevator is driven, and there are many, many, many approaches to it. Most of them follow some trends, such as what material it uses for dragging the elevator up and down, motor positioning, and rigging types.
-
Rigging Types
There are two main types of Rigging, and it is very important to choose the correct type.
-
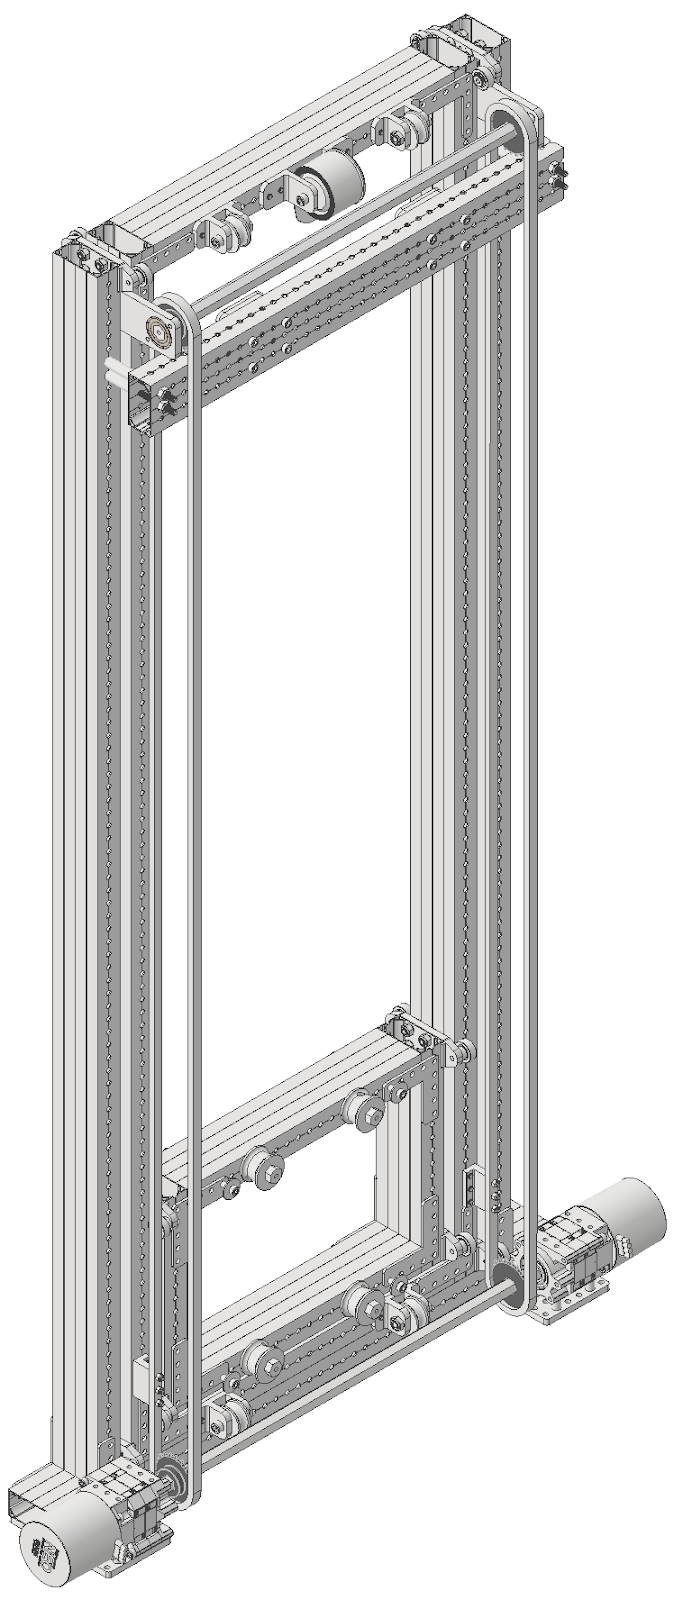
Cascade Rigging - Cascade rigging involves multiple separate loops for interacting with one stage to the next. Each stage will move the same distance from the previous stage as all others, giving it unique movement on each stage. This also means that there will be 2x force on the first stage, and the final stage will move faster than the first stage. These elevators are mostly run with Chain on the first stage and Dyneema for the rest.


Source - FRCDesign.org
Pros of Cascade Rigging
-
More Commercial, off-the-shelf (COTS) solutions, meaning less custom stuff.
-
Examples - WCP GreyT elevator, Thrifty Elevator.
-
Different ratios enable some extra functionality (eg. in 2018 climbing with the first stage due to its higher force, see 2056 in 2018).
-
More flexible with motor location (eg. can go parallel or perpendicular to elevator).
Cons of Cascade Rigging
-
Higher Center of Gravity due to the middle stage moving with other stages.
-
Complicated rigging at 3+ stages, making more stages than 3 difficult.
-
Continuous Rigging - Continuous rigging involves 1 or 2 loops running through the entire robot. This results in the stage with the least friction (should be the final stage if designed well) moving first, followed by the next stage, then the next, etc. Requires a hardstop at each stage. Typically can move faster for short extensions due to no force moving the middle stage up. Mostly either used with Dyneema and pulleys/spools or Timing Belts with pulleys.

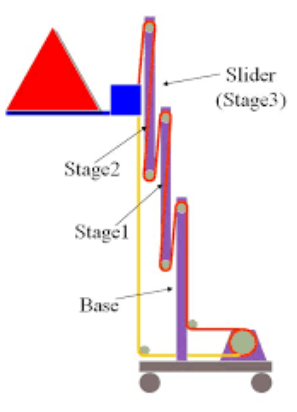

Source: Chief Delphi, FRCDesign.org
Pros of Continuous Rigging:
-
Easier to add stages (able to just run the line through another stage)
-
Can make the rigging very out of the way (a common way to rig continuous elevators is with the line going through the tube)
-
Lighter weight (in comparison to chain)
-
Low Center of Gravity since the top stage does not move until needed.
-
L O U D (makes a “clank clank clank” sound due to hitting the hardstops sequentially).
Cons of Continuous Rigging
-
More difficult to design since limited COTS support, results in lots of designs
-
More expensive (one belt for continuous elevator can cost upwards of $200 and more custom parts means higher cost)
-
Less flexible with gearbox options (needs to be perpendicular and directly under the elevator for a lot of setups)
-
Requires less play and a whole lot of tensioners in the system.
-
Since it is all one belt/rope, ensuring both sides are taught is one of the main struggles of designing continuous elevators. Often seen are idling pulleys, cam-based hardpoints, and ratcheting straps.
-
Rigging Materials
-
Chain - Very common in cascade elevators, chain is typically found in two flavors: #25 (or #25H for slightly more strength) and #35, both of which need a sprocket at the top and bottom of your elevator. Very rigid and easy to tension due to inline tensioners, but weighs a lot. Hardpoints are threaded through the chain, like with the Thrifty #25 Comb.
-
Rope (typically Dyneema/UHMWPE) - On most elevators, used in middle stages. Very lightweight and runs on pulleys, and a ratchet is typically used for tensioning with a hardpoint either tied or clamped on the robot, like a WCP ratchet block.
-
Kevlar Timing Belt - The most uncommon, belts are largely only used in continuous elevators. Though slightly more precise and rigid than rope for continuous, it is thicker, more expensive, and requires more legroom to run a 1” wide belt vs a ⅛” thick rope. Heavy use of idler pulleys for tensioning and hardpoints used to engage teeth on the end of the belt, often on cams for tensioning.
3. Gearboxes
For gearboxes, there are many considerations to be made. The first of which should be how many
motors you are using. Most use 1-2 high-powered motors, like a Kraken x60. Next, decide on your
packaging. Are they running parallel to the elevator or perpendicular? Next to each other or on
opposite sides? All considerations to be made. Then, calculate your gear ratio needed. Use either
Recalc Linear Mechanism Calculator or JVN's Mechanical Design Calculator to get the desired
ratio. You are calculating the time to go up. Try to optimize the time to get up while getting the gear
ratio smaller and smaller until the time to extension starts to decrease. (note: make sure to use
current limits when calculating! The most supply current a modern motor can take is 40A
with the correct breaker, but you should try to be as low as possible. 10A is a good supply
current limit if you don’t know anything.)
Examples
-
Continuous Elevators:
-
8727 Glitch 2.0’s 2025 Elevator - Belt In-tube 2 stage elevator driven by 2 NEOs on planetary gearboxes.
- 1690 Orbit's 2025 Elevator - A very fancy Belt Differential elevator which uses the belt driven by two motors to both drive the elevator and pivot the arm.
-
3847 Spectrum -△◅’s 2023 Elevator - External Belt 2 stage elevator with CF Springs on 1 NEO on planetary gearbox
-
6328 Mechanical Advantage's 2025 Elevator - External Cord 3 stage elevator on a huge drum driven by 2 Kraken x60s on two custom gearboxes.
-
4522 Team SCREAM's Elevator - Belt In-Tube 2 stage elevator driven by 2 Falcon 500s on a custom gearbox.
-
Eliot (111 Wildstang)’s Elevator - Belt In-Tube 3 stage elevator driven by 2 NEOs on planetary gearboxes
-
Cascade Elevators:
-
West Coast Products’ GreyT Elevator - Chain and Dyneema 1-3 stage COTS elevator kit driven by 1-2 Kraken x60s on WCP gearbox.
-
1678 Citrus Circuits' 2019 Elevator - Dyneema-only 2 stage Cascading elevator driven by 4 775pro Motors on custom gearbox.
-
9062 Critical Circuits’ 2025 Elevator - Single stage Chain-driven elevator driven by 2 Kraken x60s on planetary gearboxes.
-
FRCDesign.org’s Sample Elevator - 3-stage Chain and Dyneema elevator driven by 2 NEOs on planetary gearboxes.
- The Thrifty Elevator - Chain and Dyneema 1-2 stage elevator driven by whatever gearbox you want.
No Comments