Making Prototypes
When making a robot, we never always land on the best idea first! It is important to try any ideas that seem reasonable before we rule out something and go with a robot archetype. So here is how to try them.
- Sketch out ideas - Drawings are very important as a way to visualize your design and show it to others.
- Keep it simple - No need to add pocketing and fasteners in your drawings
- Add motor/piston positions (if applicable) - things don't move on their own, so leave a spot for motors.
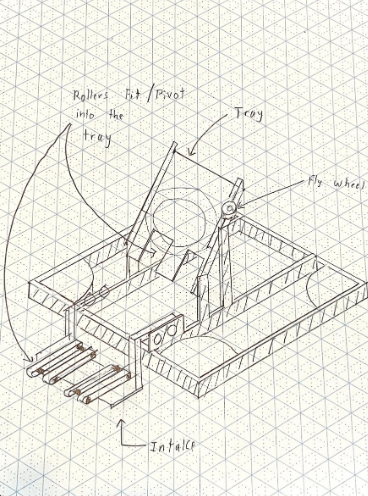
Some drawings for the 2024 season - Crescendo


- Cartoon CAD - making some basic CAD of what your prototype looks like lets you test the geometry of your idea a bit more in-depth than a drawing.
- Choose a method to prototype - There are many ways to make a prototype! Here are the most common ones
- Polycarbonate with CNC - Most precise option, ideal for things that need a certain level of precision
- Wood - Quick and easy to work with, never final for robot, very rarely use wood on a final robot
- 80/20 - Good for testing elevators because of sliding, and good for testing compression because of the quick adjustability.
- Other Notes
- When making a shooter, the launch angle and speed are the most important, test from key areas of the field (e.g. bump-firing, firing from a field line, etc.)
- For later prototypes, make sure that your shooter can actually push your game piece in! It can't just use the force to levitate the ball into the flywheel.
- When making an arm/elevator/climber, use a calculator like JVN Calculator rotary mechanism or ambcalc mechanism ratio to find the optimal gear ratios.
- Some of our previous prototypes:


No Comments