
PathPlanner
Overview and Resources:
PathPlanner is a pathing tool developed by team #3015 and is fairly easy to use because of its intuitive, visual nature.
Here are the docs: https://pathplanner.dev/home.html
This page will show you how to effectively use the tool: https://pathplanner.dev/gui-editing-paths-and-autos.html
If you have any questions, consult the docs first. They usually contain the answers you desire.
Some of the most important aspects of PathPlanner are:
Paths vs. Autos:
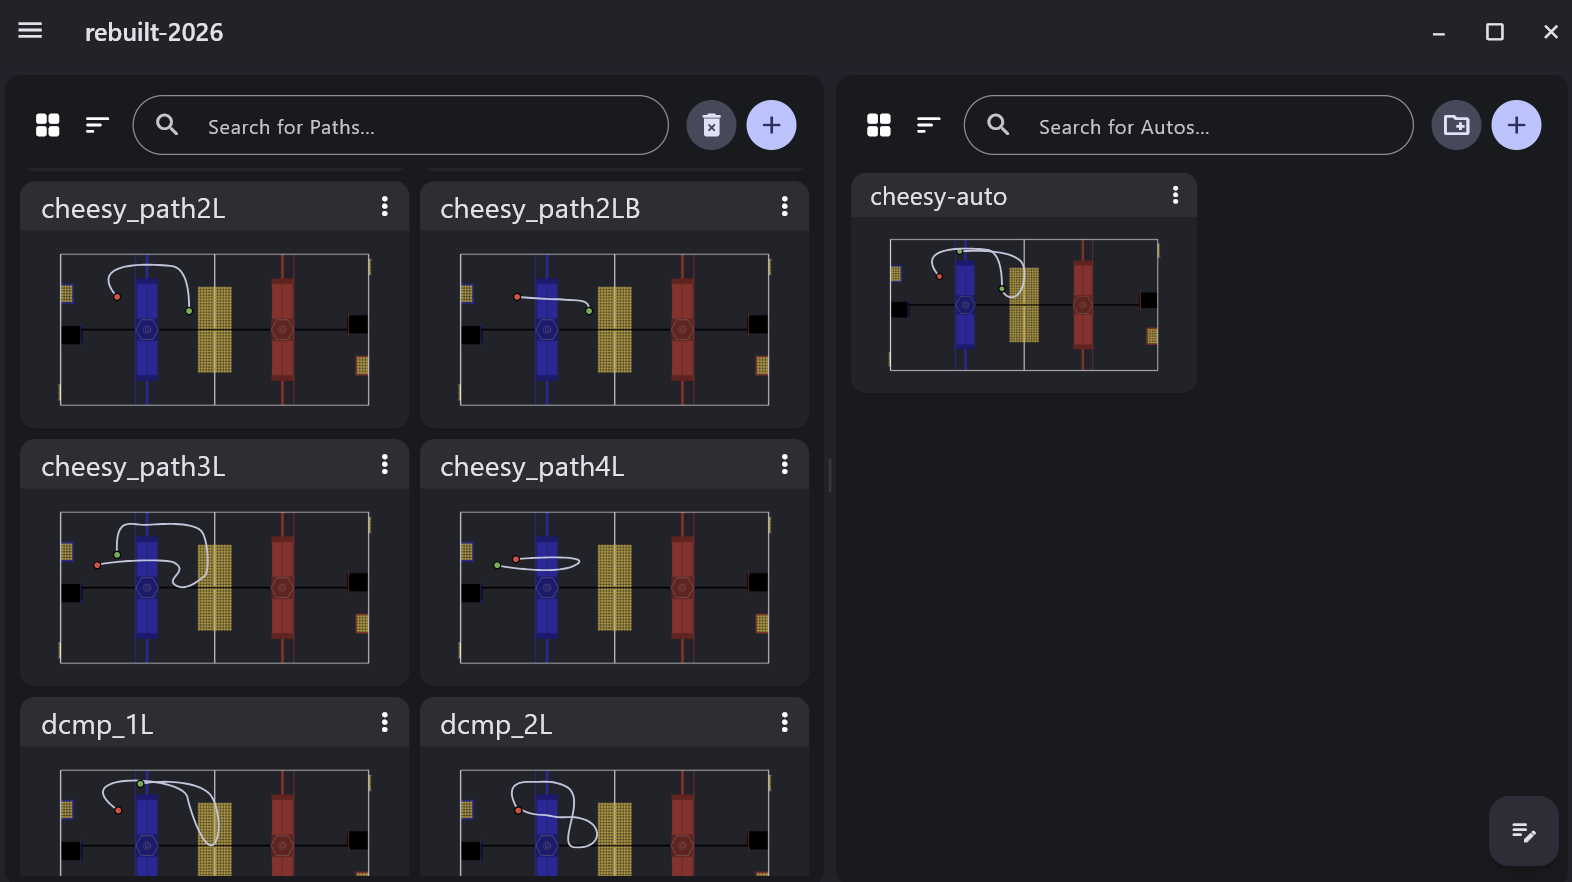
To put it simply, multiple paths make up an auto. In the picture below, the paths are individually built on the left side, while the auto is on the right side, named "cheesy-auto." In this case, "cheesy-auto" contains both paths "cheesy_path2L" and "cheesy_path3L," allowing us to split up the behaviour of our entire autos easily into distinct paths. We can change paths without interacting with the entire auto, making iteration and tuning simple.
Making a Path:
To create a path, PathPlanner includes many tools that make the process easier. Below is a description of those tools to streamline your building.
Rotation Targets:
Rotation targets define points along the path where the robot should target a given rotation. When path following, the robot will look ahead for the next rotation target, then attempt to rotate to its associated rotation. Rotation targets can be edited in the rotation targets tree. This is only available when holonomic mode is on.
Essentially, this means that you can dictate what direction the robot is facing at any point along the path. This is useful in cases when you want to point your intake towards game pieces on the floor, as many teams did with the notes in 2024.
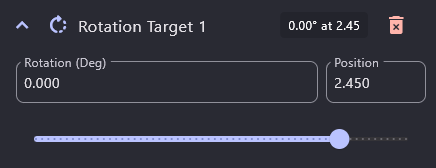
You can use the Rotation (Deg) box to change the heading of the robot and the position slider or the Position box to change at what point along the path you want the robot to be at that heading.
Event Markers
Event markers define points along the path where other commands should be triggered while path following.
This means that you can run custom commands, such as intake or shoot, at desired points along the path. Check the docs for further instructions regarding this.
Waypoints & Linked Waypoints
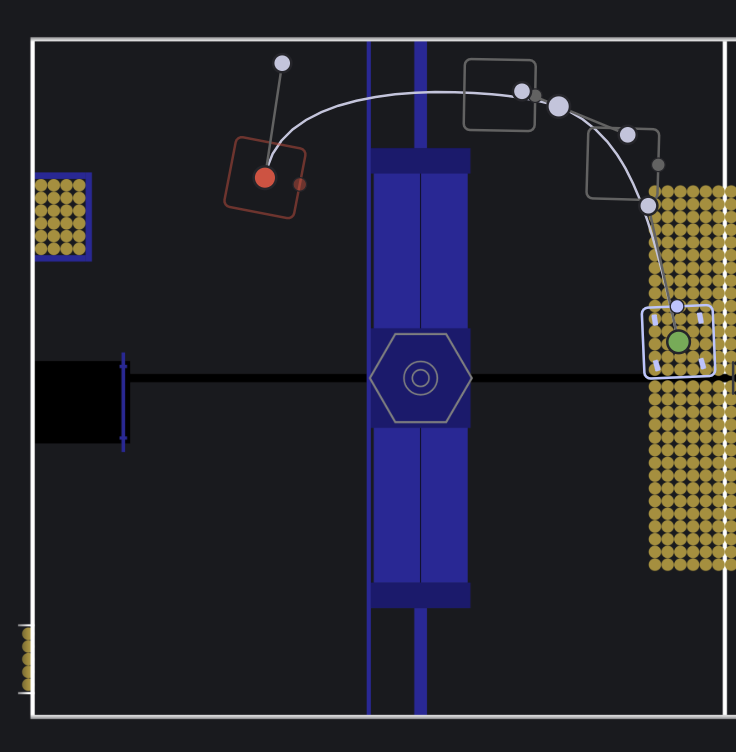
Waypoints are points that your robot will follow to connect a path. In the picture above, the robot has a start, end, and two additional waypoints along its path, indicated by various colors. Add them as necessary to allow your robot to move to the desired position and avoid obstacles.
A good rule of thumb is to use as few waypoints as needed to decrease the time it takes your robot to travel from start to end.
Linked Waypoints are universal points on the field that can be used in any path. For example, if you know an optimal shooting position, set a point at coordinates (x: 3.0, y: 4.0), and
Other Important Aspects to Consider
- Waypoints
- Path Optimization
- Command Groups
- Global Constraints