Intakes and Linkages
4 Bar Linkages:
4 Bar linkages use 4 bars(crazy, I know), 2 on each side of the bot, and dead axles instead of hex bars with bearings to pivot. These dead axles don't use bearings, making them a lot more reliable and strong than a hex bar. They are traditionally powered by pistons, but we want to use motors now because of our sweet sweet WCP parts. The 4-bar linkage also has a smaller footprint than a pivoting hex or SplineXL intake and can be good for games requiring a large shooter tower and over-bumper intake at the same time(see Aurora from 2022). They are often harder to make than traditional intakes, but have great benefits like discussed above, which is why we are teaching it.
TL;DR
Pros:
- Less prone to breaking than hex-bar
- Can take up less space if made well
Cons:
- Time consuming to make and somewhat harder to CAD than simpler ones
- Mostly needs pneumatics, more complex with motors(which we want to use because of our WCP sponsorship)
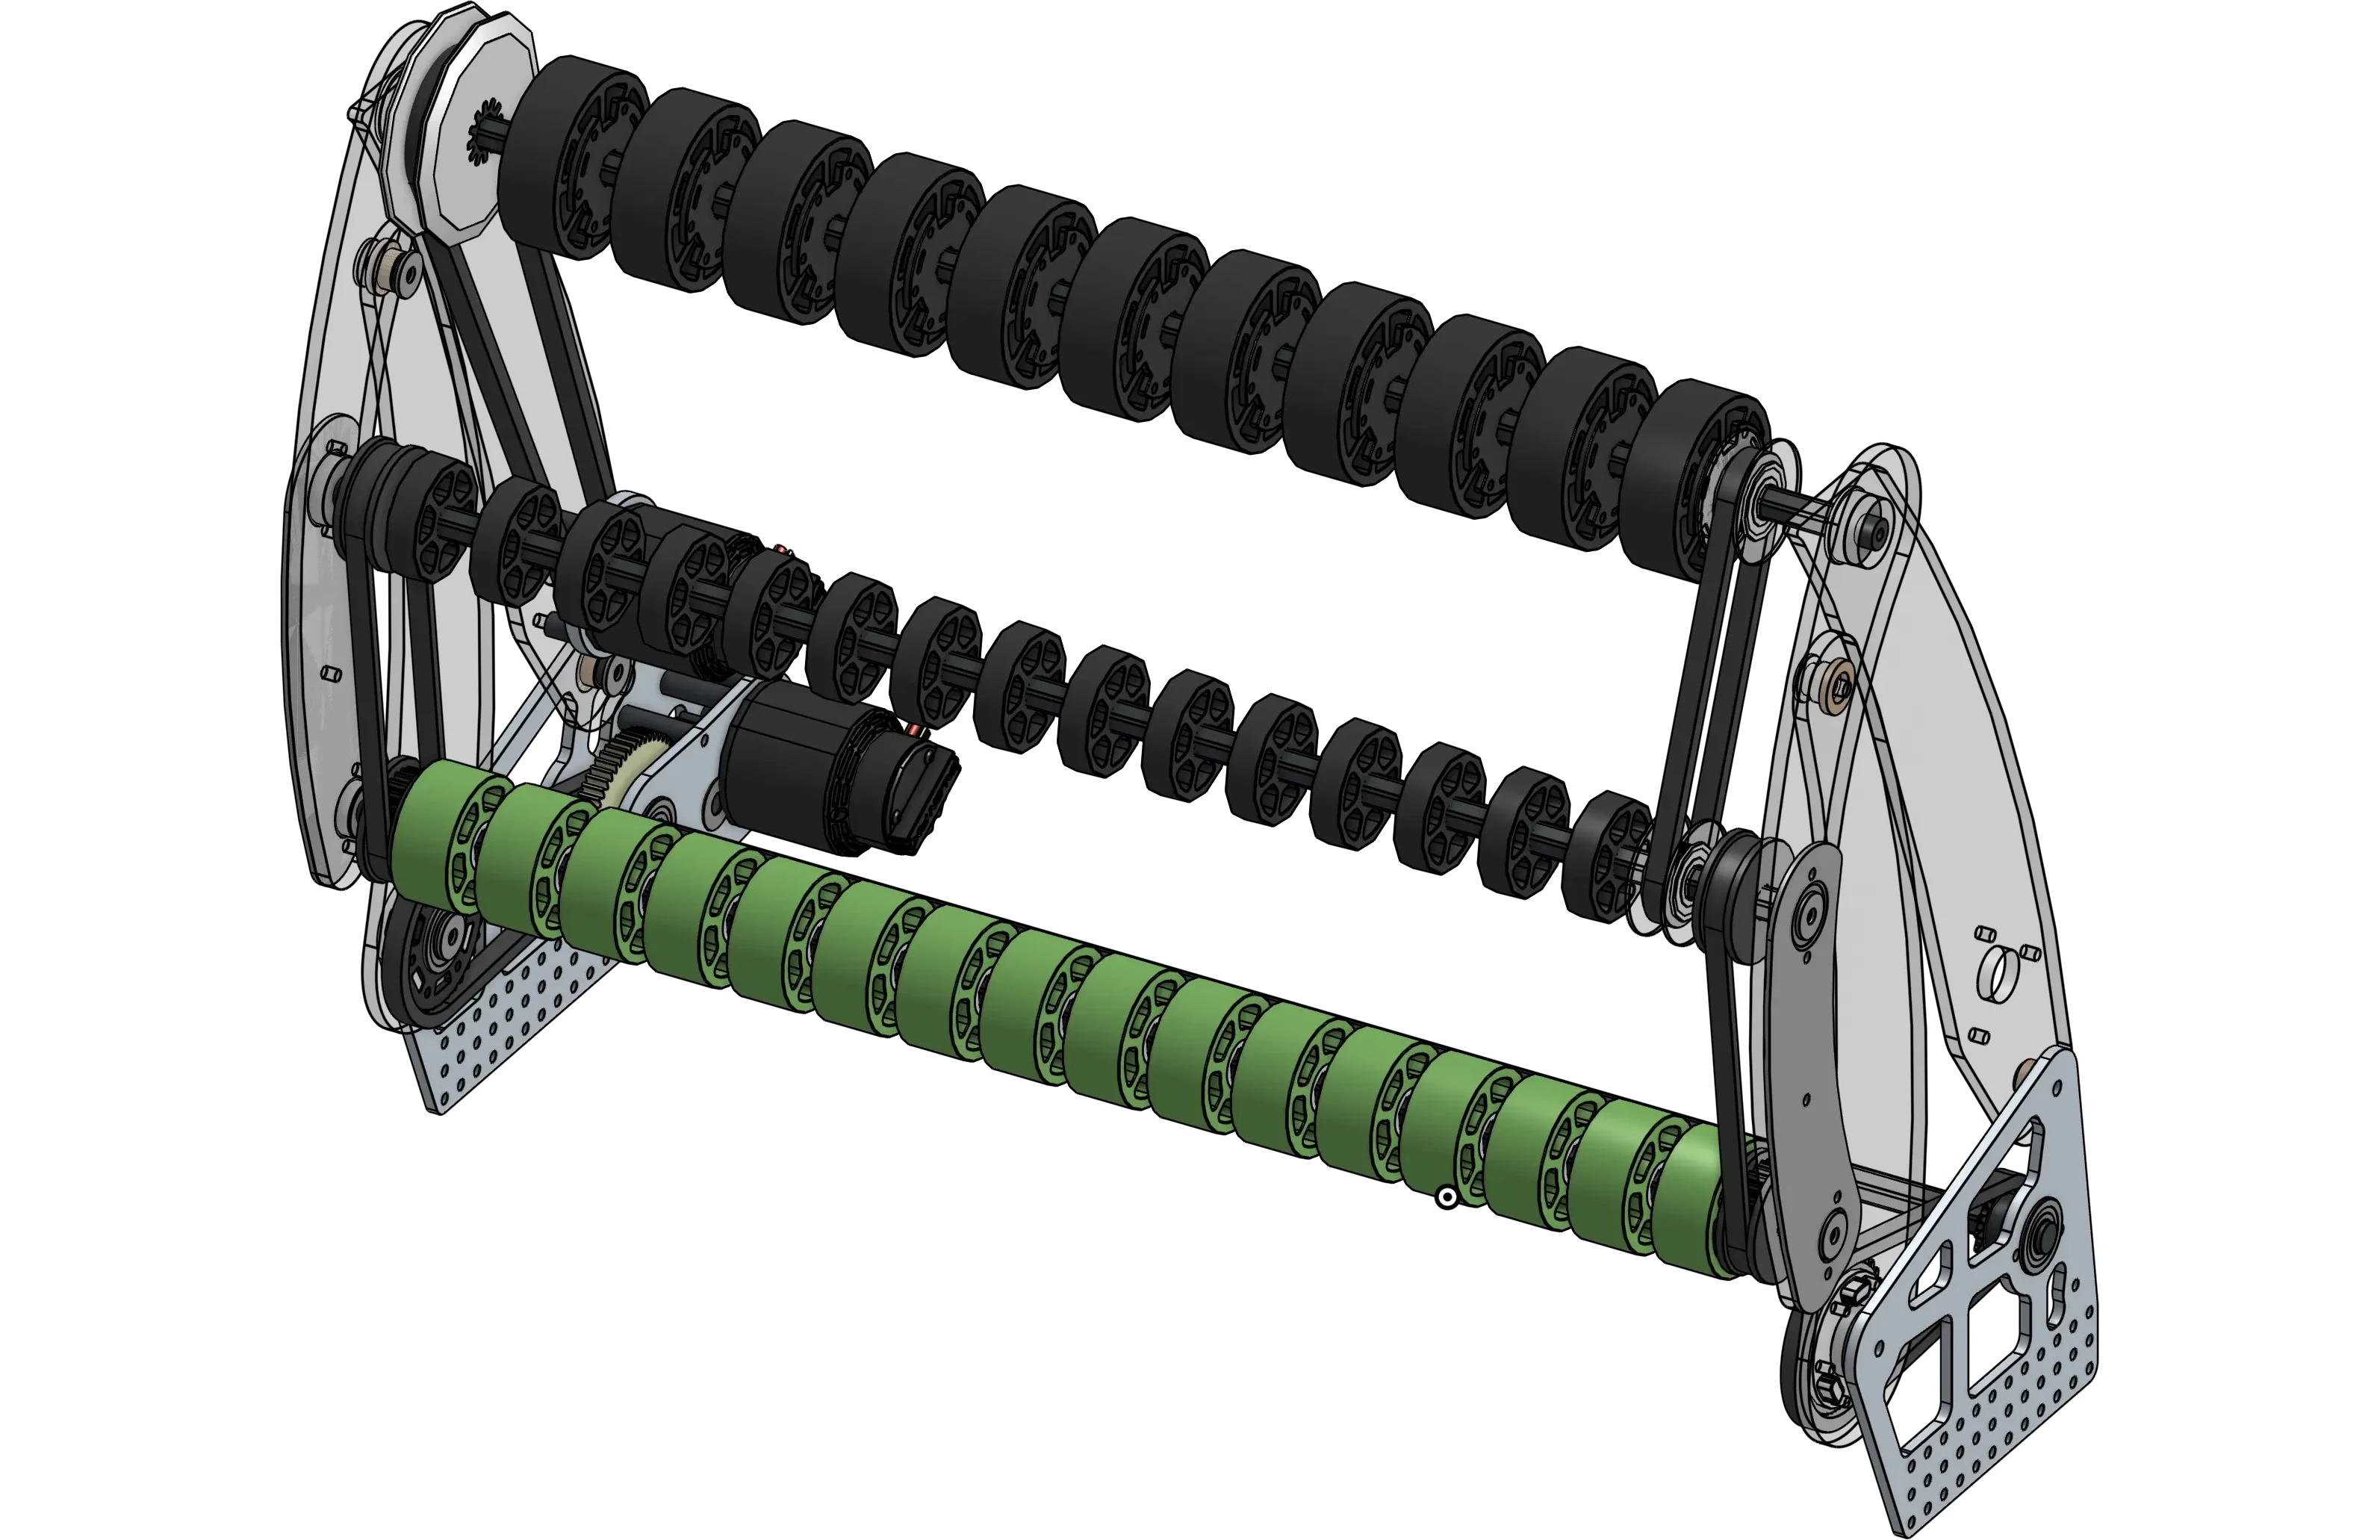
Image above is 1678 2022 Rapid React Intake
How to make a 4 bar Intake:
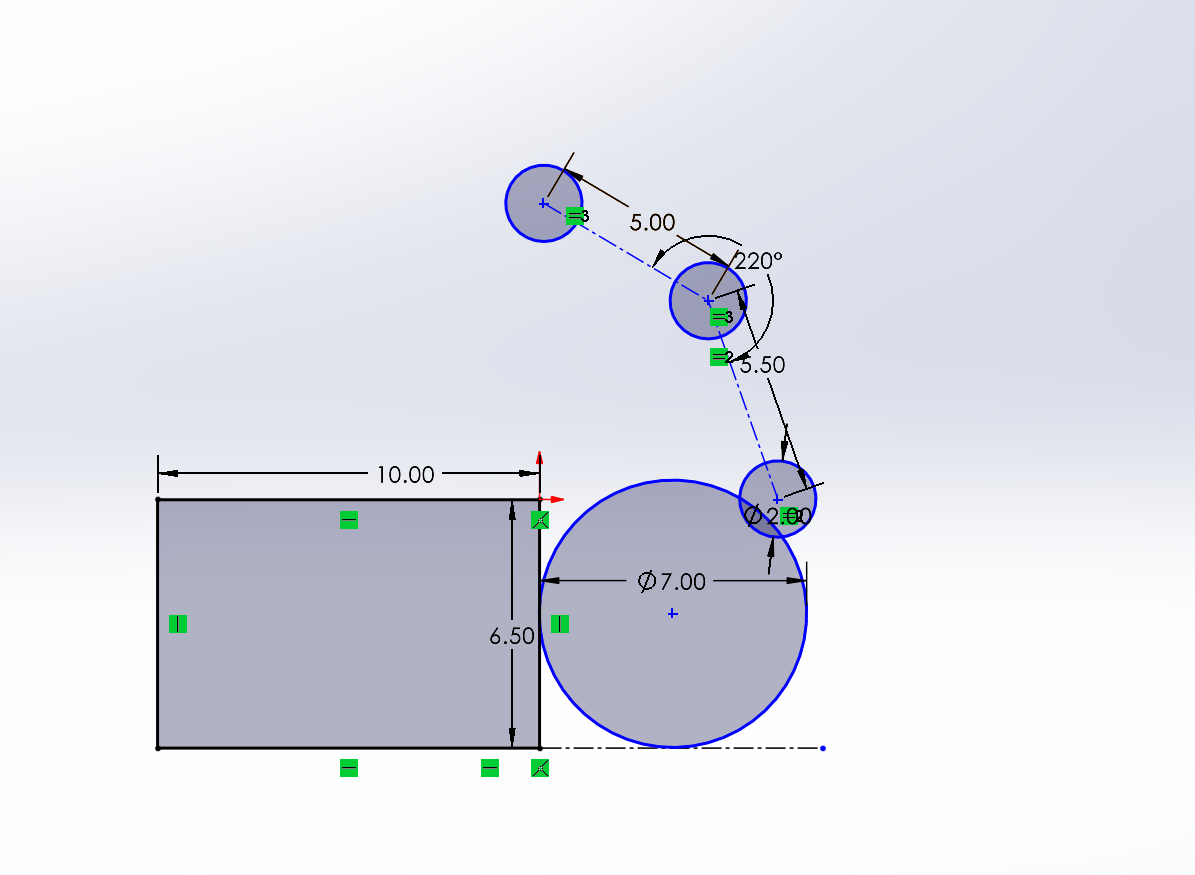
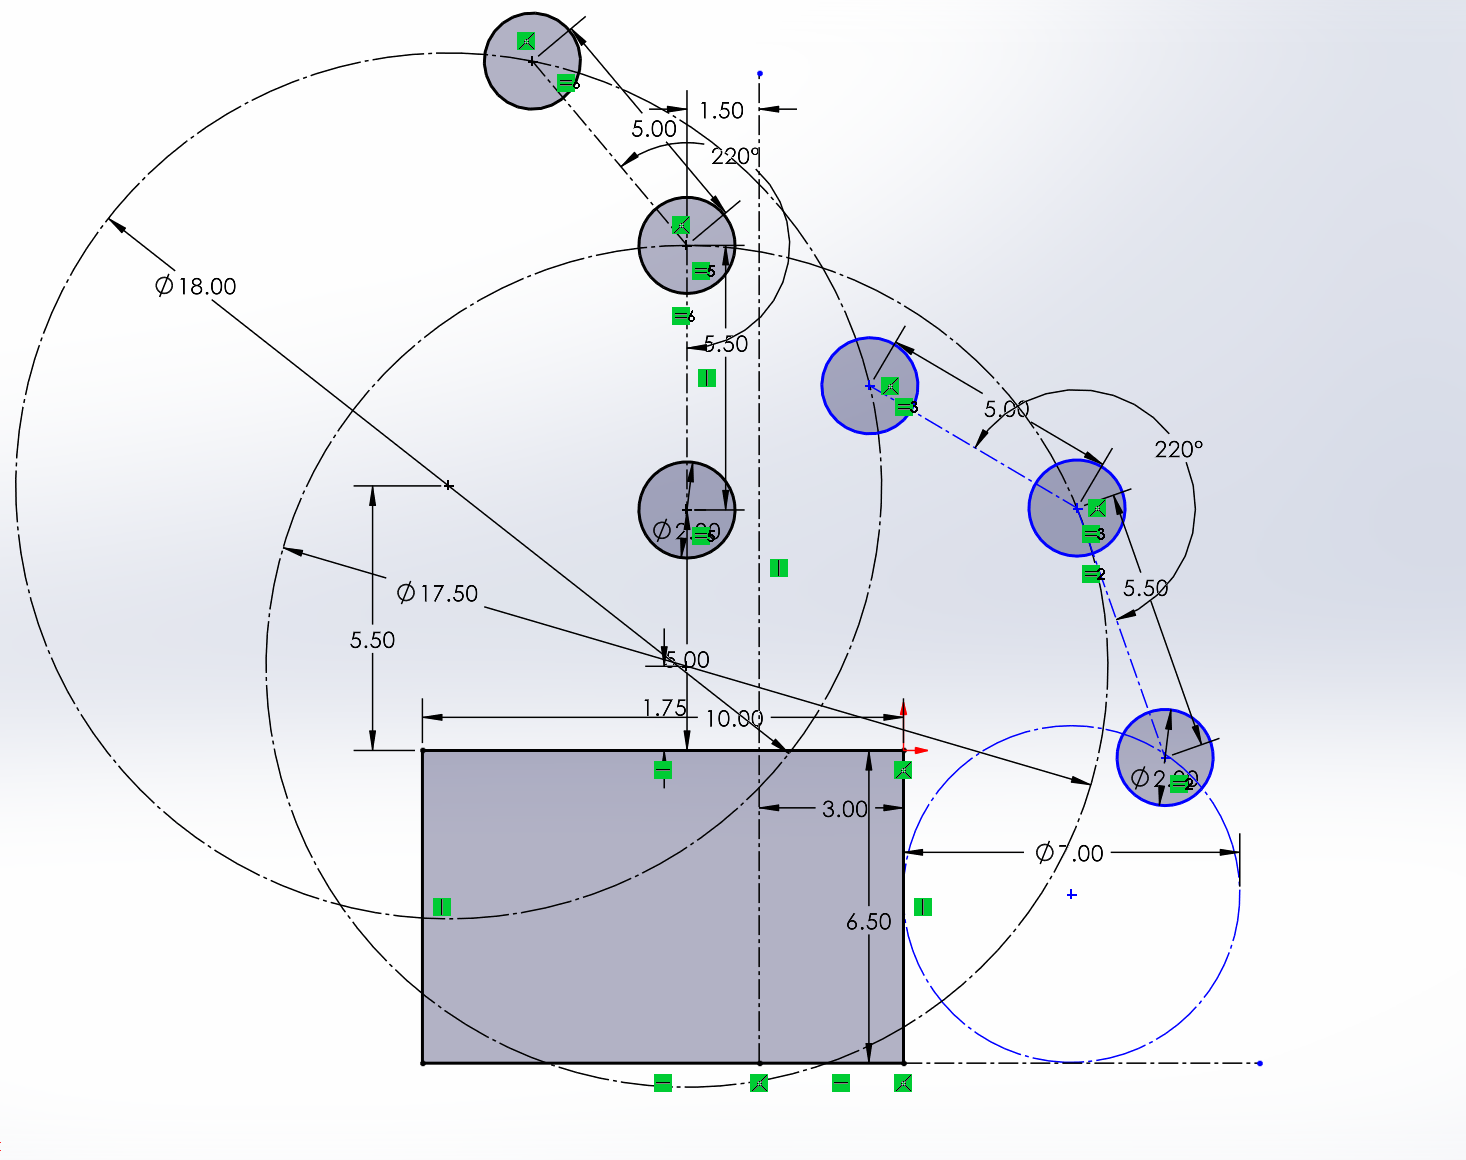
1. Create your base Geometry, this includes a rectangle for your robot body, small circles for your rollers(these will generally be the only hex-bearing parts of your intake), and a larger ball that is your game piece and determines the size and position of the smaller wheels.
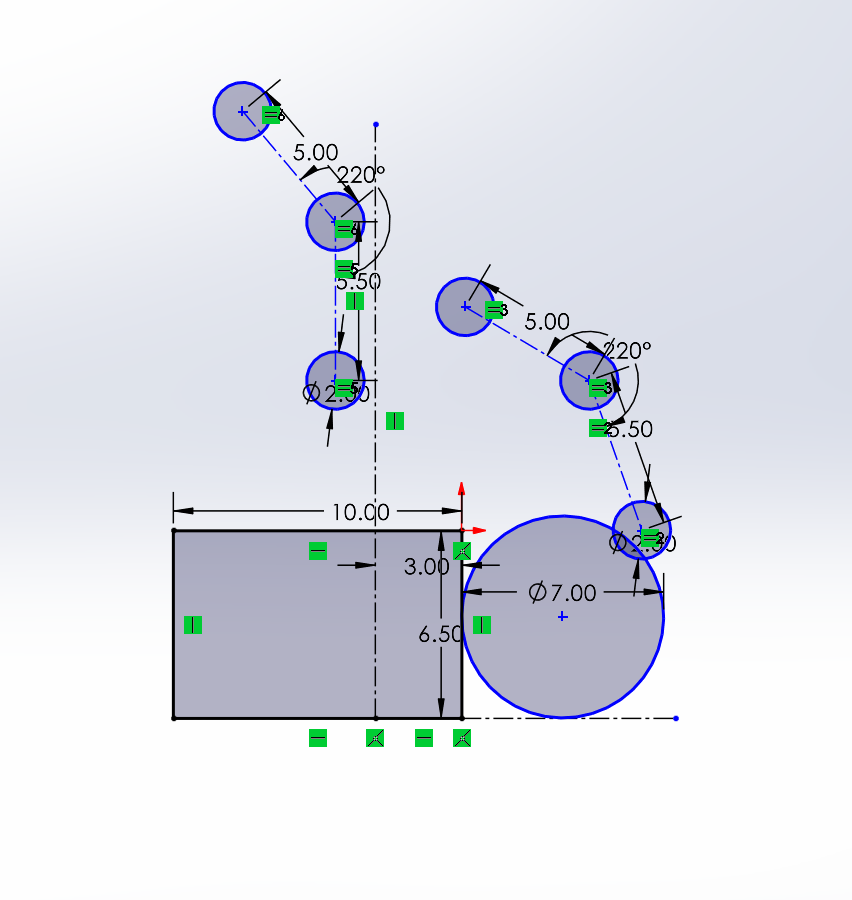
2. Create a line marking where the bumper ends, and copy your geometry past the line. This second geometry represents the rollers in the stowed position, and should keep the small roller circles in the same orientation relative to each other.
3. Create 2 circles linked up to the same two points on the Geometry (Make sure to lock your Geo in place). These will allow for you to test your stowing motion.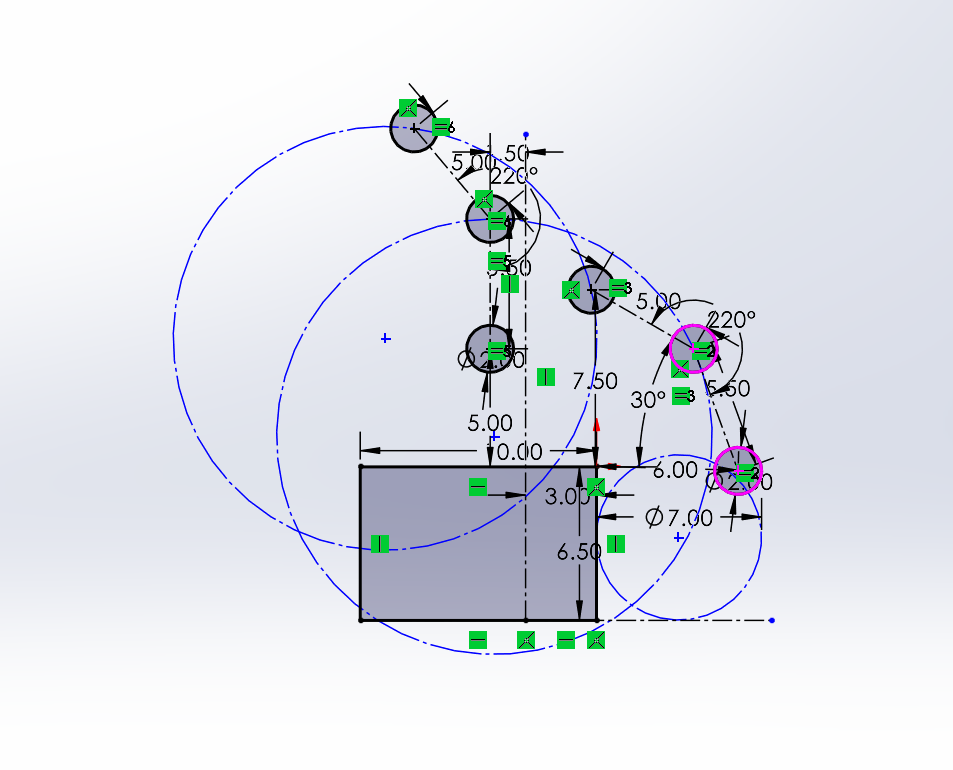
4. Mess with your circles to make them fit.
Criteria for Circles:
- Centerpoint must be behind the bumper lines
- Try not to make them too low on the robot
- Try to keep the circles similar size
5. Dimension the Circles and their position. *At this point you can remove the bottom Geo's connections and move it around :)
6. Add Lines and Liven it up (Add bearing holes, Slots ect.)
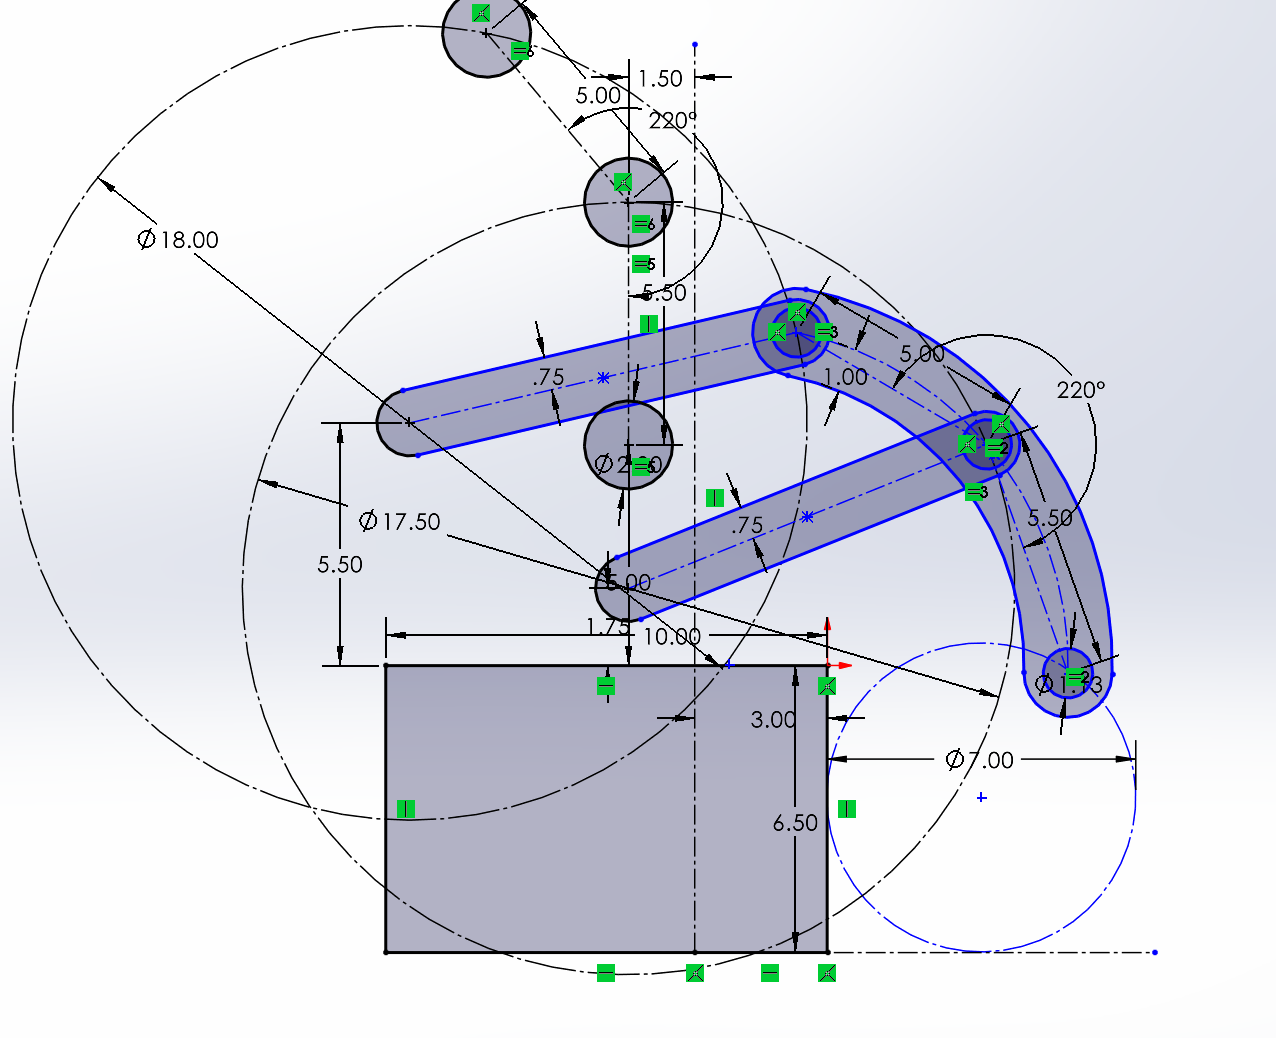
7. Finished; now that your geometry is done, do the fun parts. Make the slots into separate parts that can be used as pivots, get your bearing and dead axle holes in the right sizes, and make your rollers. Then just link up your motor or piston and you're done! Mirror it onto the other side, position your roller wheels and the assembly onto your bot, and congratulations, you've just finished your first 4-bar dead axle intake :D
No Comments