Testing Robot Code
Testing code before merging it is important to ensure it works as intended. This page discusses how to checkout the correct branch, deploy the code, test it on the robot, and merge changes.
Checking out your branch:
Go to the terminal in Intellij by clicking on this icon in the lower-left corner of your screen:
![]()
When open, type "git fetch origin" to fetch to your local repository. Then, type "git checkout [branch name]" and insert the name of the branch that contains the code you want to test. It should look like this:

You should now be on the correct branch. To ensure all of your changes are on it, type "git pull" to update your branch. It should look like this:
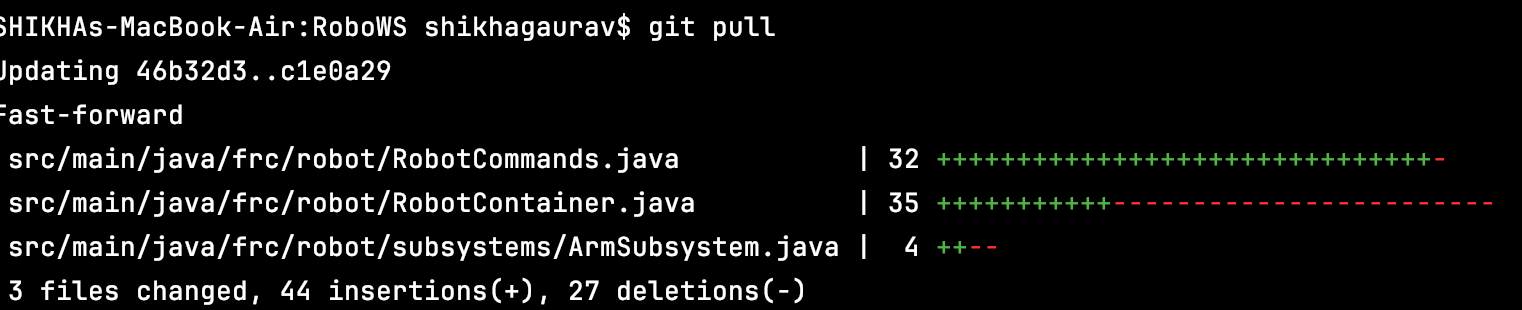
Congrats! You now have all the code that needs to be tested.
Deploying the code:
Now, you need to deploy the code to the robot. First, connect to the robot's WiFi. For our team, the network name will be in this format: 3506_robotName. Once connected, go back to IntelliJ and look for this in the top-right portion of your screen:
![]()
Ensure the dropdown is set to "Build and Deploy Robot." If that option is unavailable, you may have to scroll through the Gradle stting which you can find by clicking this icon:
![]()
You'll find the Build and Deploy Robot option in the Run Configurations folder:
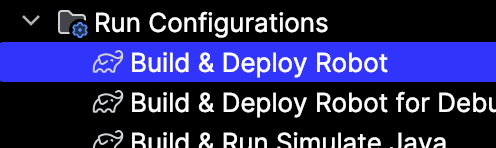
Once you've selected Build and Deploy Robot, hit the green play button. After about 30 seconds, the deployment will be complete.
Note that the Communications and Robot Code bars will turn red on the FRC Driver Station Application while deploying, but will return to green after deployment is complete. Also, if the Communications and Robot Code bars begin to cycle red and green, it means your code is crashing and there is an issue.
Hooray! The code is on the robot!
Test it out:
To run the code on the robot, go to the FRC Driver Station application. It should look something like this:
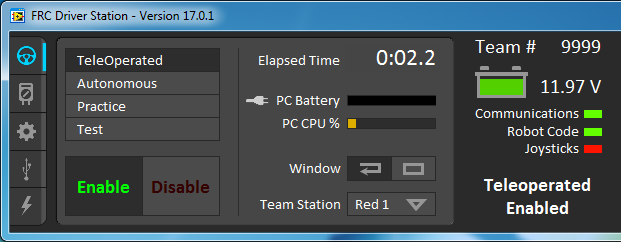
Ensure that the settings are correct. All three of the bars (Communications, Robot Code, and Joysticks) should be green. The battery should be sufficient. Ensure that you are on the correct drive setting (TeleOperated, Autonomous, Practice, and Test).
If it is in TeleOperated mode, you will need to manipulate the controller to test. If it is on Autonomous mode, ensure that the robot is placed correctly and the correct autonomous program is selected prior to enabling. Hit the green enable button to start the robot and test.
If it does not work as intended, then you will need to change some code and try again.
Nice! Your code has been tested and verified!
Merging changes:
Now that you've tested out your code and it works, you'll need to get it merged to make sure it's part of the offical robot code™.
Begin by commiting and pushing your changes. You can do this from the terminal, but it's easier to do through the IntelliJ menu bar. Click on this icon:
![]()
This will show you all of your changes. Type a commit message that details the changes made and their purpose. Make sure your changes are checkboxed. Then hit the commit and push button:

If a box pops up telling you that there are warnings, don't worry about it. However, if the box says that there are errors, then there are problems in your code that you need to fix (and maybe test) before pushing.
Your changes should now be pushed. Go to GitHub and open the repository. Then go to the Pull Requests tab:

Hit the New Pull Request Button in the top right:

This bar should pop up:
![]()
Keep the base branch development, but select the dropdown on the compare branch and change it to the branch with the the changes on it. Then hit the Create Pull Request Button and fill in the necessary information. Once completed, submit your pull request.
Once checks are completed, it may mention merge conflicts. GitHub provides ways to resolve these, so make sure those are fixed and any changes are pushed.
Once a mentor has reviewed it, they may request changes that you will need to go in and complete (and maybe retest). Once it is approved, it will be merged and will be part of the offical robot code™.
Yay! Good job testing!
No Comments