Simulating Beluga in the Sim Sandbox
Setting Up AdvantageScope
To get AdvantageScope, you can download the version for your operating system here: https://github.com/Mechanical-Advantage/AdvantageScope/releases
Then, follow the installer instructions for your system. Please install the latest stable release, and not the beta versions.
After opening AdvantageScope, go to App > Show Assets Folder. Note that if you are using the alpha release of AdvantageScope for Systemcore testing purposes, you will need to go under the AdvantageScope menu instead of Help. This will show you in Finder/File Explorer where the path of your assets folder is. You will need to know this for the next steps.
Getting Beluga in AdvantageScope
To get Beluga into AdvantageScope, download this .zip file from the YETI Shared Drive: https://drive.google.com/file/d/1L-IlO6yLEO3EWTT7hQ3TDLUFpgTqMgc7/view?usp=drive_link
If you are not part of the shared drive, please contact Mrs. Iaiela Dumitrescu to be added.
Extract the Robot_Beluga folder, and copy this into your assets folder that you found in the previous steps.
You will use Beluga when using the Sim Sandbox.
Getting Started with the Sim Sandbox
To get started, make sure you have git installed. If not, get it from this link for your operating system: https://git-scm.com/downloads
Go to the sim-sandbox repository on the YETI GitHub, or use this link: https://github.com/yeti-robotics/sim-sandbox. Then, click on the "Use this template" button in the top right hand corner. Click "Create new repository," and pick a name for it. Make sure to check the box that includes all branches! This will create your own repository with all of the template files to start.
Next, open up IntelliJ and head over to File > New > Project from Version Control. Select the Git option, and then paste in the URL of your repository, which you'd get from pressing the green "Code" button when you go to the repository in your browser, and copying the URL that you find in the little dropdown beneath it. It should look something like this
https://github.com/YOUR_GITHUB_USERNAME/REPO_NAME.gitYOUR_GITHUB_USERNAME should be replaced with your GitHub username, and the REPO_NAME should be replaced with whatever you decided to name the repository when creating it. Once you hit the "Clone" button, this will download everything onto your device.
Open up the project folder in IntelliJ. Then, you can start up your development work as normal by letting Gradle download the dependencies. Afterwards, go to the Gradle menu, and go under the tasks in the other folder. You should then find the simulateJava task. Run that task to open the simulator window.
Connecting the Simulator to AdvantageScope
Now that you've opened the simulator, let's start by configuring it. You're going to see an interface that looks something like this:
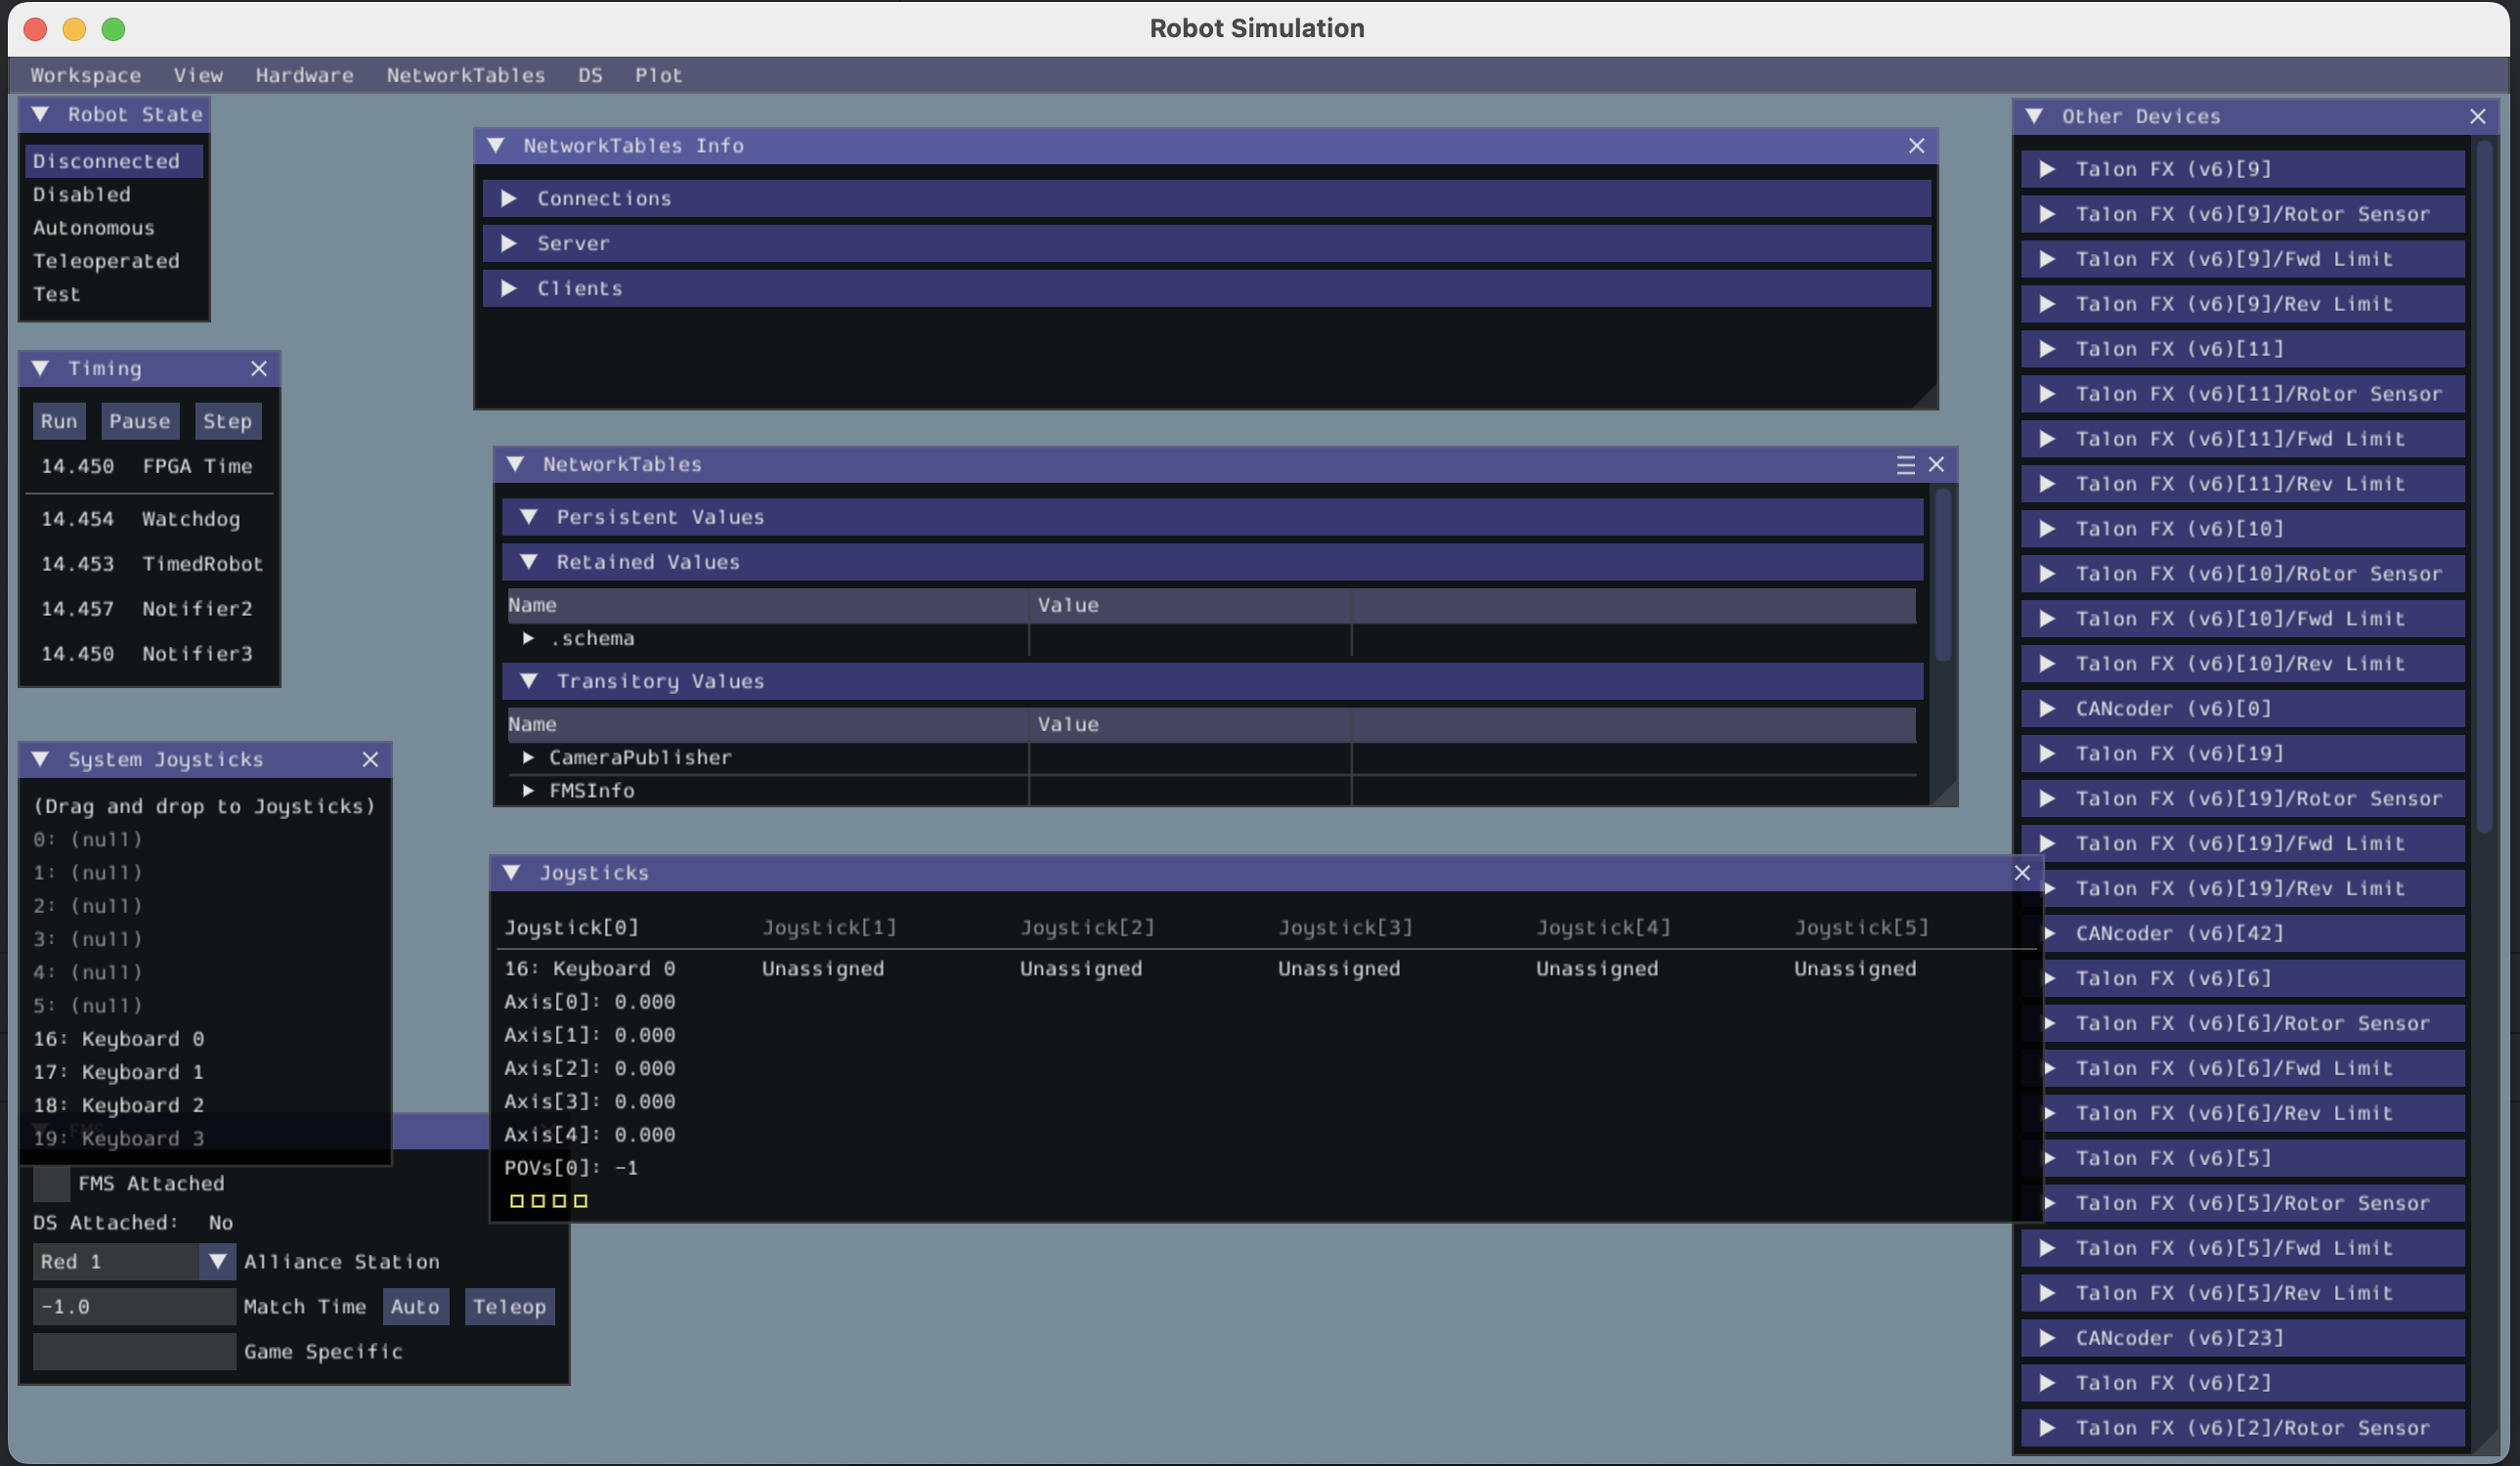
Let's connect our keyboard to the joystick port so we can drive the robot in simulation later. Under System Joysticks, drag Keyboard 0 on top of Joystick 0. Mine has already been configured as seen in the picture above, but you will need to do that on first launch.
Next, let's enable the robot. Under Robot State, hit the Teleoperated button.
Now, let's go back to AdvantageScope. It'll look something like this on first installation:
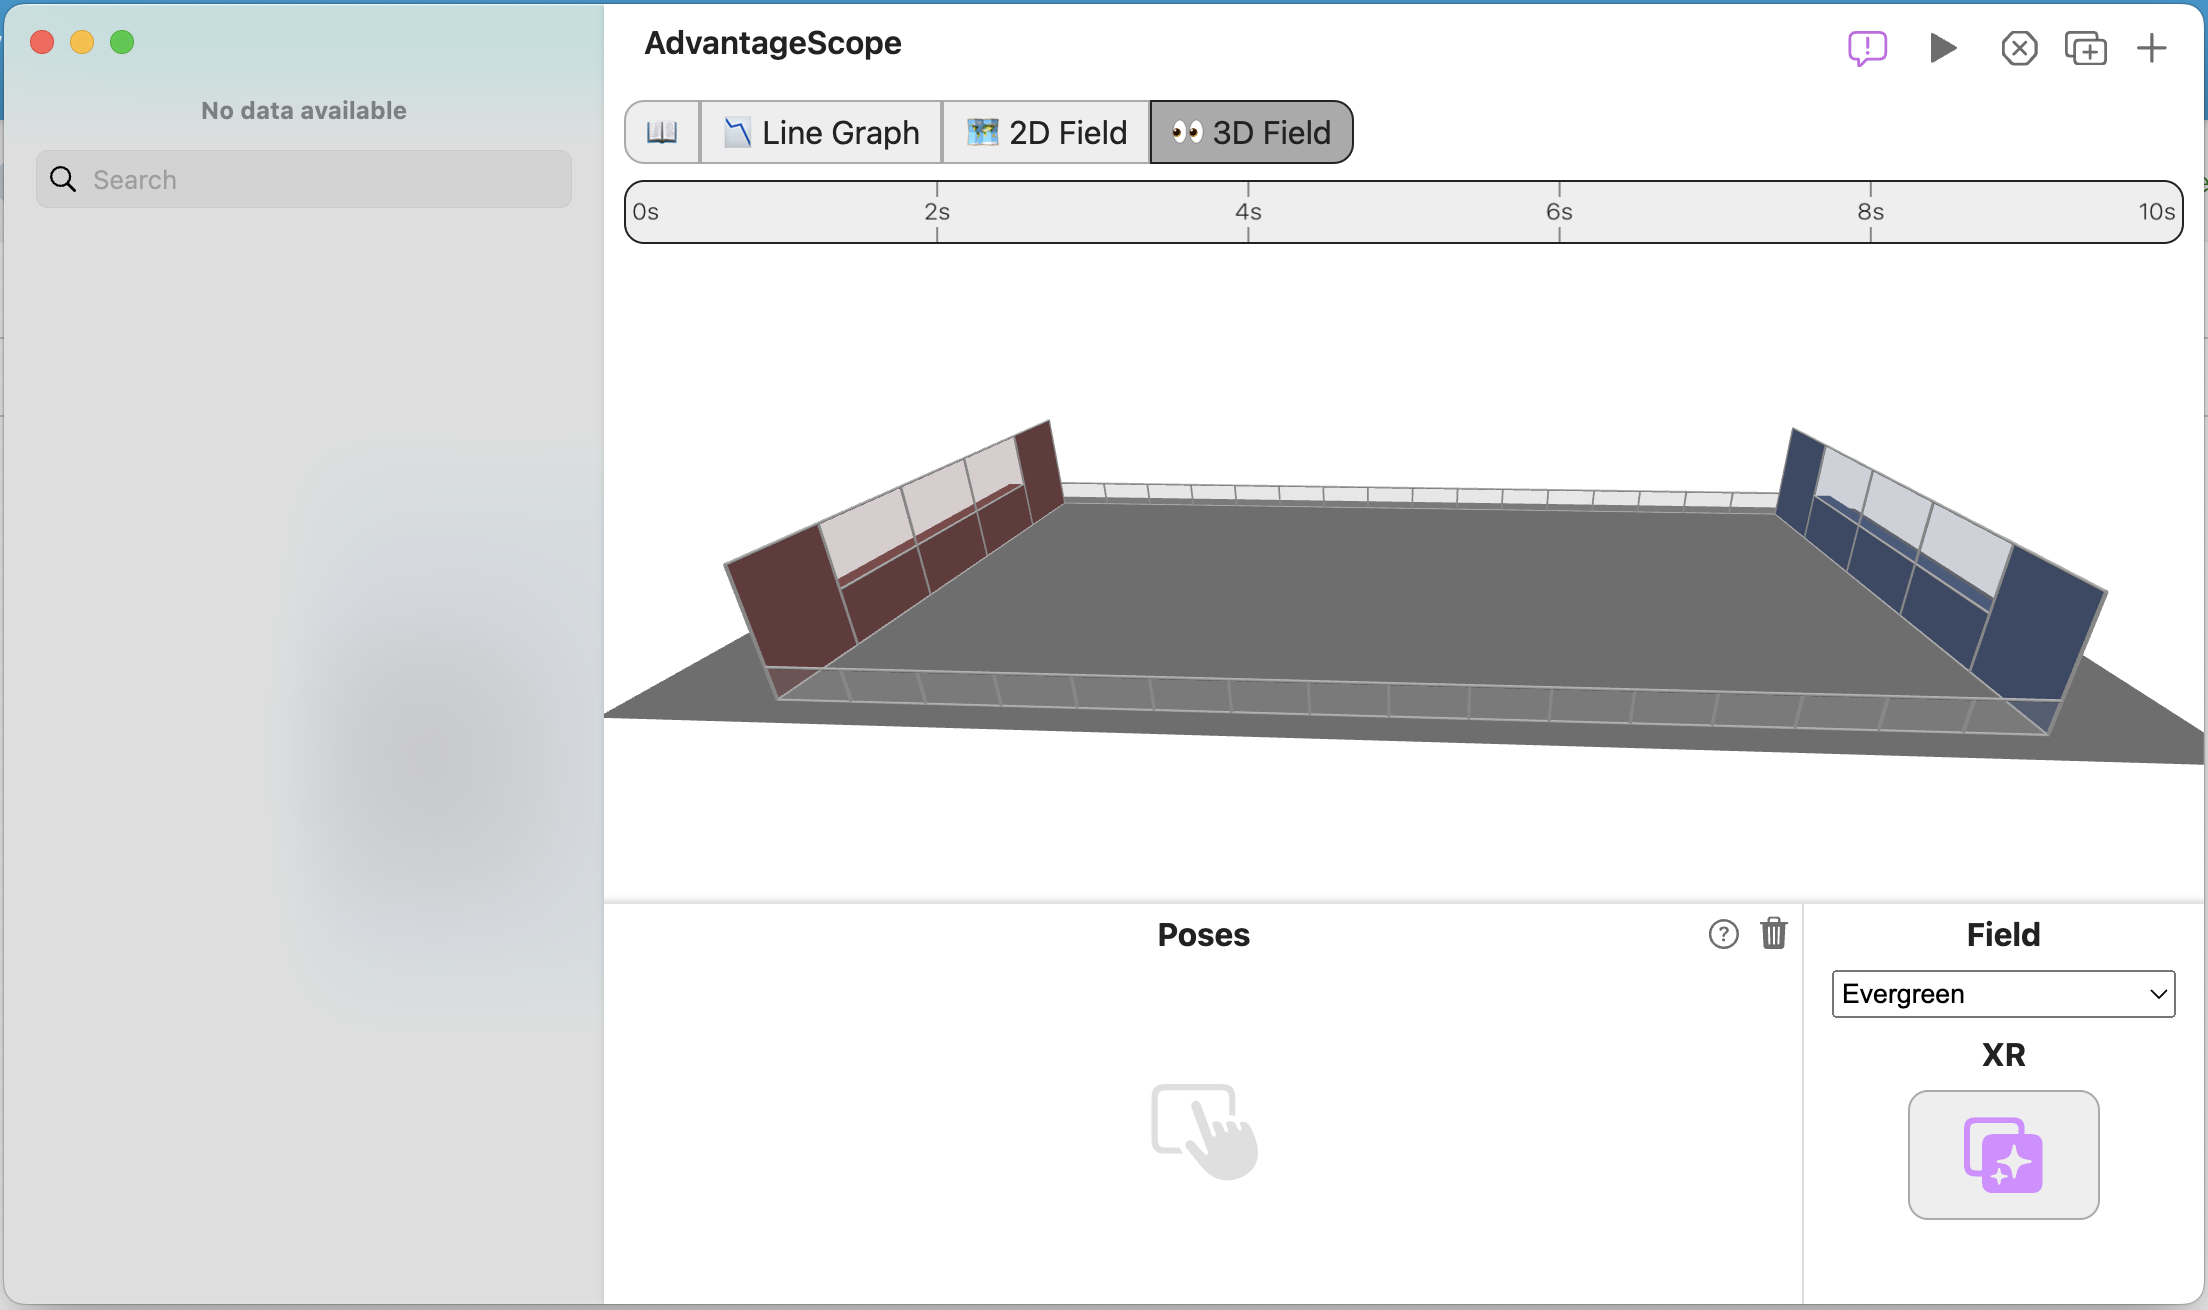
This isn't the right field. Let's change that! Under Field, click the dropdown that currently is Evergreen. Change the field to 2025 Field (Welded). That looks better! Now, if you're a Windows user, press Ctrl + Shift + K to connect the simulator to AdvantageScope. If you're a Mac user, press Cmd + Shift + K to connect the simulator to AdvantageScope. Your window should now look something like this:

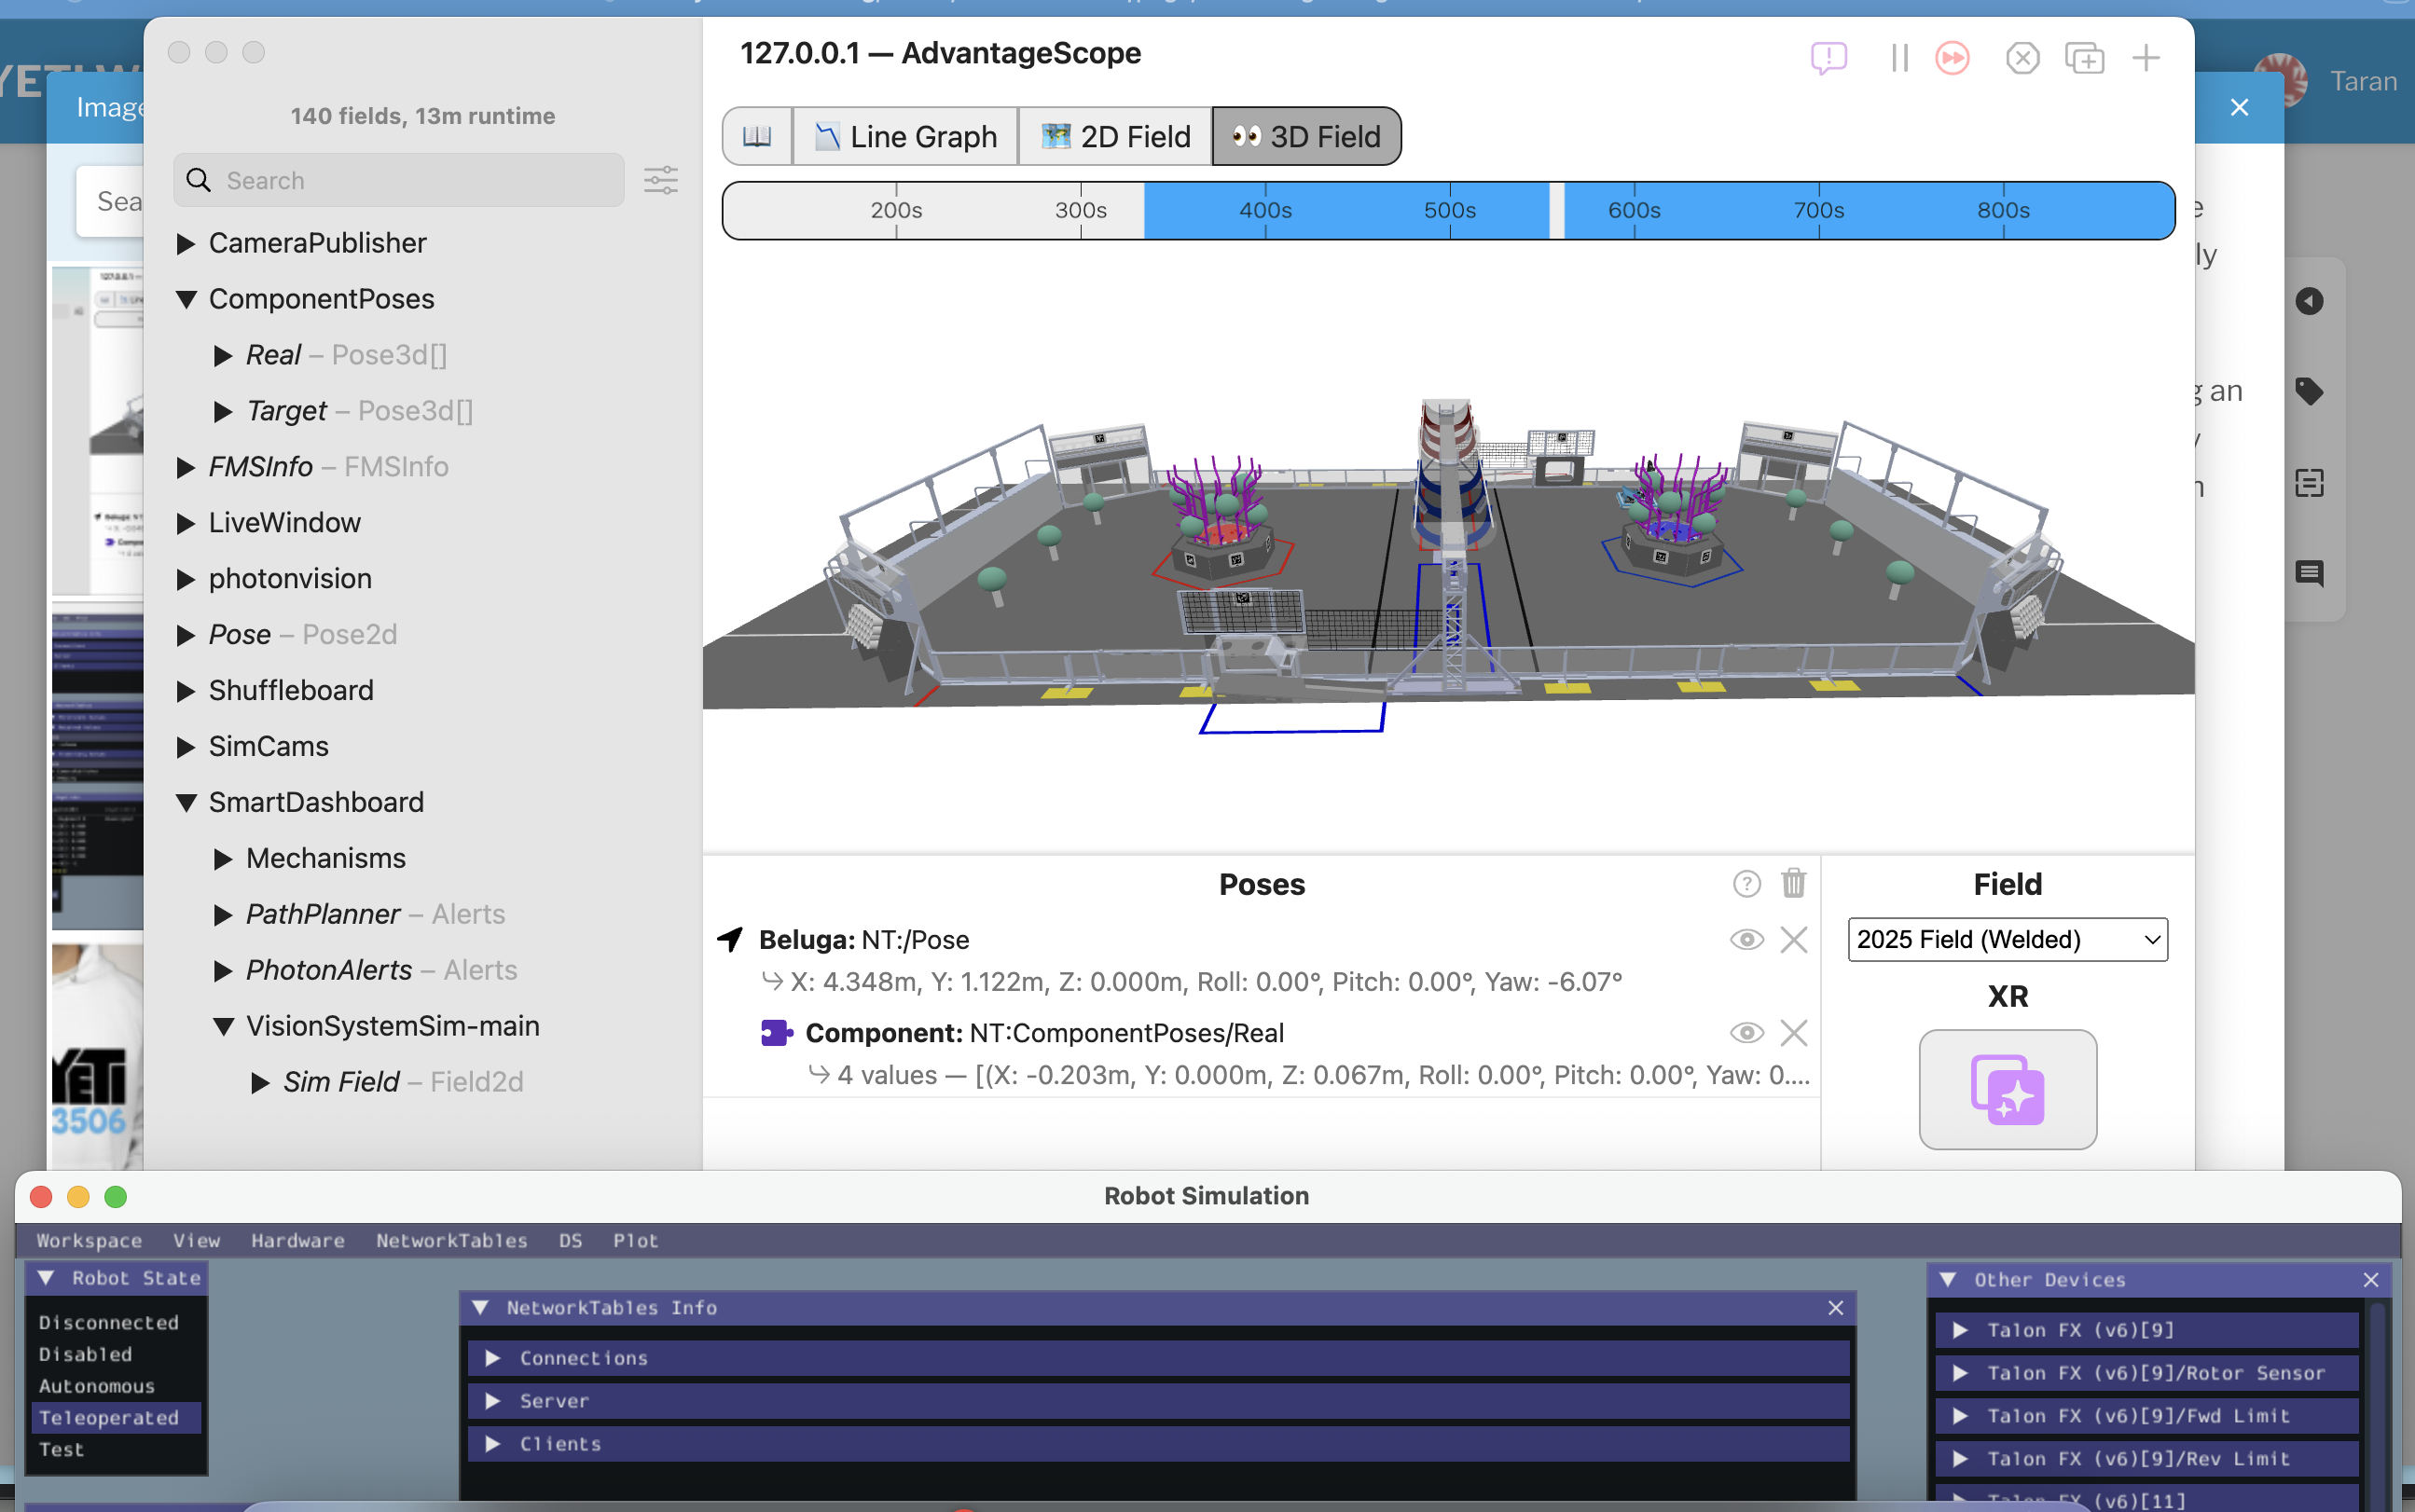
Now, we're missing the robot. Grab the Pose - Pose2d object and drag it into the Poses area underneath the 3D field. You should now see something like this:
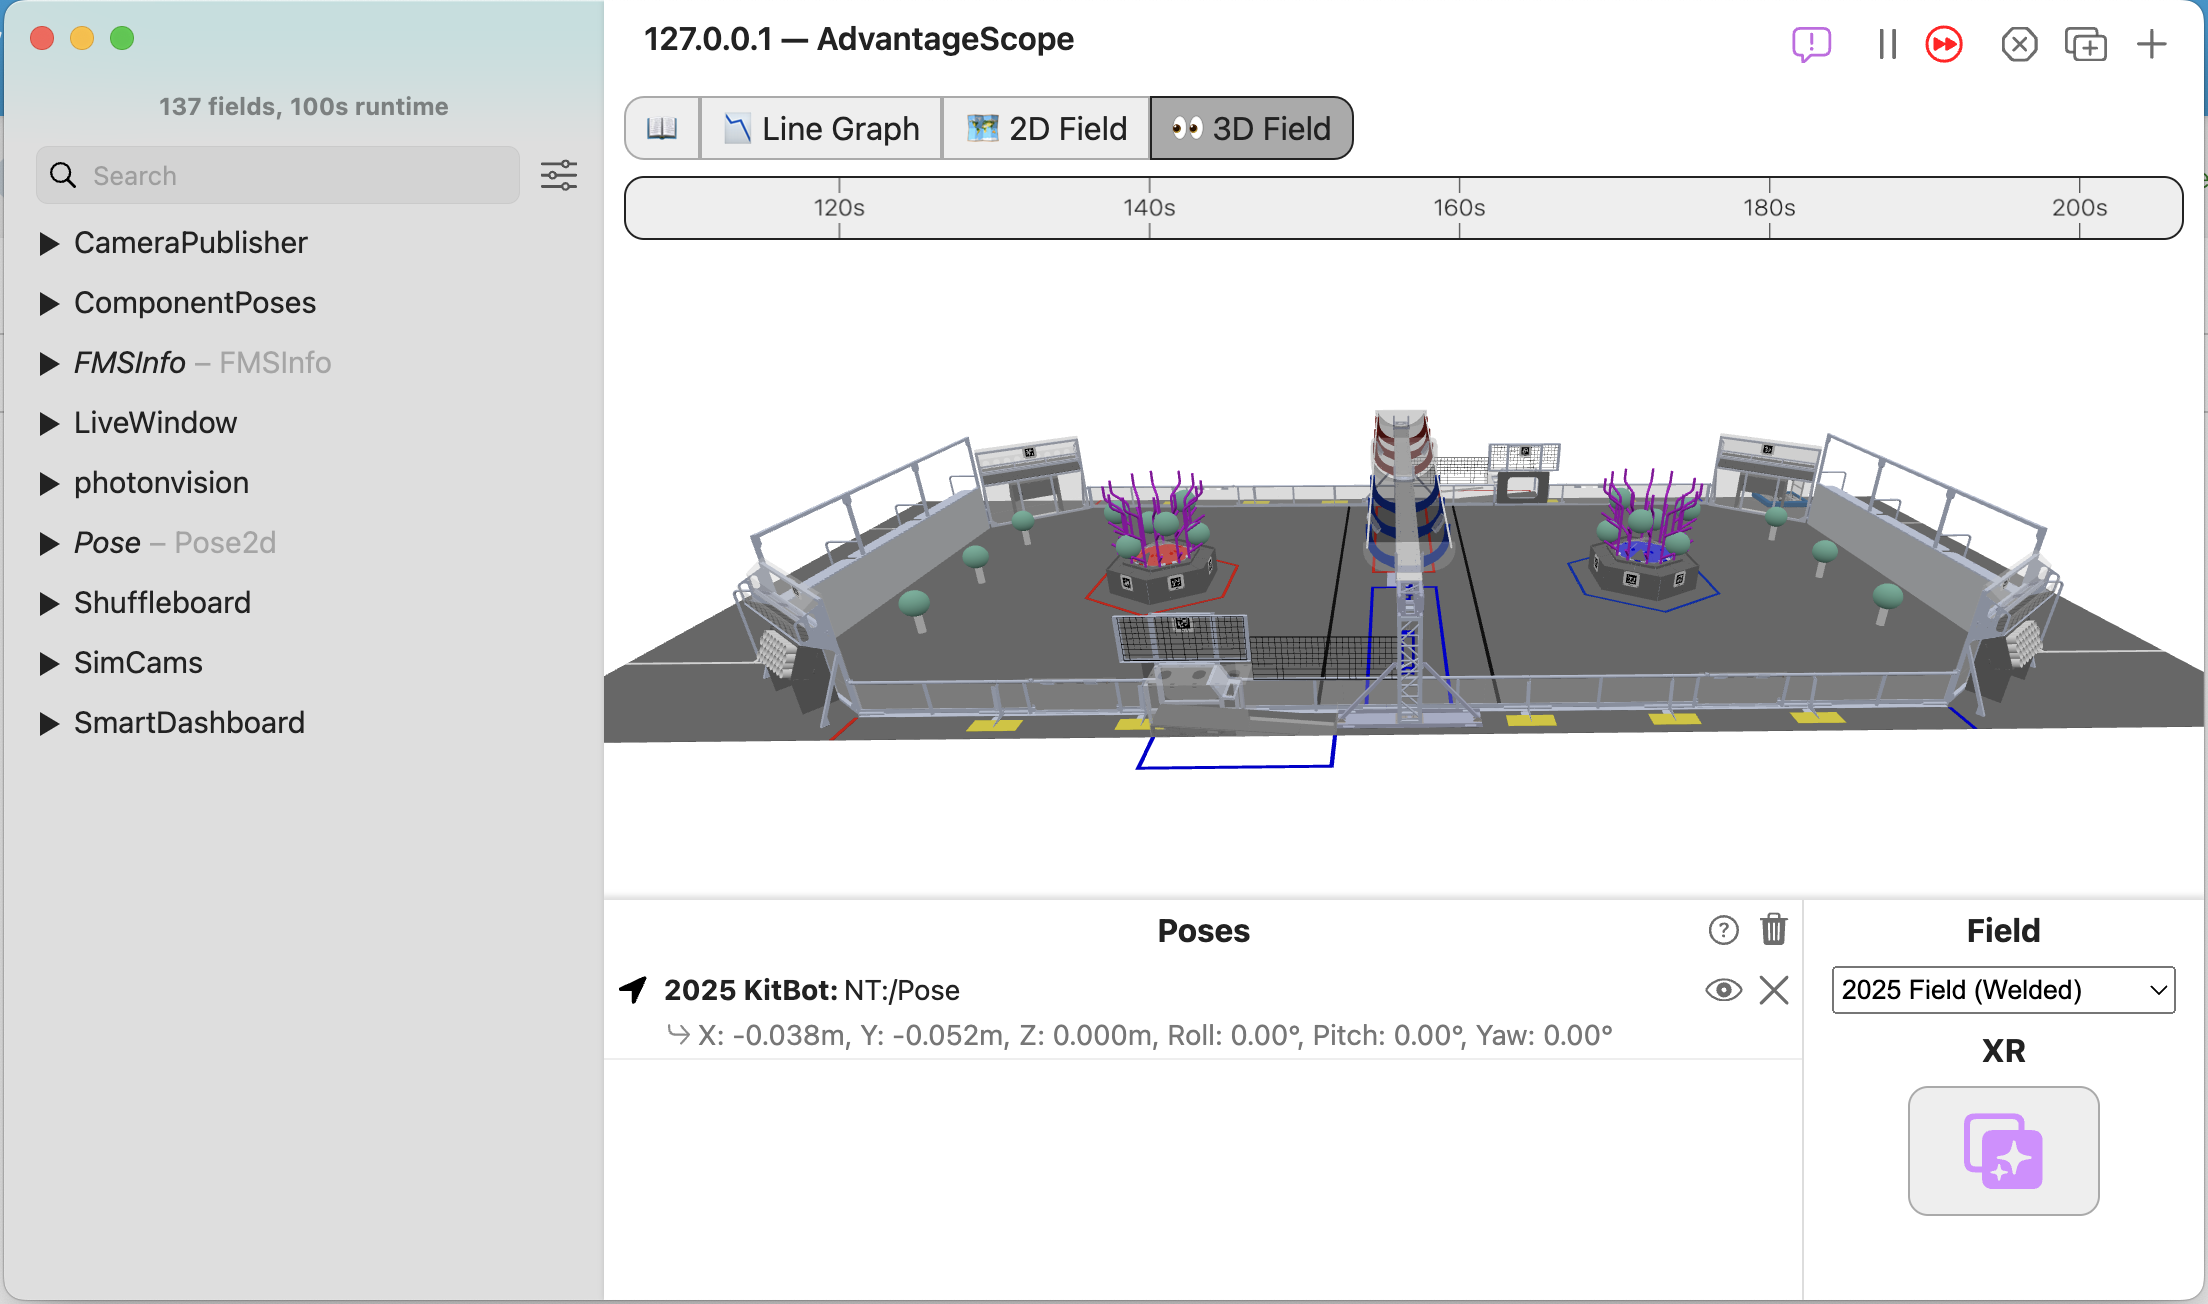
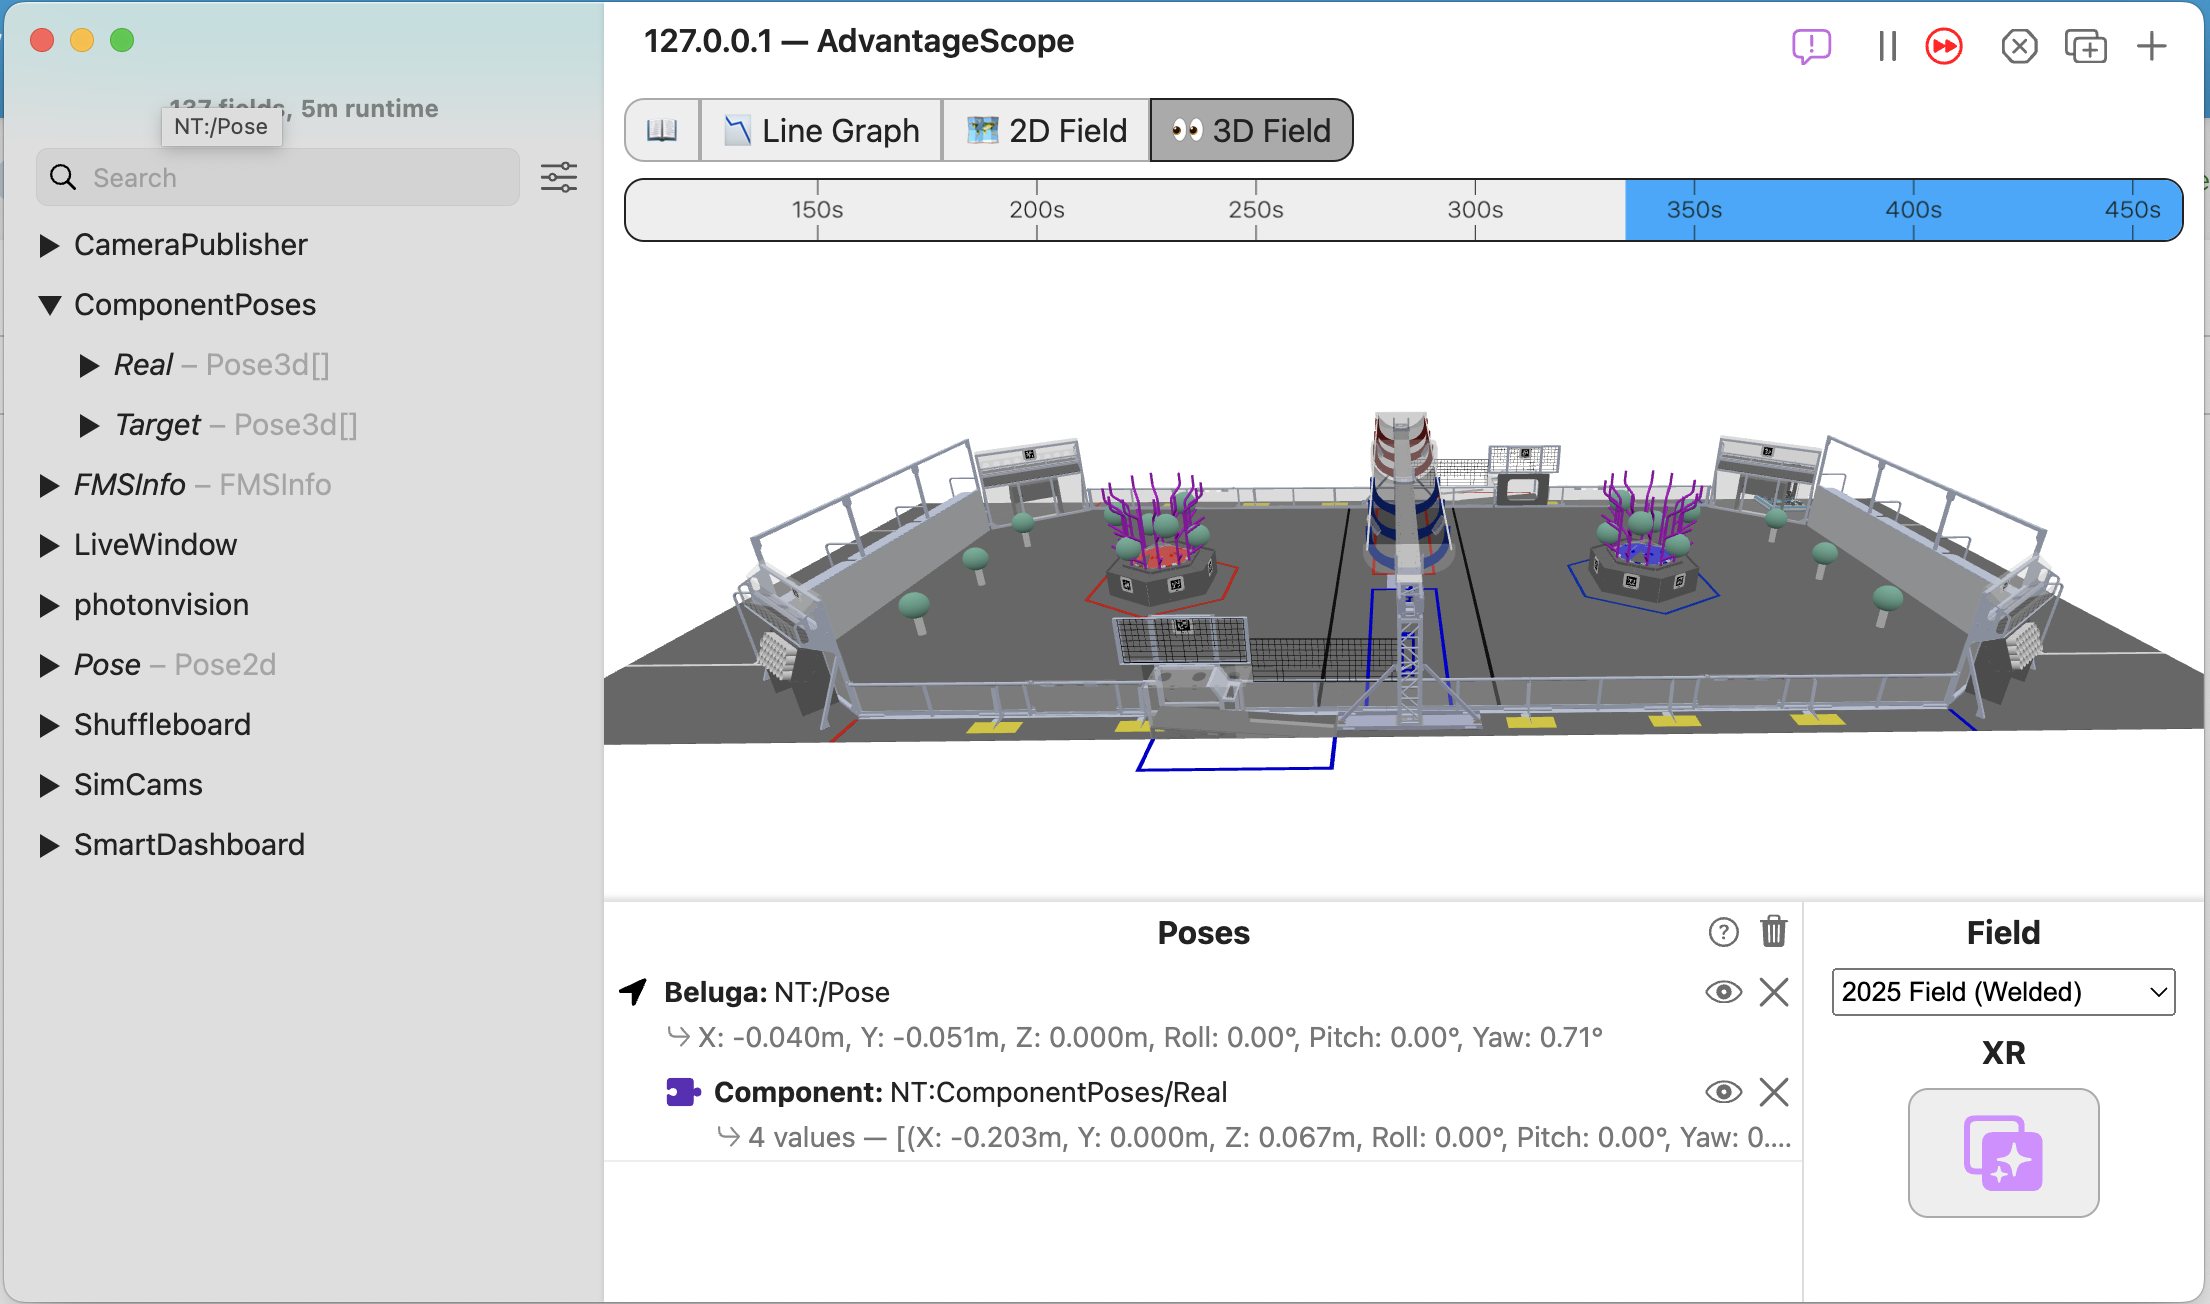
Hold up. This isn't our robot. Let's change that! Right click on 2025 Kitbot and select Beluga instead from the dropdown menu. That's better. Now, we need to add Beluga's components, like the elevator, arm, and wrist. Open up the ComponentPoses dropdown in the sidebar. You should see 2 different items, Real, and Target. It'll look something like this:

Now, drag and drop the Real object on top of Beluga. This should look something like this afterward:
That's it! You now have Beluga on your field. Finally, let's get the robot driving around the field!
Driving Beluga in Simulation
Go back to your simulation window. Now, you can use the WASD keys on your keyboard to start driving Beluga around. You'll see the robot move on the field. You will need to keep the simulation window in focus when driving the robot around. The best way to do this is by dragging the simulation window to the bottom of the screen, just keeping the title bar in frame so you have something to click to keep it in focus, and then keeping AdvantageScope up top. It'll look something like this:
That's it! Now you have a robot driving around in simulation! If you have any questions, feel free to reach out in the Programming channel on Discord. There's always someone around to help you out! After setting this sandbox up, try and code out some of the mechanism commands, like for the elevator, arm, and wrist. Good luck!
No Comments